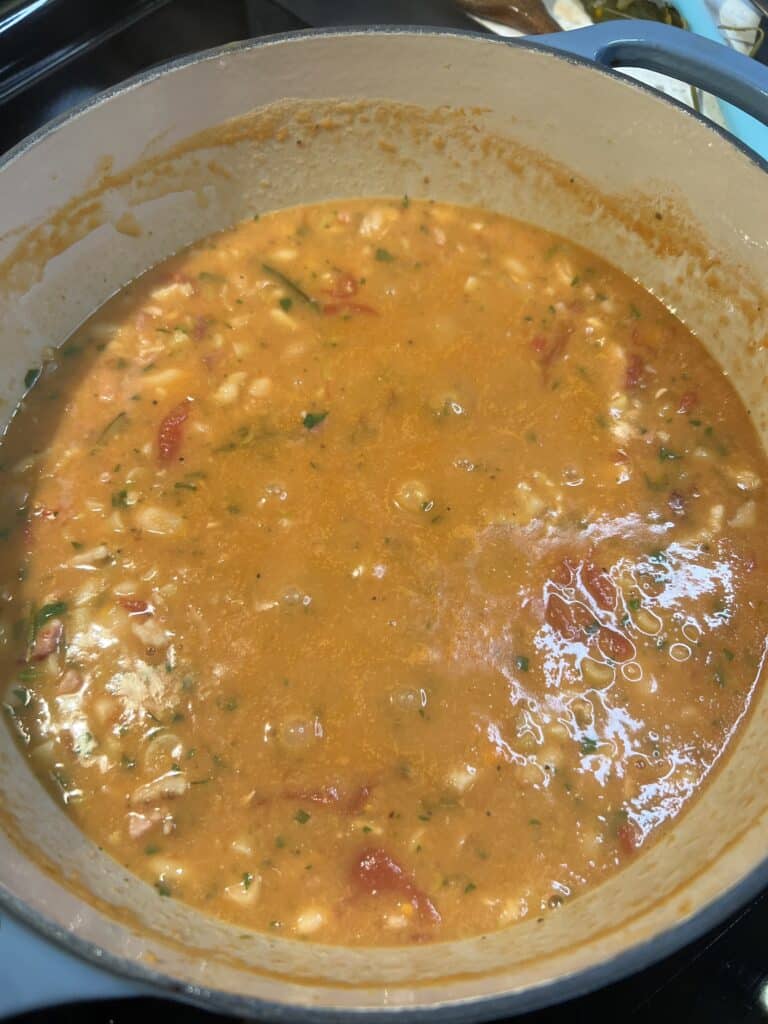
Miso Maple Glazed Salmon

A filet of miso maple glazed salmon sitting on a bed on white rice with sautéed snow peas in a white bowl

This Miso Maple Glazed Salmon strikes the perfect balance between sweet and savory, creating a harmonious symphony of flavors. The combination of umami-rich miso paste and the natural sweetness of maple syrup creates a glaze that coats the salmon with a tantalizing caramelized crust. Each bite delivers a delightful burst of contrasting tastes, making this dish an absolute crowd-pleaser. In addition, this salmon recipe is so quick and easy to prepare. It’s a perfect dish for any weeknight and is great for meal prep.

A filet of miso maple glazed salmon sitting on a bed on white rice with sautéed snow peas in a white bowl

LET’S TALK SALMON

Typically, Faroe Island salmon is my go-to when creating salmon recipes. The fat lines in this salmon make it difficult to overcook, and become dry.

This type of salmon is farm-raised using sustainable aquaculture practices. However, it is raised in a contained area of the salmon’s natural habitat. The Faroe Islands have strict regulations in place to ensure the well-being of the fish and minimize environmental impact.

Wild-caught salmon is harvested from their natural habitats, where they roam freely and feed on natural food sources.If you are looking for a sustainable, wild-caught salmon alternative to Faroe Island, King (Chinook) salmon is a great choice.

Flavor Profile and Texture

Faroe Island Salmon is known for its rich and fatty texture, offering a buttery and tender mouthfeel. It has a milder flavor compared to some wild-caught salmon varieties. On the other hand, the flavor and texture of wild-caught salmon can vary depending on the species and its environment. It tends to have a more robust flavor and firmer texture due to its natural diet and active lifestyle.

Both Faroe Island Salmon and wild-caught salmon are excellent sources of omega-3 fatty acids, which are beneficial for heart health and brain function. The specific levels may differ depending on the species, diet, and environmental factors.

Salmon Substitutes

  • Arctic Char is another viable substitute for salmon. It is a cold-water fish with a flavor profile reminiscent of a cross between salmon and trout. It has a rich and buttery texture and can be cooked in a variety of ways.
  • For vegetarian or vegan options, seitan or tofu can be used as substitutes for salmon. These plant-based alternatives can be marinated and cooked to mimic the texture and flavors of fish. However, it’s important to note that the taste and texture will differ from actual salmon. Be sure to check out my recipe for Miso Glazed Vegan Scallops!
  • Chicken can also be a great alternative. It’s important to note that it won’t provide the same flavor or nutritional composition. However, chicken’s versatility, affordability, and widespread availability make it an excellent choice for those seeking a substitute for salmon in various recipes and dietary preferences.

Hungry for More?

If you love this recipe, be sure to check out some of my other favorite salmon recipes!

WHAT IS MISO PASTE?

At the heart of this salmon recipe lies the secret ingredient, miso paste. Miso paste is a traditional Asian ingredient made from fermented soybeans, grains (such as rice or barley), salt, and a type of fungus called koji. It is known for its distinct umami flavor and is a versatile ingredient used in a wide range of Asian and non-Asian dishes. Miso paste comes in different varieties, with white miso and red miso being two commonly found types.

The choice between white and red miso depends on the desired flavor profile and the specific dish being prepared. Both types offer unique characteristics that can elevate the taste of a wide range of dishes, providing a delightful umami boost to your culinary creations.

White miso, given its mild flavor, is often used in miso soup, salad dressings, and marinades for seafood or light proteins. It also blends well with dairy products, making it suitable for creamy sauces or spreads.

Red miso’s robust flavor makes it ideal for hearty soups, rich broths, and savory sauces. It adds depth and complexity to braised dishes, glazes, and roasted vegetables. Red miso is great in small quantities to enhance the umami taste in vegetarian or vegan dishes.

TIPS ON MAKING THE BEST MISO MAPLE GLAZED SALMON

Honestly, this recipe for Miso Maple Glazed Salmon could not be easier. Here are a few tips and acceptable substitutes:

  1. Choose high-quality salmon fillets for the best results.
  2. Pat the salmon filets dry prior to seasoning and brushing on the glaze.
  3. Allow the salmon to “marinate” in the glaze as the oven is preheating.
  4. Feel free to marinate the salmon longer for more pronounced flavor.
  5. If miso paste is not readily available, you can find it in the Asian section of most grocery stores or at specialty Asian markets.
  6. Use “real” maple syrup.
  7. Substitute honey for the maple syrup.
  8. Coconut aminos are a great alternative to soy sauce.
  9. Add fresh ginger and minced garlic to the miso mixture, if you prefer.
  10. Adjust the sweetness and saltiness of the glaze to suit your personal taste preferences.
  11. Adjust the cooking time based on the thickness of the salmon fillets. Thicker cuts may require slightly longer cooking times.
  12. Baking is an alternative to broiling. Bake at 400° for 10-15 minutes, depending on the thickness of the salmon. Broil for a minute or two at the end to caramelize the glaze.
  13. Garnish your plated dish with sesame seeds and fresh herbs, such as cilantro, parsley or green onions, to add a touch of freshness and visual appeal.

AIR FRYER MAPLE GLAZED SALMON

Air frying salmon provides a convenient and healthier cooking option while still delivering a crispy and flavorful result:

  • Preheat the air fryer to 400°F (200°C).
  • Lightly grease the air fryer basket or use parchment paper to prevent sticking.
  • Place the seasoned and glazed salmon fillets in a single layer, leaving some space between each fillet for proper air circulation.
  • Cook the salmon in the preheated air fryer for about 8 to 12 minutes, depending on the thickness of the fillets.

HOW TO SERVE MISO MAPLE GLAZED SALMON

Pairing the flavorful and savory Miso Maple Glazed Salmon with complimentary side dishes can create a well-rounded and satisfying meal. Here are some side dish options that would work well with this easy quick and easy weeknight meal:

  • steamed white or brown rice
  • roasted or steamed vegetables
  • sautéed greens
  • Asian slaw
  • grilled asparagus

STORING LEFTOVER SALMON

Properly storing leftover Maple Glazed Salmon is essential to maintain its quality and ensure food safety. Once cooled, transfer the leftover salmon to an airtight container or wrap it tightly in plastic wrap or aluminum foil.

Place the container of leftover Miso Salmon in the refrigerator promptly, preferably within two hours of cooking. Consume within 2-3 days. However, it is always best to rely on your senses and discard the salmon if it shows any signs of spoilage, such as an off odor, slimy texture, or unusual coloration.

Reheat the prepared salmon gently, and at a low temperature in the oven or on stovetop, to avoid drying it out.

You can freeze the leftover Maple Glazed Salmon. Before freezing, ensure that the salmon has cooled completely. Wrap it tightly in plastic wrap or aluminum foil, or place it in a freezer-safe bag, removing as much air as possible to prevent freezer burn. Freeze up to 3 months. When ready to use, thaw the salmon in the refrigerator overnight before reheating.

Print
clock clock iconcutlery cutlery iconflag flag iconfolder folder iconinstagram instagram iconpinterest pinterest iconfacebook facebook iconprint print iconsquares squares iconheart heart iconheart solid heart solid icon
A filet of miso maple glazed salmon sitting on a bed on white rice with sautéed snow peas in a white bowl

Miso Maple Glazed Salmon


5 Stars 4 Stars 3 Stars 2 Stars 1 Star

No reviews

Description

This Miso Maple Glazed Salmon strikes the perfect balance between sweet and savory, creating a harmonious symphony of flavors. The combination of umami-rich miso paste and the natural sweetness of maple syrup creates a glaze that coats the salmon with a tantalizing caramelized crust.


Ingredients

Scale
  • 2, 6-8 ounce salmon filets (skin on or skin off)
  • 1/2 teaspoon salt
  • 1/2 teaspoon black pepper
  • 2 teaspoons olive oil
  • 2 tablespoons white miso paste
  • 2 tablespoons real maple syrup
  • 1 teaspoon soy sauce or coconut aminos
  • 1 teaspoon rice vinegar or mirin
  • 1 teaspoon sesame oil
  • 2 teaspoons sesame seeds, for garnish
  • herbs for garnish (cilantro, green onion or parsley)

Instructions

  1. Preheat the broiler or oven.
  2. In a bowl, combine the miso paste, maple syrup, soy sauce, rice vinegar and sesame oil.
  3. Oil the bottom of an oven-safe dish or pan. 
  4. Pat the salmon filets dry. 
  5. Add the salmon to the baking pan. Season with salt and pepper.
  6. Brush the filets with the miso maple mixture (tops and sides).
  7. Place under the broil (middle rack). Broil for about 8 to 10 minutes depending on the thickness of the fish.
  8. Move the oven rack closer to the broiler and broil for another 1 to 2 minutes to caramelize the glaze. 
  9. Serve garnished with sesame seeds and fresh herbs. 
  10. ENJOY!

Notes

  • cooking times will vary depending on the thickness of the fish
  • broil with the rack in the middle position first
  • move rack closer to the broil for 1 to 2 minutes at the end to caramelize the glaze
  • see post for serving options and other tips
  • Prep Time: 5 minutes
  • Cook Time: 15 minutes

Nutrition

  • Serving Size: 1 serving

GET TO KNOW ME!

A photo of me in a black floral dress cooking at the stovetop at Williams-Sonoma

I am more than just recipes. I love fashion and style too! Most importantly, I love my Family (my Hubby and my Fur Babies). My Husband (aka my “Kitchen Bitch”) means the world to me. He’s pretty damn cool too. Not only is he one of the nicest guys you will ever meet, he also has had a lengthy career in professional hockey. Not only winning two Stanley Cups with the Pittsburgh Penguins in the early ’90’s, but most recently winning the Calder Cup with the Charlotte Checkers, amongst many other accolades. If you live in Charlotte and play hockey, or have a family member who plays, be sure to contact him!

Our life has changed dramatically in the past few years with the passing of our two goldendoodles, Vegas and Viva. We were lucky enough to have Vegas for five years (totally wish it was longer). Most recently, losing our Viva to a brain tumor in July of 2020. We welcomed our mini goldendoodle 7, almost seven years ago. We just added the amazing Hazel! Of course, I am always posting tons and tons of photos! Be sure to check out my recipe for Pet Bone Broth! This broth is super rich in nutrients and will provide your pet with a multitude of health benefits!

Let’s Get Social!

Be sure to follow me on social media! I’m always talking food, fashion, and family! I also love sharing some of my favorite Amazon Finds too. Click here to check out my Amazon page! FacebookInstagramTikTokTwitter and Pinterest! THANK YOU!

Cannellini Bean Sausage Stew

A blue bowl filled with Cannellini Bean Sausage Stew garnished with fresh chopped parsley

This hearty and comforting Cannellini Bean Sausage Stew combines the creamy goodness of cannellini beans with the bold flavors of hot sausage. Whether you’re looking for a satisfying meal for a chilly evening, or simply want to indulge in a flavorful delight, this bean stew recipe is sure to please. One of the fantastic aspects of this Bean Stew recipe is how quick and easy it is to prepare. This one-pot recipe is an excellent choice for a satisfying weeknight meal. After a long day at work or when time is of the essence, you can still enjoy a delicious homemade dinner without spending hours in the kitchen.

A blue bowl filled with Cannellini Bean Sausage Stew garnished with fresh chopped parsley

WHY THIS CANNELLINI BEAN SAUSAGE STEW IS GREAT FOR A WEEKNIGHT MEAL!

By taking advantage of the simplicity and efficiency of this recipe, you can enjoy a wholesome and flavorful Cannellini Bean Sausage Stew on even the busiest of weeknights. This stew recipe is also great for meal prep and will hold up well in the freezer.

  1. Minimal Prep Time: The preparation for this stew requires minimal effort. The sausage adds plenty of flavor, so there’s no need for extensive seasoning or complex preparations.
  2. One-Pot Wonder: This bean stew recipe is a one-pot wonder! So, there is less cleanup and fewer dishes to tackle after dinner.
  3. Quick Cooking Time: Once all the ingredients are assembled in the pot, the stew simply needs to simmer for about 15 minutes.
  4. Make-Ahead and Leftovers: If you prefer to plan ahead or if you have a busy week ahead, this stew is a great candidate for make-ahead preparation. You can easily prepare the stew in advance and store it in the refrigerator or freezer, until needed.

INGREDIENTS AND SUBSTITUTIONS

The versatility of this cannellini bean recipe allows you to customize it based on your preferences and the time you have available.

Cannellini Beans – To thicken the stew, add one can directly to the pot without draining or rinsing. Navy beans or Great Northern Beans are great substitutions.

Hot Sausage – Link sausage out of the casing works best. Substitute with ground, if you prefer. If you do not enjoy the heat, use mild sausage, ground beef, or even ground turkey.

Vegetables – This stew is simply made with onions, garlic and fresh spinach. Feel free to add minced celery and/or carrots. However, you may have to adjust the cooking time, or add as you are browning the sausage.

Whole Tomatoes – Substitute canned, whole tomatoes with canned, diced or crushed. Fresh tomatoes can also be used. Note, you will probably not need all of the sauce from the can.

Herbs – Add your favorite blend of herbs. Rosemary would work really well in this Sausage and Bean Stew.

Cannellini Bean Sausage Stew cooking in an enameled cast iron pot

HOW TO SERVE CANNELLINI BEAN SAUSAGE STEW

The hearty stew can be served as a complete meal on its own, eliminating the need to prepare additional side dishes. However, you can also pair it like I did ladled over warm mashed potatoes.

Additional pairing include:

  • with a side salad
  • loads of crusty bread
  • rice or orzo pasta
  • serve in a bread bowl with grated Parmesan cheese

If you love cannellini beans as much as I do, check out these recipes utilizing this tasty bean:

HOW TO STORE CANNELLINI BEAN STEW

If you have leftover Cannellini Bean Sausage Stew, or want to make this quick stew ahead of time, here’s how to store and reheat it to retain its deliciousness:

  1. Storage: Allow the stew to cool completely before transferring it to an airtight container. Refrigerate for up to 3-4 days. Alternatively, you can freeze the stew for up to 3 months, ensuring it is stored in a freezer-safe container.
  2. Reheating: When ready to enjoy this Bean Stew, thaw it overnight in the refrigerator (if frozen) and reheat it gently on the stovetop over low heat, stirring occasionally. If reheating individual portions, the microwave can also be used.
Print
clock clock iconcutlery cutlery iconflag flag iconfolder folder iconinstagram instagram iconpinterest pinterest iconfacebook facebook iconprint print iconsquares squares iconheart heart iconheart solid heart solid icon
A blue bowl filled with Cannellini Bean Sausage Stew garnished with fresh chopped parsley

Cannellini Bean Sausage Stew


5 Stars 4 Stars 3 Stars 2 Stars 1 Star

No reviews

Description

This hearty and comforting Cannellini Bean Sausage Stew combines the creamy goodness of cannellini beans with the bold flavors of hot sausage. Whether you’re looking for a satisfying meal for a chilly evening, or simply want to indulge in a flavorful delight, this bean stew recipe is sure to please.


Ingredients

Scale
  • 2 cans cannellini beans, one can drained and rinsed
  • 1 pound hot sausage links
  • 1 package prepared mashed potatoes (optional)
  • 1 tablespoon olive oil
  • 1 28-ounce can whole tomatoes, reserve most of the sauce (use only if the stew seems too thick)
  • 4 garlic cloves, minced
  • 1/4 white onion, minced
  • 2 cups fresh baby spinach
  • 1/2 teaspoon salt
  • 1 teaspoon black pepper
  • 2 tablespoons fresh parsley

Instructions

  • Heat the olive oil in a heavy bottom pot.
  • Remove the sausage from the casings and add to the pot. Break apart.
  • Once the sausage is almost fully cooked, add in the minced onion and garlic. Cook for another minute, or two.
  • Add in the tomatoes. Season with salt and pepper.
  • Crush the tomatoes and allow everything to simmer for at least 10 minutes. 
  • Add in the spinach and cannellini beans. 
  • Stir gently and allow the beans to warm through, about another 5 minutes. 
  • Garnish with fresh parsley.
  • Serve alone, or on top of mashed potatoes.
  • ENJOY!

Notes

  • sausage in casing has more flavor than ground
  • you will not use all of the sauce in the canned tomatoes
  • serve alone or with suggestions in post
  • top freshly grated Parmesan cheese as an additional flavor element
  • see post for additional notes, tips and substitutions
  • Prep Time: 5 minutes
  • Cook Time: 20 minutes
  • Category: Dinner
  • Method: Easy
  • Cuisine: American

GET TO KNOW ME!

A photo of me in a black floral dress cooking at the stovetop at Williams-Sonoma

I am more than just recipes. I love fashion and style too! Most importantly, I love my Family (my Hubby and my Fur Babies). My Husband (aka my “Kitchen Bitch”) means the world to me. He’s pretty damn cool too. Not only is he one of the nicest guys you will ever meet, he also has had a lengthy career in professional hockey. Not only winning two Stanley Cups with the Pittsburgh Penguins in the early ’90’s, but most recently winning the Calder Cup with the Charlotte Checkers, amongst many other accolades. If you live in Charlotte and play hockey, or have a family member who plays, be sure to contact him!

Our life has changed dramatically in the past few years with the passing of our two goldendoodles, Vegas and Viva. We were lucky enough to have Vegas for five years (totally wish it was longer). Most recently, losing our Viva to a brain tumor in July of 2020. We welcomed our mini goldendoodle 7, almost seven years ago. We just added the amazing Hazel! Of course, I am always posting tons and tons of photos! Be sure to check out my recipe for Pet Bone Broth! This broth is super rich in nutrients and will provide your pet with a multitude of health benefits!

Let’s Get Social!

Be sure to follow me on social media! I’m always talking food, fashion, and family! I also love sharing some of my favorite Amazon Finds too. Click here to check out my Amazon page! FacebookInstagramTikTokTwitter and Pinterest! THANK YOU!

Ground Lamb Cabbage Rolls

A white bowl filled with two ground lamb cabbage rolls with potatoes.

Take a classic comfort dish for a spin with this recipe for Ground Lamb Cabbage Rolls. These Mediterranean-Style Stuffed Cabbage Rolls are a hearty and flavorful meal that’s perfect for any occasion. With the health benefits of ground lamb and cabbage, this slow cooked recipe is not only delicious but also nutritious. Whether you’re a seasoned cook or just starting out, this one-pot recipe is sure to become a new favorite in your kitchen.

A white bowl filled with two ground lamb cabbage rolls with potatoes.

WHAT DOES GROUND LAMB TASTE LIKE?

If you’ve never tried ground lamb before, it’s worth giving it a try to see if you enjoy its rich, savory taste. Eating lamb is part of my Serbian heritage. In fact, I’m quite sure lamb was given to me in my baby bottle.

Ground lamb has a distinct flavor that sets it apart from other types of ground meat. The taste of ground lamb can be described as rich, slightly gamey, and savory. It has a strong, earthy flavor that is similar to that of lamb chops or other lamb cuts. Some people may find the taste of lamb to be a bit too strong, while others enjoy it as a flavorful alternative to beef or pork.

TIPS ON MAKING THE BEST GROUND LAMB CABBAGE ROLLS

Although not traditional, I loved changing up a classic Cabbage Roll recipe by substituting ground beef with ground lamb. In addition, the use of lamb called for a variety of spices that would not normally be used when making the traditional recipe.

Here are a few tips to use when making these Lamb Stuffed Cabbage Rolls:

  • Salt the water for wilting the cabbage
  • Do NOT boil the leaves…a simmer is all you need to wilt the cabbage leaves (this will only take a few minutes)
  • Boiling the delicate leaves will make them fall apart
  • Drain the leaves on paper towels to soak up any excess water
  • Add the seasonings to the ground lamb, first
  • Do NOT over mix the meat mixture
  • Add the leftover raw, inner cabbage leaves to the bottom of the oven-safe pot to ensure the potatoes do not burn
  • Season every layer with a touch of salt and pepper (including the chopped tomatoes)
  • You can use whole tomatoes…just crush with your hands prior to adding them to the pot
  • Roll the stuffed cabbage rolls as tight as you can
  • Add enough stock to the pot to at least cover the cabbage rolls by half
  • Form meatballs with any leftover meat and add them to the pot

HOW TO SERVE AND STORE LEFTOVER CABBAGE ROLLS

This Ground Lamb Cabbage dish is a hearty, one-pot meal. Serve the stuffed cabbage and potatoes with crusty bread, and/or a side salad. If you desire, top with sour cream or a yogurt sauce.

How to Store Cabbage Rolls

After making a delicious batch of Ground Lamb Cabbage Rolls, you may be wondering how to store them properly. Fortunately, cabbage rolls are easy to store and can be kept in the fridge or freezer for later consumption.

To store cabbage rolls in the fridge, place them in an airtight container. Make sure the cabbage rolls are completely cooled down before storing them in the fridge. Cabbage rolls can be stored in the fridge for up to 3-4 days. To reheat, place the cabbage rolls in a baking dish and cover with foil. Bake in the oven at 350°F for 15-20 minutes, or until heated through.

Freezing Cabbage Rolls

If you want to store cabbage rolls for a longer period of time, freezing them is a great option. To freeze cabbage rolls, place them in an airtight container, or freezer-safe bag. Cabbage rolls can be stored in the freezer for up to 2-3 months.

When reheating frozen cabbage rolls, it’s important to thaw them first. You can do this by placing them in the fridge overnight. Once thawed, place the cabbage rolls in a baking dish and cover with foil. Bake in the oven at 350°F for 25-30 minutes, or until heated through.

When storing and reheating cabbage rolls, it’s important to keep food safety in mind. Always make sure that the cabbage rolls are heated to an internal temperature of 165°F before consuming. This will help prevent any food-born illnesses and ensure that your cabbage rolls are safe to eat.

Print
clock clock iconcutlery cutlery iconflag flag iconfolder folder iconinstagram instagram iconpinterest pinterest iconfacebook facebook iconprint print iconsquares squares iconheart heart iconheart solid heart solid icon
A white bowl filled with two ground lamb cabbage rolls with potatoes.

Ground Lamb Cabbage Rolls


5 Stars 4 Stars 3 Stars 2 Stars 1 Star

No reviews

Description

Take a classic comfort dish for a spin with this recipe for Ground Lamb Cabbage Rolls. These Mediterranean-Style Stuffed Cabbage Rolls are a hearty and flavorful meal that’s perfect for any occasion. With the health benefits of ground lamb and cabbage, this slow cooked recipe is not only delicious but also nutritious. Whether you’re a seasoned cook or just starting out, this one-pot recipe is sure to become a new favorite in your kitchen.


Ingredients

Scale
  • 1 1/2 pounds ground lamb
  • 1 large head Napa cabbage
  • 1 28-ounce can whole or chopped tomatoes
  • 2 russet potatoes, peeled and thick-sliced
  • 2 1/2 teaspoons salt, divided
  • 1 teaspoon black pepper
  • 2 teaspoons cumin
  • 2 teaspoons ground coriander
  • 1 1/2 teaspoons dried oregano
  • 1/2 teaspoon crushed red pepper
  • 2 teaspoons lemon zest
  • 3 garlic cloves, minced
  • 1/4 white onion, minced
  • 3/4 cup cooked rice
  • 2 tablespoons fresh chopped parsley, plus more for garnish
  • 1 egg
  • 3 1/2 to 4 cups chicken stock

Instructions

  1. Preheat oven to 350°.
  2. Bring a pot or deep pan of water almost to a boil.
  3. Trim the bottom core of the Napa cabbage to release the leaves (you should get about 8 large leaves).
  4. Salt the water. Add the cabbage leaves and cook for about 2 minutes to wilt.
  5. Transfer onto paper towels to dry.
  6. Add the ground lamb to a large bowl. Sprinkle the meat with 1 teaspoon salt, the black pepper, cumin, coriander, and oregano. 
  7. Add the lemon zest, minced garlic and onions, cooked rice, fresh parsley and egg.
  8. Mix just until fully incorporated (Do NOT over mix). 
  9. Lay down one wilted cabbage leave onto a flat surface.
  10. Trim away any hard core.
  11. Grab some of the meat mixture and place on the core end. 
  12. Roll once, grab the sides and fold them on the top. Continue rolling to form.
  13. Finish the remaining. 
  14. Form meatballs with any of the remaining meat mixture.
  15. Line the bottom of an oven-safe, heavy bottom pot with the leftover raw cabbage leaves.
  16. Add the sliced potatoes in a single layer. Season with a touch of salt and pepper.
  17. Spoon on about 3/4 of the chopped tomatoes. Season with a sprinkling of salt.
  18. Place the cabbage rolls. Top with the remaining tomatoes. 
  19. Pour in the stock (Enough to cover the cabbage rolls by half).
  20. Cover and bake for 2 hours. 
  21. Serve the cabbage rolls with the melty potatoes. Garnish with fresh chopped parsley and cracked black pepper.
  22. ENJOY!

Notes

  • salt the water used to wilt the cabbage
  • do NOT boil the leaves as this may cause them to fall apart
  • one large head of Napa cabbage should yield about 8 usable leaves
  • do NOT over mix the ground lamb mixture
  • recipe will yield about 4 to 5 servings
  • see post for additional tips and notes
  • Prep Time: 15 minutes
  • Cook Time: 2 hours
  • Category: Dinner
  • Method: Moderate
  • Cuisine: Polish/Serbian

Nutrition

  • Serving Size: 2 rolls

GET TO KNOW ME!

A photo of me in a black floral dress cooking at the stovetop at Williams-Sonoma

I am more than just recipes. I love fashion and style too! Most importantly, I love my Family (my Hubby and my Fur Babies). My Husband (aka my “Kitchen Bitch”) means the world to me. He’s pretty damn cool too. Not only is he one of the nicest guys you will ever meet, he also has had a lengthy career in professional hockey. Not only winning two Stanley Cups with the Pittsburgh Penguins in the early ’90’s, but most recently winning the Calder Cup with the Charlotte Checkers, amongst many other accolades. If you live in Charlotte and play hockey, or have a family member who plays, be sure to contact him!

Our life has changed dramatically in the past few years with the passing of our two goldendoodles, Vegas and Viva. We were lucky enough to have Vegas for five years (totally wish it was longer). Most recently, losing our Viva to a brain tumor in July of 2020. We welcomed our mini goldendoodle 7, almost seven years ago. We just added the amazing Hazel! Of course, I am always posting tons and tons of photos! Be sure to check out my recipe for Pet Bone Broth! This broth is super rich in nutrients and will provide your pet with a multitude of health benefits!

Let’s Get Social!

Be sure to follow me on social media! I’m always talking food, fashion, and family! I also love sharing some of my favorite Amazon Finds too. Click here to check out my Amazon page! FacebookInstagramTikTokTwitter and Pinterest! THANK YOU!

Cheesy Reuben Sliders with Homemade Russian Dressing

Six Cheesy Reuben Sliders sitting on top of a piece of brown parchment paper with chips and a bowl of homemade Russian dressing in the background

If you’re a fan of the Reuben Sandwich, then you’re going to love these Cheesy Reuben Sliders! These mini sandwiches are packed with all of the classic Reuben flavors – corned beef, sauerkraut, Swiss and Gruyere cheese, and a homemade Russian dressing – all nestled inside King’s Hawaiian buttery rolls. Above all, these small sandwiches are perfect for game day, parties, or just a fun family dinner. This crowd-pleasing recipe is sure to be a hit.

Are you a big fan of corned beef? If so, here are several ways your can prepare it at home, along with a few yummy recipes using corned beef as the star of the show:

Six Cheesy Reuben Sliders sitting on top of a piece of brown parchment paper with chips and a bowl of homemade Russian dressing in the background

WHAT IS A REUBEN SANDWICH?

A Reuben sandwich is a classic deli sandwich made with corned beef, sauerkraut, Swiss cheese, and Russian or Thousand Island dressing. All of this goodness is sandwiched between slices of rye bread and grilled until the cheese is melted and the bread is crispy.

Typically, these toasty sandwiches are served hot and often accompanied by a pickle spear and a side of fries or potato chips. The Classic Reuben Sandwich is said to have originated in the early 20th century at the now-defunct Reuben’s Delicatessen in New York City. Ever since, it has become a beloved American classic.

Corned Beef

Corned beef is a type of meat that is typically made from brisket, which is a cut of beef from the breast or lower chest of the cow. The term “corned” refers to the curing process that the meat undergoes, which involves soaking it in a brine solution. Traditionally, the brine is made up of water, salt, sugar, and various spices such as cloves, allspice, and mustard seeds.

The curing process helps to preserve the meat and give it a distinctive salty and savory flavor. Corned beef is commonly used in sandwiches, stews, and other dishes, particularly in Irish and Jewish cuisine.

INGREDIENTS FOR CHEESY REUBEN SLIDERS

King’s Hawaiian Buttery Rolls Any slider buns will do, but these are the best!

Corned Beef – A great way to use leftover homemade corned beef or grab some at the deli counter.

Sauerkraut – Thoroughly drain and squeeze out as much of the liquid as you can.

Swiss Cheese – Sliced or shredded.

Gruyère Cheese – Shredded is best. Can opt to leave out!

Russian Dressing – The classic condiment to a Reuben sandwich. Feel free to substitute with Thousand Island Dressing.

Melted Butter and Caraway Seeds – Brush the top of the buns with melted butter for extra flavor and texture. Caraway seeds are optional. However, the addition of the seeds give that dark rye flavor to the corned beef sliders.

Six uncooked Reuben sliders sitting on a parchment lined baking sheet ready to be baked. Sliders are filled with cheese, corned beef, sauerkraut and the top bun is brushed with melted butter and topped with caraway seeds

HOW TO MAKE REUBEN SLIDERS

These Cheesy Reuben Sliders are so easy to prepare. Honestly, every single bite is packed full of flavor!

  1. Preheat oven to 350°.
  2. Combine all of the ingredients for the Russian Dressing in a bowl. Mix well.
  3. Start assembling the reuben sliders.
  4. Slice the slider buns in half, horizontally, create one large top and bottom (do NOT separate the individual buns).
  5. Place the bottom layer on a parchment lined baking sheet or in a greased baking dish.
  6. Evenly, layer on the Swiss cheese, corned beef, sauerkraut and Gruyère cheese (all in that order).
  7. Spread a generous layer of Russian dressing on the inside of the top bun. Place top bun.
  8. Brush top bun with melted butter. Sprinkle on caraway seeds.
  9. Cover and bake for 15 to 20 minutes, or until the cheese is melted and the sliders are heated through.
  10. Remove cover and bake for an additional 5 minutes, or until the rolls are golden brown and crispy.
  11. Cut and serve with french fries, or potato chips!

SERVING AND STORAGE

Once the Cheesy Reuben Sliders are finished baking, remove them from the oven and let cool for a few minutes before serving. Honestly, these little sandwiches are the perfect size for snacking, and they’re sure to be a hit with anyone who loves a good Reuben Sandwich.

These mini Reuben Sliders are a great party food idea, perfect as a game day recipe, and/or for a family dinner. Easily serve with potato chips or hand cut fries, and do NOT forget the pickle!

To store, tightly wrap leftovers in foil or plastic wrap. Place in fridge for up to two days. Reheating is best done wrapped in foil in the oven.

Print
clock clock iconcutlery cutlery iconflag flag iconfolder folder iconinstagram instagram iconpinterest pinterest iconfacebook facebook iconprint print iconsquares squares iconheart heart iconheart solid heart solid icon
Six Cheesy Reuben Sliders sitting on top of a piece of brown parchment paper with chips and a bowl of homemade Russian dressing in the background

Cheesy Reuben Sliders with Homemade Russian Dressing


5 Stars 4 Stars 3 Stars 2 Stars 1 Star

No reviews

Description

If you’re a fan of the classic Reuben sandwich, then you’re going to love these Cheesy Reuben Sliders! These mini sandwiches are packed with all of the classic Reuben flavors – corned beef, sauerkraut, Swiss and Gruyere cheese, and a homemade Russian dressing – all nestled inside King’s Hawaiian buttery rolls. Perfect for game day, parties, or just a fun family dinner. This crowd-pleasing recipe is sure to be a hit.


Ingredients

Scale
  • 1/2 package King’s Hawaiian Buttery Rolls
  • 1/2 pound corned beef
  • 3 slices Swiss Cheese
  • 3 ounces Gruyère cheese, shredded
  • 5 ounces sauerkraut, drained and liquid squeezed out
  • 2 to 3 tablespoons Russian dressing, plus more for serving (see recipe below)
  • 2 tablespoons melted butter
  • 1/2 to 1 teaspoon caraway seeds

FOR THE RUSSIAN DRESSING:

  • 1/2 cup mayo
  • 3 tablespoons ketchup
  • 1 teaspoon Sriracha
  • two dashes Worcestershire sauce
  • 1/2 shallot, grated
  • 1 tablespoon prepared horseradish
  • 1 teaspoon paprika
  • 1/8 teaspoon salt
  • 1/2 teaspoon black pepper

Instructions

  1. Preheat oven to 350.
  2. In a bowl, combine all of the ingredients for the Russian Dressing. Mix well.
  3. Slice the slider buns in half, horizontally. Create one large top and bottom (do NOT separate the individual buns).
  4. Place the bottom layer onto a parchment lined baking sheet or in a greased baking dish.
  5. Evenly, layer on the Swiss cheese, corned beef, sauerkraut and Gruyère cheese (in that order).
  6. Spread a generous layer of Russian dressing on the inside of the top bun. Place top bun.
  7. Brush the top bun with melted butter. Sprinkle on caraway seeds.
  8. Cover with tin foil and bake for 15 to 20 minutes, or until the cheese is melted and the sliders are heated through.
  9. Remove the foil and bake for an additional 5 minutes, or until the rolls are golden brown and crispy.
  10. Cut and serve with french fries, or potato chips.
  11. ENJOY!

Notes

  • Sliced deli corned beef can be substituted for homemade corned beef.
  • Double both the sandwich and Russian dressing recipe if making a full package of Hawaiian rolls.
  • Be sure to squeeze out as much of the liquid from the sauerkraut.
  • See post for additional tips and notes.
  • Plan on at least 2 sliders per person.
  • Prep Time: 10 minutes
  • Cook Time: 20 minutes
  • Category: Appetizer, Dinner
  • Method: Easy
  • Cuisine: American

Nutrition

  • Serving Size: 2 sliders

GET TO KNOW ME!

I am more than just recipes. I love fashion and style too! Most importantly, I love my Family (my Hubby and my Fur Babies). My Husband (aka my “Kitchen Bitch”) means the world to me. He’s pretty damn cool too. Not only is he one of the nicest guys you will ever meet, he also has had a lengthy career in professional hockey. Not only winning two Stanley Cups with the Pittsburgh Penguins in the early ’90’s, but most recently winning the Calder Cup with the Charlotte Checkers, amongst many other accolades. If you live in Charlotte and play hockey, or have a family member who plays, be sure to contact him!

Our life has changed dramatically in the past few years with the passing of our two goldendoodles, Vegas and Viva. We were lucky enough to have Vegas for five years (totally wish it was longer). Most recently, losing our Viva to a brain tumor in July of 2020. We welcomed our mini goldendoodle 7, almost seven years ago. We just added the amazing Hazel! Of course, I am always posting tons and tons of photos! Be sure to check out my recipe for Pet Bone Broth! This broth is super rich in nutrients and will provide your pet with a multitude of health benefits!

Let’s Get Social!

Be sure to follow me on social media! I’m always talking food, fashion, and family! Honestly, I also love sharing some of my favorite Amazon Finds too. Click here to check out my Amazon page! FacebookInstagramTikTokTwitter and Pinterest! THANK YOU!

Creamy Lobster Pot Pie

Creamy Lobster Pot Pie sitting on a small wooden board

Creamy Lobster Pot Pie is one luxurious, and decadent dish. The rich, flavorful lobster filling pairs perfectly with the flaky, buttery puff pastry crust. This indulgent seafood pie recipe is one way to level up a classic pot pie. Lobster Pot Pie may become your new favorite cheat meal. Seriously, don’t look at the nutrition information!

The creamy lobster filling is very similar to my Lobster Newburg Sauce. Although I saw a lot of similar recipes for Lobster Pot Pie, Cooking with Cocktail Rings was my inspiration!

Creamy Lobster Pot Pie sitting on a small wooden board

WHAT’S NOT TO LOVE ABOUT LOBSTER POT PIE?

The making of Lobster Pot Pie is heavily influenced by French cuisine. Homard en Croûte (French Lobster Pie) calls for the incorporation of brandy, instead of sherry, which adds another dimension of luxurious flavor. In all honesty, the French term even sounds much more appealing. Am I right?

Also, what can be better than pairing a rich, savory cream sauce with chunks of sweet lobster then topped with a flaky, buttery crust?

This decadent pot pie recipe is a perfect addition to your Feast of the Seven Fishes meal on Christmas Eve, or even for Valentine’s Day Dinner at Home for that special someone. Honestly, I would have serve Lobster Pot Pie all year long if I could!

INGREDIENTS AND SUBSTITUTIONS

  • LOBSTER – Maine lobster, whole or just the tails, works great in this recipe. Find cooked, shelled lobster if you can for timesaving. If not, cook a whole lobster and/or lobster tails (Seal extra lobster in an airtight bag and freeze for up to three months).
    • TIP: Use the lobster shells with vegetables and water to make your own lobster stock as I do when making Lobster Bisque. (If you are not a fan of lobster, substitute with your favorite fish and/or seafood).
  • POTATOES – Easily substitute the red potatoes in this recipe with creamy, Yukon gold. Dice small for cooking and aesthetics.
  • SHERRY WINE – Cooking sherry is NOT an acceptable substitute. Use sherry wine, or substitute with brandy.
  • SEAFOOD STOCK – Homemade is best. However, seafood stock in a carton worked well for me.
  • HERBS – Fresh Tarragon is a great substitute for the fresh parsley (sorry, I’m not a fan of tarragon)
  • PUFF PASTRY (pâte feuilletée) – Highly recommend either frozen, or refrigerated puff pastry. Making your own is great, but very time consuming.

MORE TIPS ON MAKING THE BEST CREAMY LOBSTER POT PIE

  • plan on dedicating about an hour from start to finish (assuming lobster is cooked and shelled)
  • if using frozen puff pastry, thaw according to package directions (keep refrigerated until ready to use)
  • use dainty, tiny knife cuts on the vegetables (makes for a better presentation for such an elegant dish)
  • allow the raw flour taste to cook off for a few minutes prior to adding the stock
  • use the heavy cream!
  • do NOT forget the nutmeg (used in the French version)
  • the more lobster, the better (lobster chunks in every single bite)
  • cut the puff pastry into rounds much larger than the opening of the dish…drape over the sides (you will thank me)
  • pull the pastry tight around the edges (you do not want the dough to sink into the filling)
  • make a tiny slice at the top of the dough for venting (allowing the steam to escape will keep the crust flaky and prevent the filling from overflowing)
  • brush egg wash over the entire surface of the dough (the end result will be a glistening brown, flaky crust)

SERVING SUGGESTIONS AND STORAGE

Although you can make this Creamy Lobster Pot Pie in one large (12″ to 14″) baking dish. I prefer individual seafood pies using 8-ounce to 10-ounce ramekins. The full recipe will easily make three, 8-ounce pies, or two, 10-ounce pies with a little left over for a smaller portion.

This Creamy Lobster dish is hearty, comforting and filling. Serve on its own, or with a light side salad.

Store leftovers in the fridge for up to two days. Reheat in oven for best results. Uncooked lobster pies, if stored properly, can be frozen for up to three months. Bake frozen at 400° for about 40 to 45 minutes.

OTHER CREAMY LOBSTER RECIPES TO TRY!

Print
clock clock iconcutlery cutlery iconflag flag iconfolder folder iconinstagram instagram iconpinterest pinterest iconfacebook facebook iconprint print iconsquares squares iconheart heart iconheart solid heart solid icon
Creamy Lobster Pot Pie sitting on a small wooden board

Creamy Lobster Pot Pie


5 Stars 4 Stars 3 Stars 2 Stars 1 Star

No reviews

Description

Creamy Lobster Pot Pie is one luxurious, and decadent dish. The rich, flavorful lobster filling pairs perfectly with the flaky, buttery puff pastry crust. This indulgent seafood pie recipe is one way to level up a classic pot pie. Lobster Pot Pie may become your new favorite cheat meal. 


Ingredients

Scale
  • 1 pound lobster meat, cooked and cut into chunks (leave a few claws whole)
  • 1 to 2 sheets puff pastry
  • 2 cups seafood stock
  • 1 tablespoon olive oil
  • 1 stalk celery with leaves, tiny dice
  • 1 small leek, halved and sliced thin
  • 1 small shallot, tiny dice
  • 2 small red potatoes, diced small
  • 1 teaspoon salt
  • 1 teaspoon black pepper
  • 1/2 cup sherry wine
  • 2 tablespoons butter, plus more for lining the ramekins
  • 3 tablespoons flour
  • 1 tablespoon fresh parsley, chopped
  • 1/2 cup heavy whipping cream
  • 1 teaspoon nutmeg
  • 1/4 teaspoon ground cayenne
  • 1 egg, beaten

Instructions

  1. Preheat oven to 400°.
  2. Heat oil in a heavy bottom pot.
  3. Add in the leeks, celery, shallots and potatoes. Season with salt and pepper.
  4. Soften for about 5 minutes.
  5. Add the sherry wine and allow to cook off until it’s almost fully evaporated.
  6. Add the butter and allow to melt.
  7. Coat the vegetables with the flour. Cook off the raw flour taste for a few minutes.
  8. Pour in the seafood stock. Scrape up any bits on the bottom.
  9. Add in the parsley. Allow to simmer for 10 minutes.
  10. Pour in the heavy whipping cream, nutmeg and cayenne. Cook for two more minutes.
  11. Taste for salt.
  12. Turn off the heat. Fold in the lobster meat.
  13. Line the inside of the ramekins with butter (try to avoid the top edges).
  14. Ladle the creamy lobster mixture into the ramekins (not overflowing)
  15. Remove the puff pastry from the oven and turn out onto a lightly floured surface.
  16. Cut round circles out of the pastry dough larger than the circumference of the ramekins.
  17. Place the pastry on top of the ramekins. Stretching over the top to avoid sinking into the mixture.
  18. Allow the pastry to run down the edges of the ramekin for a rustic look.
  19. Make a small slice in the middle of the dough for venting.
  20. Place ramekins on a parchment lined baking sheet.
  21. Brush the surface and edges of the pastry with an egg wash. 
  22. Bake for 20 to 25 minutes. Puff pastry should be fully-cooked, golden brown and flaky.
  23. Serve and ENJOY!

Notes

SEE POST FOR NOTES, SUBSTITUTIONS AND TIPS!

  • Prep Time: 10 minutes
  • Cook Time: 40 minutes
  • Category: Dinner
  • Method: Moderate
  • Cuisine: Seafood

Nutrition

  • Serving Size: 1 serving

GET TO KNOW ME!

I am more than just recipes. I love fashion and style too! Most importantly, I love my Family (my Hubby and my Fur Babies). My Husband (aka my “Kitchen Bitch”) means the world to me. He’s pretty damn cool too. Not only is he one of the nicest guys you will ever meet, he also has had a lengthy career in professional hockey. Not only winning two Stanley Cups with the Pittsburgh Penguins in the early ’90’s, but most recently winning the Calder Cup with the Charlotte Checkers, amongst many other accolades. If you live in Charlotte and play hockey, or have a family member who plays, be sure to contact him!

Our life has changed dramatically in the past few years with the passing of our two goldendoodles, Vegas and Viva. We were lucky enough to have Vegas for five years (totally wish it was longer). Most recently, losing our Viva to a brain tumor in July of 2020. We welcomed our mini goldendoodle 7, almost seven years ago. We just added the amazing Hazel! Of course, I am always posting tons and tons of photos! Be sure to check out my recipe for Pet Bone Broth! This broth is super rich in nutrients and will provide your pet with a multitude of health benefits!

Let’s Get Social!

Be sure to follow me on social media! I’m always talking food, fashion, and family! I also love sharing some of my favorite Amazon Finds too. Click here to check out my Amazon page! FacebookInstagramTikTokTwitter and Pinterest! THANK YOU!

Keto Chicken Teriyaki with Charred Cabbage

Keto Chicken Teriyaki with Charred Cabbage sitting on a white plate with a half head of cabbage and a package of Kevin's Natural Foods Chicken Style Teriyaki

A healthy, keto meal will never be boring again with this recipe for Keto Chicken Teriyaki with Charred Cabbage. Kevin’s Natural Foods brings all the flavor with their new Teriyaki-Style Chicken Meal Prep Entree. Serve on a perfectly charred cabbage steak for one incredibly delicious meal full of flavor, smokiness and texture. Can you believe this entire keto-friendly meal can be on your table in under 15 minutes? It’s true and you are going to love it, even if you don’t follow a keto meal plan!

Keto Chicken Teriyaki with Charred Cabbage sitting on a white plate with a half head of cabbage and a package of Kevin's Natural Foods Chicken Style Teriyaki

KEVIN’S NATURAL FOODS

Kevin’s Natural Foods has “Hacked Healthy!” Their mission is to empower people to eat a clean diet without having to sacrifice flavor. Their new line of Heat & Eat Entrees are perfect for people on the go who want a quick and healthy meal that is both gluten-free and paleo! All of Kevin’s meal prep entrees are fully-cooked, and can be on your table in five minutes!

Each delectable entree contains 2 to 3 servings.

Order online now in bundles of 8, 16 or 24. Starting as low as $99, these meal prep entrees make for a great, quick and healthy meal that can also be served as an emergency meal, when time is just not on your side. These healthy, prepackaged meals will last in your fridge for up to 30 days, or can also be frozen to enjoy later!

Whether you are choosing a beef or chicken entree, the sous-vide meat is flavorful, and tender. The savory sauces will have you mystified as to how something so healthy, can taste so incredible.

Be sure to check out Kevin’s Natural Foods complete line of not only super flavorful, but also clean eating product offerings. Give them a follow on FacebookInstagram and Pinterest. Another bonus, Kevin’s sous-vide entrees are Certified Gluten-Free and Paleo and Keto Certified!

Kevin’s Teriyaki-Style Chicken

Sous-vide chicken is fully-cooked, and so unbelievably tender. The teriyaki sauce is sweet, savory and soy-free. It’s made with coconut aminos, ginger and garlic. Simply drain the sous-vide liquid. Brown the chicken with olive oil in a pan. Add the sauce and cook for a minute.

KETO-FRIENDLY INGREDIENTS

Charred cabbage was the perfect bed for this easy to prepare Teriyaki Chicken. The smokiness from the charred cabbage added a wonderful flavor element. Additionally, the dish was further elevated by the crunchiness from the crispy cabbage. Finishing with a hint of sesame oil and sesame seeds sent this dish over the top!

TIP: Sesame oil is best used as a finishing oil for a ketogenic diet. Using as a cooking oil should be used sparingly, or not at all as the Omega-6 fatty acids contained in sesame oil breaks down under high temperatures, and disintegrates into toxic by-products.

As you cut the cabbage steaks, be sure to keep the core attached. Cut the core after the cabbage is charred.

As an alternative to cabbage considering charring any of the following keto-friendly (above-ground) vegetables:

  • cauliflower
  • zucchini rounds
  • green and/or red peppers
  • asparagus

Root vegetables such as potatoes and sweet potatoes contain more carbohydrates and are not great choices when following a keto-diet.

LIVING KETO

The ketogenic diet is very low in carbs, and high in fats. It’s very similar to the Atkins/low carb diets. Basically, the diet involves the drastic reduction of carbohydrate intake ,while increasing fat intake.

Follow these simple rules:

  • EAT meat, fish eggs, butter, cream, cheese, nuts, seeds, healthy oils, low carb vegetables (mentioned above), avocados
  • AVOID sugary foods, grains, starches, fruit, beans, root vegetables, unhealthy fats, alcohol, low fat, diet products

STORING LEFTOVER KETO CHICKEN TERIYAKI WITH CHARRED CABBAGE

No dairy, no problem. This chicken teriyaki with charred cabbage will last up to five days in the fridge and is perfect for weekly meal prep. Once charred, the cabbage can be cut up for easy storage. Freezing is not recommended.

Print
clock clock iconcutlery cutlery iconflag flag iconfolder folder iconinstagram instagram iconpinterest pinterest iconfacebook facebook iconprint print iconsquares squares iconheart heart iconheart solid heart solid icon
Keto Chicken Teriyaki with Charred Cabbage sitting on a white plate with a half head of cabbage and a package of Kevin's Natural Foods Chicken Style Teriyaki

Keto Chicken Teriyaki with Charred Cabbage


5 Stars 4 Stars 3 Stars 2 Stars 1 Star

No reviews

Description

A healthy, keto meal will never be boring again with this recipe for Keto Chicken Teriyaki with Charred Cabbage. Kevin’s Natural Foods brings all the flavor with their new Teriyaki-Style Chicken Meal Prep Entree. Serve on a perfectly charred cabbage steak for one incredibly delicious meal full of flavor, smokiness and texture. Can you believe this entire keto-friendly meal can be on your table in under 15 minutes? It’s true and you are going to love it, even if you do not follow a keto meal plan!


Ingredients

Scale
  • 1 package Kevin’s Natural Foods Teriyaki-Style Chicken
  • 2 tablespoons olive oil, divided
  • 1/2 head cabbage, cut into two steaks
  • 1 teaspoon salt
  • 1 teaspoon black pepper
  • drizzle of sesame oil
  • sprinkle of sesame seeds

Instructions

  1. Heat the olive oil in cast iron pan to smoking.
  2. Cut the cabbage into 1″ steaks, leaving the core.
  3. Season with salt and pepper on both sides.
  4. Sear on both sides for a few minutes.
  5. As the cabbage is searing, drain the sous-vide liquid from the chicken.
  6. In a separate pan, heat up the remaining olive oil. 
  7. Add the chicken. Sauté/brown for two minutes.
  8. Add the teriyaki sauce packet to the chicken. 
  9. Toss the chicken in the sauce and heat through another minute.
  10. Plate the charred cabbage steak. Cut and discard the core.
  11. Top with a generous spoonful of the Teriyaki Chicken.
  12. Drizzle with sesame oil and sprinkle on sesame seeds.
  13. ENJOY!

Notes

SEE POST FOR NOTES AND TIPS ON HOW TO MAINTAIN A KETOGENIC DIET!

  • Prep Time: 2 minutes
  • Cook Time: 8 minutes
  • Category: Dinner
  • Method: Easy
  • Cuisine: Keto-Friendly

Nutrition

  • Serving Size: 1 serving

GET TO KNOW ME!

I am more than just recipes. I love fashion and style too! Most importantly, I love my Family (my Hubby and my Fur Babies). My Husband (aka my “Kitchen Bitch”) means the world to me. He’s pretty damn cool too. Not only is he one of the nicest guys you will ever meet, he also has had a lengthy career in professional hockey. Not only winning two Stanley Cups with the Pittsburgh Penguins in the early ’90’s, but most recently winning the Calder Cup with the Charlotte Checkers, amongst many other accolades. If you live in Charlotte and play hockey, or have a family member who plays, be sure to contact him!

Our life has changed dramatically in the past few years with the passing of our two goldendoodles, Vegas and Viva. We were lucky enough to have Vegas for five years (totally wish it was longer). Most recently, losing our Viva to a brain tumor in July of 2020. We welcomed our mini goldendoodle 7, almost seven years ago. We just added the amazing Hazel! Of course, I am always posting tons and tons of photos! Be sure to check out my recipe for Pet Bone Broth! This broth is super rich in nutrients and will provide your pet with a multitude of health benefits!

Let’s Get Social!

Be sure to follow me on social media! I’m always talking food, fashion, and family! I also love sharing some of my favorite Amazon Finds too. Click here to check out my Amazon page! FacebookInstagramTikTokTwitter and Pinterest! THANK YOU!
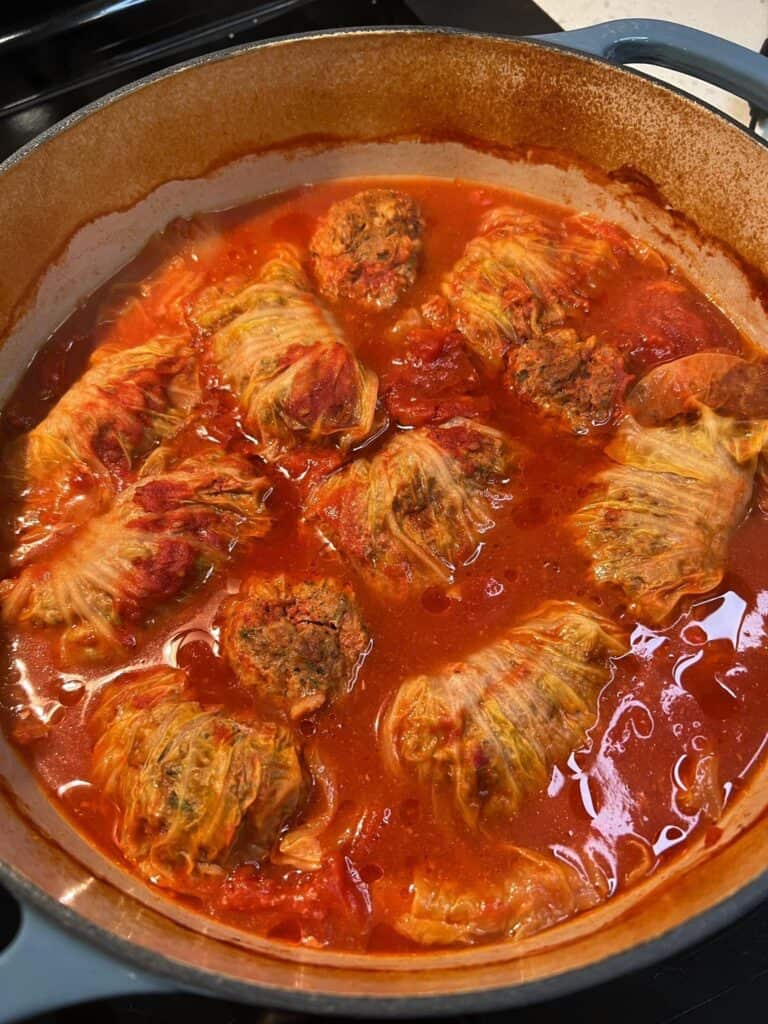
Fresh Salsa Chorizo Meatloaf

Fresh salsa meatloaf roasted in a cast iron pan with carrots and onions and a container of salsa in the background

Take your Classic Meatloaf recipe for a spin! Fresh Salsa Chorizo Meatloaf is a flavorful, hearty dinner full of ground beef, pork, chorizo, and studded with fresh vegetables. The right amount of spice from the chorizo sausage combines perfectly with Sam’s Fresh Medium Salsa for a wonderful explosion of flavor. What a time saver using the fresh salsa. No need to chop vegetables. The Pico de Gallo style salsa is full of tomatoes, onions, bell peppers, jalapeños, and fresh cilantro.

SAM’S FRESH SALSA

So, let’s talk about Sam’s Fresh Salsa. Their mission and priority has always been to “ensure consistent quality in their produce.” Sam’s award-winning fresh salsas are created using the freshest of produce.

Find Sam’s Fresh Salsa products at ShopRite, Acme and Safeway. For a complete list of retailers, click here! If not available in your local market, ask them to carry Sam’s Fresh Salsa products. Follow Sam’s Fresh Salsa on Facebook and Instagram!

me holding a container of Sam's Fresh Medium Salsa

MEATLOAF

Did you know meatloaf originated in Germany? Meatloaf become popular in America as German immigrants made their way to America.

Consequently, meatloaf became a favored dish during the Great Depression. As meat became scarce, grains and leftover ingredients were added to whatever meat was on hand to “bulk” up the recipe. Tomatoes and/or tomato sauce was then poured on top to not only provide additional flavor, but to also keep the meatloaf moist and tender.

Chorizo Meatloaf

Honestly, some of us can agree that traditional meatloaf can be quite boring, right? Not anymore, now that we have this recipe for Fresh Salsa Chorizo Meatloaf! Chorizo is a well seasoned pork sausage that is very popular in Spanish and Mexican cuisine.

I used Mexican chorizo in this dish. This type of fatty sausage has a very distinct red tint from the various spices used to make it.

NOTE: Spanish chorizo and Mexican chorizo are very different. Mexican chorizo is raw and fresh. Unlike most sausages, the casing is inedible. Thankfully, you will find most Mexican chorizo is sold in a tube, sans the casing.

TIPS ON MAKING THE BEST FRESH SALSA CHORIZO MEATLOAF

As mentioned earlier, the use of fresh salsa as a main ingredient to prepare the meatloaf will be a huge time saver, and flavor builder. The fresh salsa contains the ingredients you would normally spend time chopping.

Additionally, the juices from the salsa help to keep this flavor-packed meatloaf moist and tender as it bakes. Also, this tangy meatloaf recipe does not call for eggs. You do not need them. The salsa and cream soaked bread are the perfect binders.

Here are a few more tips:

  • meatloaf mix (find in the meat section) can be substituted for ground beef and pork
  • use 80/20 beef (the more fat, the more flavor)
  • do NOT skip the bread soaking step (I even do this for Meatballs)
  • a crusty bread works better than sandwich bread
  • milk can be substituted for the heavy whipping cream
  • do NOT overwork the meat
  • as the meatloaf bakes, you will need to drain off some of the fat
  • cook meatloaf to an internal temperature of 165° using an instant-read thermometer placed in the center of the loaf
  • add vegetables to the baking pan (potatoes, carrots, onions, garlic)
  • form two loaves for faster a faster bake

HOW TO SERVE AND STORE LEFTOVER SALSA MEATLOAF

Traditionally, serve this tasty, spicy meatloaf on top of creamy mashed potatoes with a side of roasted vegetables, or consider these other options as perfect pairings:

  • macaroni and cheese
  • rice
  • mashed cauliflower
  • green beans or peas
  • scalloped potatoes
  • fried potatoes
  • roasted potatoes

Thankfully, leftover Fresh Salsa Chorizo Meatloaf will last up to three days in the fridge. Leftovers will make for great meatloaf sandwiches the next day. Additionally, cut up the chorizo meatloaf and serve as a topping for nachos, with extra Sam’s Fresh Salsa, of course!

If stored properly, leftover meatloaf can last up to three months in the freezer.

Print
clock clock iconcutlery cutlery iconflag flag iconfolder folder iconinstagram instagram iconpinterest pinterest iconfacebook facebook iconprint print iconsquares squares iconheart heart iconheart solid heart solid icon
Fresh salsa meatloaf roasted in a cast iron pan with carrots and onions and a container of salsa in the background

Fresh Salsa Chorizo Meatloaf


5 Stars 4 Stars 3 Stars 2 Stars 1 Star

No reviews

Description

Take your classic meatloaf recipe for a spin! Fresh Salsa Chorizo Meatloaf is a flavorful, hearty dinner full of ground beef, pork, chorizo, and studded with fresh vegetables. The right amount of spice from the sausage combines perfectly with Sam’s Fresh Medium Salsa for a wonderful explosion of flavor. What a time saver using the fresh salsa. No need to chop vegetables. The Pico de Gallo style salsa is full of tomatoes, onions, bell peppers, jalapeños, and fresh cilantro.


Ingredients

Scale
  • 1 pound ground beef (80/20)
  • 1/2 pound ground pork
  • 6 ounces Mexican chorizo, out of casing
  • 2 slices bread, torn into bite-sized pieces
  • 1/3 cup heavy whipping cream or milk
  • 1 teaspoon salt
  • 1 teaspoon black pepper
  • 1/2 teaspoon garlic powder
  • 1/2 teaspoon onion powder
  • 3 tablespoons Sam’s Fresh Salsa (Medium or Mild)
  • 2 tablespoons fresh cilantro, chopped
  • 8 to 10 baby carrots
  • 1/2 red onion, quartered
  • 2 garlic cloves, halved
  • 2 teaspoons olive oil

Instructions

  1. Preheat oven to 350°.
  2. Tear the bread into a large bowl and allow to soak in the heavy cream for a few minutes (the mixture should be paste-like)
  3. To the same bowl, add the ground meats, chorizo, fresh cilantro, and salsa. 
  4. Season with salt, pepper, garlic and onion powder.
  5. Use your hands to evenly incorporate the ingredients.
  6. Do NOT over mix.
  7. Form into a loaf. Place in a cast iron, or baking pan.
  8. Add the carrots, onions and garlic around the meatloaf. 
  9. Sprinkle the vegetables with a touch of olive oil and season with salt and pepper.
  10. Cover, or tent with tin foil.
  11. Bake for about 45 minutes, or until the internal temperature reaches 165° using an instant-read thermometer
  12. Remove from oven and allow to rest at least five minutes prior to cutting.
  13. Cut into generous, thick slices.
  14. Suggested serving on top of creamy mashed potatoes with a spoonful of the roasted vegetables.
  15. Garnish with a few spoonfuls of fresh salsa and chopped cilantro.
  16. ENJOY!

Notes

  • Depending on the fat content of the meat, you may have to remove a bit of fat while the meatloaf is baking (check at the 25 minute marker).
  • SEE POST FOR ADDITIONAL NOTES AND TIPS!
  • Prep Time: 10 minutes
  • Cook Time: 1 hour
  • Category: Dinner
  • Method: Easy
  • Cuisine: American

Nutrition

  • Serving Size: 2 slices

GET TO KNOW ME!

a photo of me leaning against a brick wall with my logo, "Charlotte Fashion Plate" to the left of me

I am more than just recipes. I love fashion and style too! Most importantly, I love my Family (my Hubby and my Fur Babies). My Husband (aka my “Kitchen Bitch”) means the world to me. He’s pretty damn cool too. Not only is he one of the nicest guys you will ever meet, he also has had a lengthy career in professional hockey. Not only winning two Stanley Cups with the Pittsburgh Penguins in the early ’90’s, but most recently winning the Calder Cup with the Charlotte Checkers, amongst many other accolades. If you live in Charlotte and play hockey, or have a family member who plays, be sure to contact him!

Our life has changed dramatically in the past few years with the passing of our two goldendoodles, Vegas and Viva. We were lucky enough to have Vegas for five years (totally wish it was longer). Most recently, losing our Viva to a brain tumor in July of 2020. We welcomed our mini goldendoodle 7, almost seven years ago. We just added the amazing Hazel! Of course, I am always posting tons and tons of photos! Be sure to check out my recipe for Pet Bone Broth! This broth is super rich in nutrients and will provide your pet with a multitude of health benefits!

Let’s Get Social!

Be sure to follow me on social media! I’m always talking food, fashion, and family! I also love sharing some of my favorite Amazon Finds too. Click here to check out my Amazon page! FacebookInstagramTikTokTwitter and Pinterest! THANK YOU!

One Pot Pasta Fagioli

A white bowl with a yellow rim filled with Pasta Fagioli that is garnished with fresh parsley, grated Parmesan cheese and a drizzle of olive oil.

Looking for a cozy, flavorful, and hassle-free meal? Look no further! This One Pot Pasta Fagioli recipe is the answer! Packed with aromatic herbs, hearty beans, and the rich taste of bacon, this dish is a true Italian classic that warms the soul.

Plus, it’s a one-pot wonder, making cleanup a breeze. Wondering why you should try this recipe? Because it’s a comforting bowl of happiness, perfect for chilly nights or when you crave a taste of Italy in your own kitchen.

A white bowl with a yellow rim filled with Pasta Fagioli that is garnished with fresh parsley, grated Parmesan cheese and a drizzle of olive oil.

What is Pasta Fagioli?

Pasta Fagioli is a traditional Italian peasant dish. The ingredients to prepare this hearty soup are relatively inexpensive. Depending on the region, some Italians will prepare this as a thickened stew, while others enjoy as a brothy soup. Pancetta or bacon will often be used to flavor the fagioli. Alternatively, some preparations are vegetarian.

What kind of pasta to use in this One Pot Pasta Fagioli recipe?

This Pasta e Fagioli recipe calls for the pasta to cook in the soup broth. So, it’s best to use a small pasta shape. Ditalini is a great choice. However, feel free to use elbow macaroni, or a mezze pasta of your choice. Alternatively, break up partially used boxes of whatever pasta you have in your pantry.

Ingredients to Make One Pot Pasta Fagioli

Chances are, you have most, or all of the ingredients in your pantry and fridge to whip up this hearty Italian soup.

  • Cannellini beans: Great Northern or Navy Beans are great substitutes.
  • Crushed tomatoes: Easily substitute with tomato sauce or tomato passata.
  • Chicken stock: Use vegetable stock to make this a Vegetarian Pasta Fagioli.
  • Bacon: Pancetta is a great alternative. Leave out if making this a vegetarian pasta soup.

Dried vs. Canned Beans

Dried beans can be used instead of canned. Using dried beans to make this Italian pasta soup will require a bit more prep as the beans should soak overnight in salt water. Alternatively, cook dried beans prior to incorporating them into the Pasta Fagioli.

Additionally, dried beans will require additional broth or water, and will take a bit longer to cook in the soup. So, once you add them to the pot, keep checking the liquid levels as they simmer. Add more, as needed.

How to Prepare Pasta Fagioli

This One Pot Pasta Fagioli recipe is incredibly easy to make. It requires just one pot, but its exceptional depth of flavors develops over time as it simmers to perfection, making it well worth the wait.

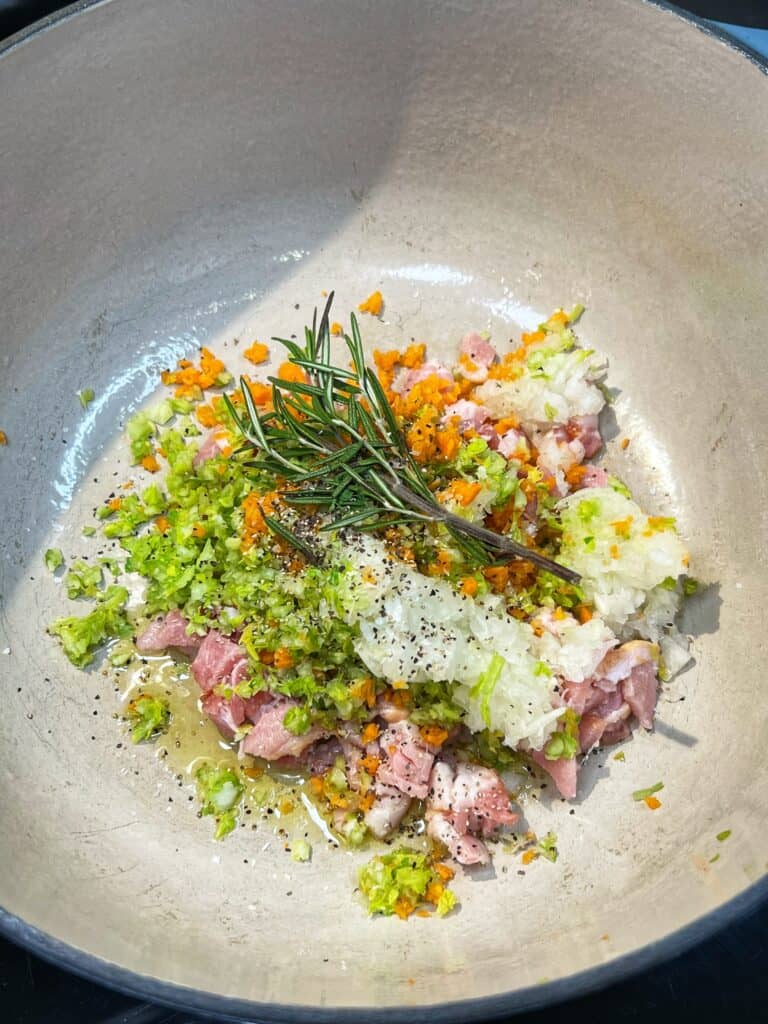
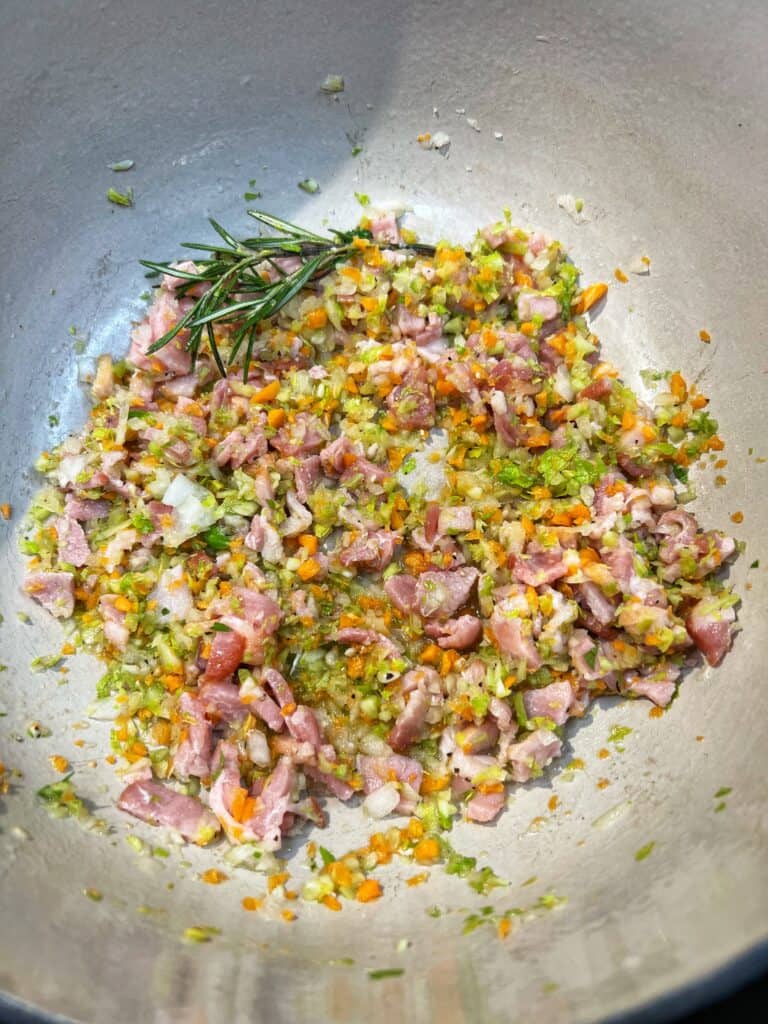
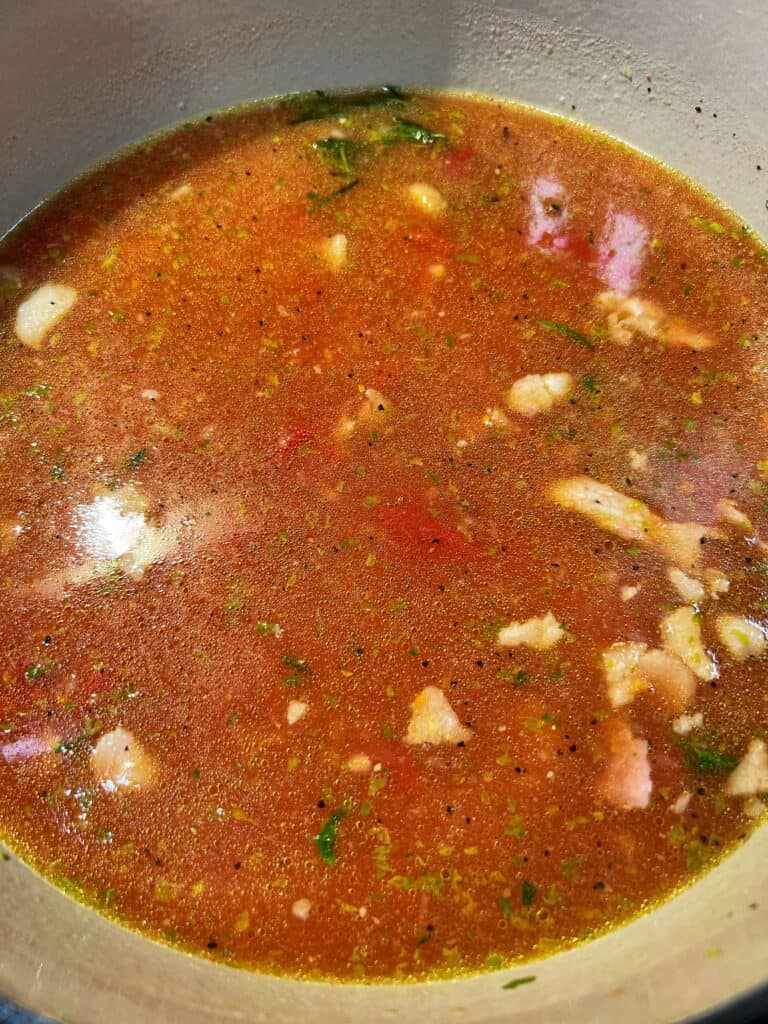
  1. Sauté Aromatics: Heat olive oil in a soup pot over medium heat. Add bacon, onion, celery, carrot, and rosemary. Season with salt and pepper. Sauté for 5 minutes until vegetables soften and bacon is rendered.
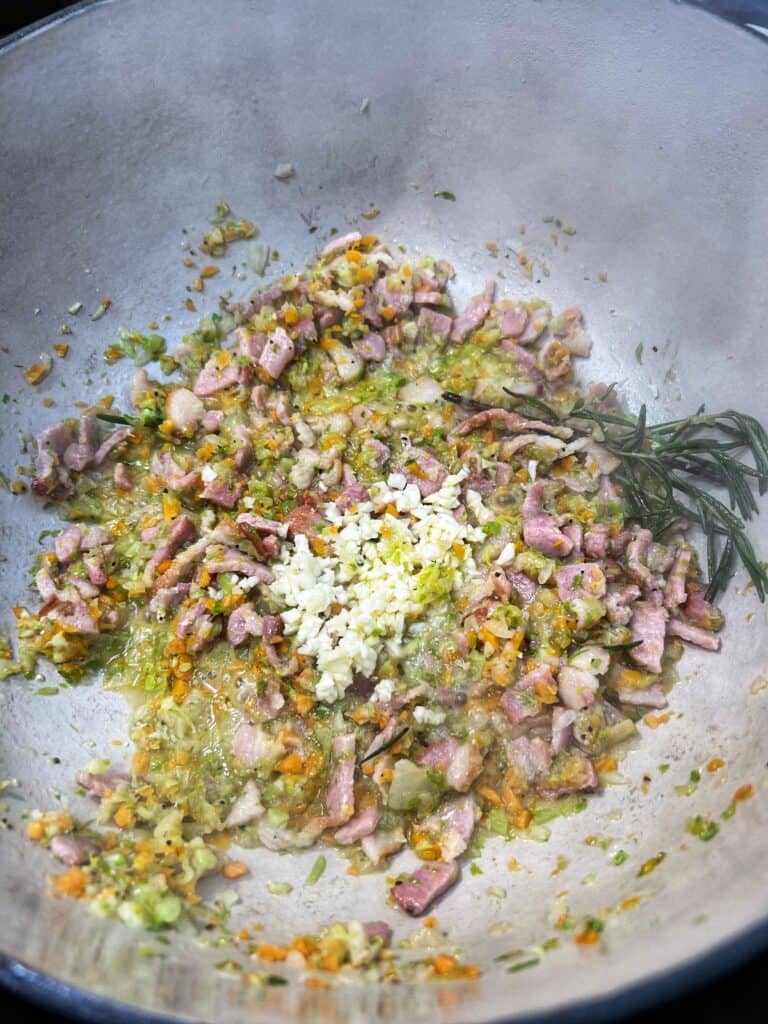
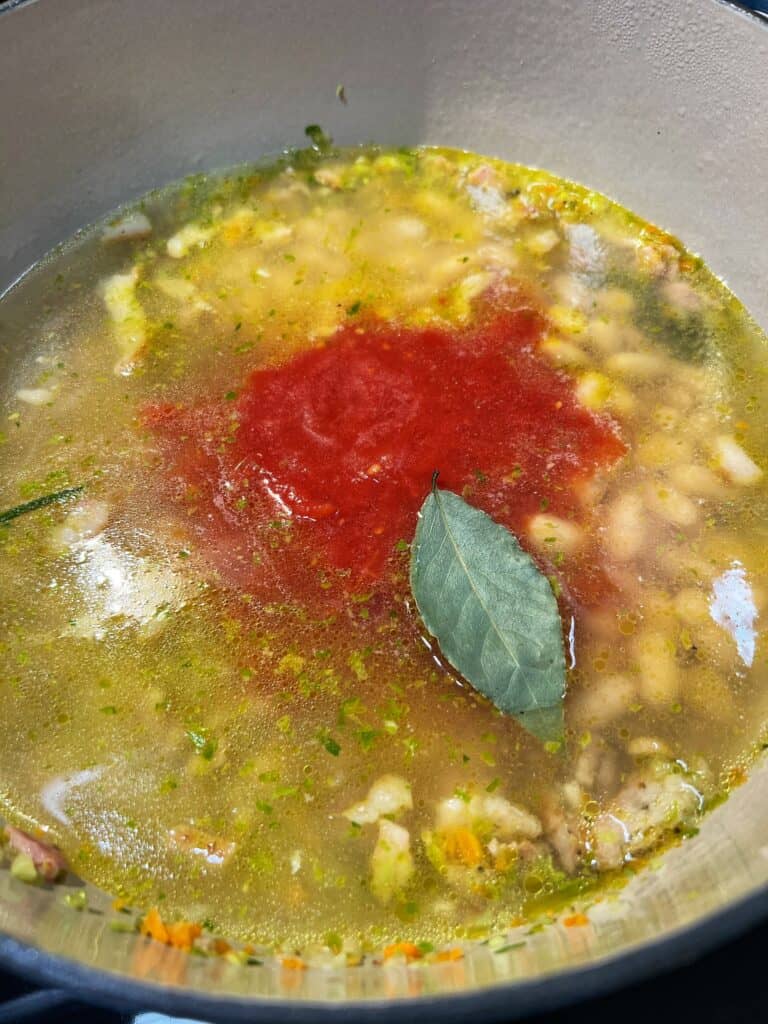
  2. Add Flavors: Stir in minced garlic and cook for another minute. Add two cans of cannellini beans, crushed tomatoes, bay leaf, chicken stock and water. Bring almost to a boil, then reduce heat and simmer for 30-40 minutes. Remove bay leaf and woody stem of rosemary.
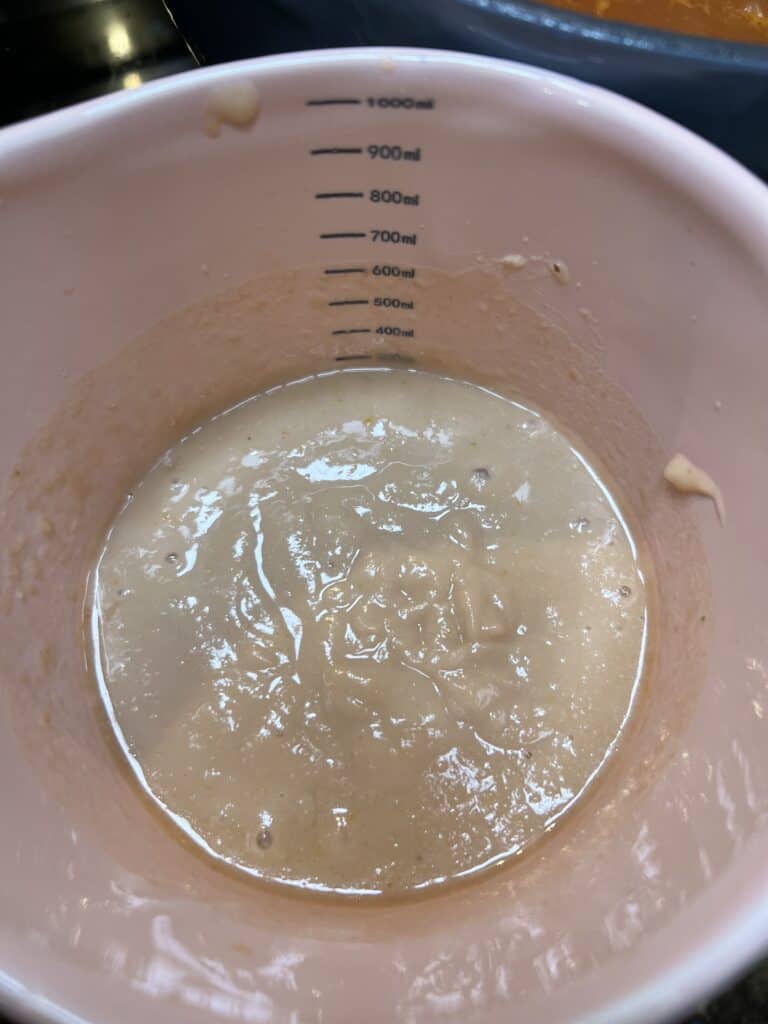
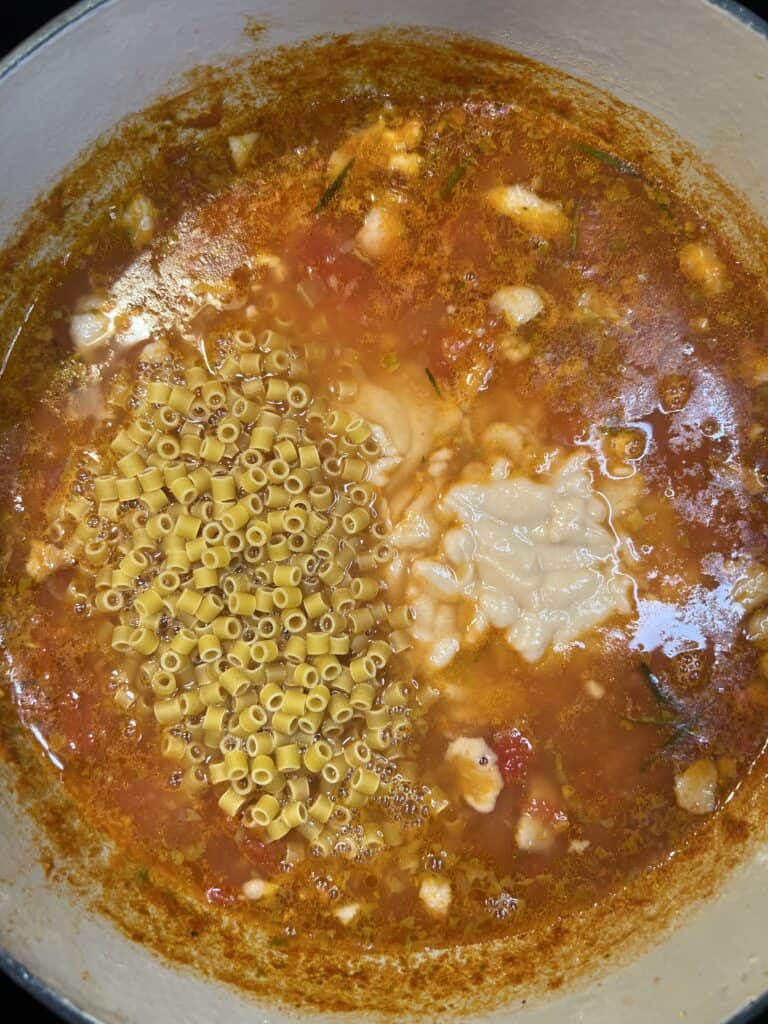
  3. Blend and Cook: Blend the remaining can of cannellini beans with a ladle of the soup in a food processor or use an immersion blender. Pour the mixture back into the pot. Add ditalini pasta and cook until al dente.
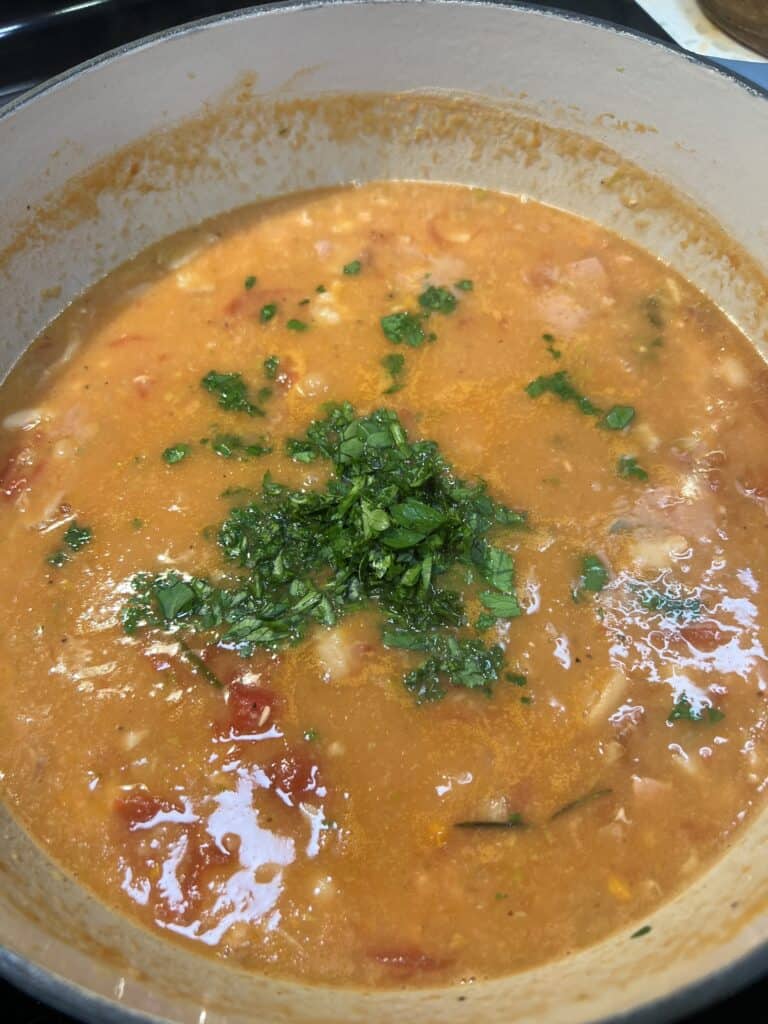
  4. Serve and Garnish: Stir in fresh parsley. Ladle the piping hot Pasta Fagioli into bowls. Garnish with freshly grated Parmesan cheese and a drizzle of olive oil.

Tips on Making the Best Pasta Fagioli

Preparing a delicious and healthy Pasta Fagioli is so easy! It does, however, require time to prep the vegetables, and simmer to marry all of these delicious flavor elements. Honestly, this One Pot Pasta Fagioli can be on your dinner table in about an hour!

  • Prep the ingredients first (if using dried beans, allot time for soaking overnight).
  • Dried herbs can be used instead of fresh (cut the amount in half if using dried).
  • Water can replace the broth.
  • Adding a Parmesan rind to the broth will enhance the flavor, but is not necessary.
  • Fresh spinach, escarole or other leafy greens are also great additions and should be added at the end.
  • Cook the pasta just to al dente.

How to Serve and Store

  • Serve this Italian Pasta Bean Soup with a side of crusty garlic bread and/or a simple green salad for a complete meal.
  • Store leftovers in an airtight container in the fridge for up to 3 days.
  • Reheat gently on the stove, adding a splash of water or broth if needed to maintain the soup’s consistency.
  • This soup freezes wonderfully! Store cooled soup in freezer-safe containers for up to 2 months. Thaw in the fridge overnight and reheat on the stove over low heat, stirring occasionally.
Print
clock clock iconcutlery cutlery iconflag flag iconfolder folder iconinstagram instagram iconpinterest pinterest iconfacebook facebook iconprint print iconsquares squares iconheart heart iconheart solid heart solid icon
A white bowl with a yellow rim filled with Pasta Fagioli that is garnished with fresh parsley, grated Parmesan cheese and a drizzle of olive oil.

One Pot Pasta Fagioli


5 Stars 4 Stars 3 Stars 2 Stars 1 Star

No reviews

Description

Pasta e Fagioli is like a warm, cozy bowl of deliciousness. It’s the ultimate Italian comfort food. This soup-like pasta is loaded with cannellini beans, pasta and a thick tomato base. 


Ingredients

Scale
  • 12 ounces ditalini pasta, uncooked
  • 1 tablespoon olive oil
  • 4 strips bacon, diced
  • 1 carrot, minced
  • 1 celery stock, minced
  • 1/2 white onion, minced
  • 1 large garlic clove, minced
  • 1 sprig fresh rosemary
  • 1 teaspoon salt, plus more for taste
  • 1 teaspoon black pepper
  • 3 cans cannellini beans (rinsed and drained)
  • 14 ounces crushed tomatoes
  • 2 cups chicken stock, plus
  • 1 cup water
  • 1 bay leaf
  • 1/3 cup fresh parsley (optional)
  • Freshly grated Parmesan cheese, for garnish
  • Drizzle of olive oil, for garnish

Instructions

  1. Heat olive oil in a large dutch oven or soup pot. 
  2. Add the bacon, carrots, celery, onion and rosemary.
  3. Season with salt and pepper.
  4. Cook for about 5 minutes to soften the vegetables and render the bacon.
  5. Add the garlic. Cook for another minute.
  6. Add two cans of the three cans of cannellini beans (rinsed and drained).
  7. Add the crushed tomatoes and bay leaf. 
  8. Pour in the chicken stock and water.
  9. Season again with salt and pepper. Stir.
  10. Bring almost to a boil. Reduce heat and allow to simmer hard with the lid on for about 30 to 40 minutes (stir often and continue checking the liquid levels).
  11. Remove the bay leaf and woody rosemary stem.
  12. Add the remaining can of cannellini beans (rinsed and drained) to a food processor or bowl (if using an immersion blender) with a spoonful of the broth. Pulse until thickened.
  13. Pour and mix into the soup.
  14. Stir in the uncooked pasta.
  15. Cook until the pasta is al dente.
  16. Taste for salt.
  17. Stir in the fresh parsley.
  18. Ladle into soup bowls.
  19. Garnish with freshly grated Parmesan cheese and a drizzle of olive oil
  20. ENJOY!

Notes

  • Substitute the ditalini pasta with elbow macaroni, small shells or a small pasta shape.
  • Use gluten-free pasta to make this a Gluten-free Pasta Fagioli
  • Replace the bacon with pancetta.
  • Eliminate the bacon to make this a vegetarian soup.
  • Tomato sauce or tomato passata can be substituted for the crushed tomatoes.
  • Allow the base to simmer hard for at least 30 minutes to develop the flavors and thicken.
  • Blend one can of the beans with a bit of the soup to thicken the soup.
  • If the soup is too thick, add a touch more stock, crushed tomatoes or water.
  • Cook the pasta just to al dente.
  • Add your favorite garnishes, fresh basil would also be great!
  • Serve with crusty bread and/or a side salad for an easy dinner.
  • Prep Time: 10 minutes
  • Cook Time: 50 minutes
  • Category: Soup, Bisque
  • Method: Easy
  • Cuisine: Italian

GET TO KNOW ME!

A photo of me in a black floral dress cooking at the stovetop at Williams-Sonoma

WELCOME! My name is Melissa Latin aka. Charlotte Fashion Plate. Happy to meet you! I am more than just recipes. I love fashion and style too! Most importantly, I love my Family (my Hubby and my Fur Babies). My Husband (aka my “Kitchen Bitch”) means the world to me. He’s pretty damn cool too. Not only is he one of the nicest guys you will ever meet, he also has had a lengthy career in professional hockey. Not only winning two Stanley Cups with the Pittsburgh Penguins in the early ’90’s, but most recently winning the Calder Cup with the Charlotte Checkers, amongst many other accolades. If you live in Charlotte and play hockey, or have a family member who plays, be sure to contact him!

Our life has changed dramatically in the past few years with the passing of our two goldendoodles, Vegas and Viva. We were lucky enough to have Vegas for five years (totally wish it was longer). Most recently, losing our Viva to a brain tumor in July of 2020. We welcomed our mini goldendoodle 7, almost seven years ago. We just added the amazing Hazel! Of course, I am always posting tons and tons of photos! Be sure to check out my recipe for Pet Bone Broth! This broth is super rich in nutrients and will provide your pet with a multitude of health benefits!

Let’s Get Social!

Be sure to follow me on social media! I’m always talking food, fashion, and family! I also love sharing some of my favorite Amazon Finds too. Click here to check out my Amazon page! FacebookInstagramTikTokTwitter and Pinterest! THANK YOU!

Blackened Salmon Rice Bowl

a blackened salmon rice bowl with roasted Brussels Sprouts topped with a mayo sriracha sauce

Oftentimes, we correlate healthy food, with tasteless food. This does NOT have to be the case. You just need to know how to impart flavor when creating healthy meals. This protein-packed, Blackened Salmon Rice Bowl recipe is super healthy, delicious, and so quick and easy to prepare. The flavor from the homemade blackening seasoning will blow you away. Additionally, roasting the Brussels Sprouts adds another dimension of both texture, and smokiness. This rice bowl recipe can also be adapted using your favorite protein. Blackened chicken and/or shrimp are great alternatives to the salmon.

a blackened salmon rice bowl with roasted Brussels Sprouts topped with a mayo sriracha sauce

LET’S TALK SALMON

Typically, Faroe Island salmon is my go-to when creating salmon recipes. This type of salmon is farm-raised. However, it is raised in a contained area of the salmon’s natural habitat. The fat lines in this salmon make it difficult to overcook, and become dry.

If you are looking for a sustainable, wild-caught salmon alternative, King (Chinook) salmon is a great option. Sockeye has a rich flavor and texture and can also be used in this Salmon Bowl recipe.

Salmon Substitutes

  • Arctic char
  • Steelhead

Protein Alternatives

If you are not a fan of salmon, try this Blackened Rice Bowl using:

  • chicken
  • shrimp
  • tuna
  • white fish (ie. cod, flounder, mahi, grouper)
  • beef

WHAT IS BLACKENING SEASONING

If you are looking to amp up any meal with big and bold flavors, a blackening seasoning blend will do the trick! Do not let the name fool you, most blackened seasonings are not “hot.” Yes, it is spicy and it does bring a little heat, but not overpowering like other fiery seasoning blends. However, if you are looking to add a blast of heat to your dish, you can easily adjust the spice blend.

Although this cajun-type of seasoning is available for purchase, I highly recommend making your own. Honestly, you likely have everything to make this delicious homemade seasoning in your spice drawer. Leftover seasoning can be sealed in an airtight container and will last up to three months in your pantry.

Just to clarify, the term blackening actually refers to the cooking technique, using a cast iron pan with high heat. Cooking the protein in this manner will give it a charred crust on both sides.

WHAT ABOUT THE RICE

Rice is so very easy to prepare and relatively inexpensive. A few months ago, I purchased this easy to use rice cooker. Bibigo Rice is my go-to for a yummy, microwavable rice option.

In my opinion, the choice of rice in this Blackened Salmon Recipe is just a matter of preference. We can debate all day about the health benefits of brown rice vs. white rice. Go with what you enjoy!

I would however, avoid using sushi rice. Sushi rice will only add a heaviness to this light and healthy dish. The following are all great rice options:

  • basmati
  • jasmine
  • black rice
  • brown rice
  • wild rice

Why limit these healthy dinner bowls to just plain rice? Try any of these as the base to your Salmon Bowl:

LET’S TALK VEGGIES FOR BLACKENED SALMON RICE BOWLS

Roasted Brussels Sprouts added the perfect amount of smokiness and texture to this dish. Honestly, if you are looking for additional or alternative(s) vegetable options for this Blackened Salmon Rice Bowl, the sky is the limit. Again, a matter of preference. Here are a few options:

  • broccoli
  • cauliflower
  • mushrooms
  • carrots
  • zucchini
  • kimchi
  • cucumber
  • edamame

HOW TO MAKE THE BEST BLACKENED SALMON RICE BOWL

Here are a few tips to how to make this Blackened Salmon Rice Bowl recipe come out perfectly, every single time:

  • timing is everything (if cooking rice, as opposed to using a microwavable option, do this first)
  • use skinless salmon
  • cut salmon into equal, bite-sized pieces
  • roast the Brussels Sprouts while you are preparing the salmon, blackening seasoning and sauce.
  • adjust the spice level of the blackening seasoning to your liking
  • salmon bites can also be prepared in the air fryer or traditional cast iron pan

Air Fryer Salmon Bites

Using the air frying to prepare these spicy salmon bites can be a time saver, as they can air fry while the Brussels Sprouts are roasting.

Here’s how:

  • preheat the air fryer to 390°
  • spray the inside of the basket with non-stick spray
  • place the salmon bites (may have to prepare in batches depending on the size of the air-fryer)
  • air fry the salmon for about 8 to 10 minutes, flipping halfway (internal temperature should be 145° for salmon that is not sushi-grade

HOW TO MAKE THE SPICY SWEET MAYO SAUCE

The sauce is made by combining kewpie mayo (can use regular mayo) with sriracha and sweet chili sauce. Honestly, the taste of this sriracha mayo is out of this world. However, it will add a few more calories and fat to the dish. So, use just a touch. As an alternative, you can top this Salmon Bowl with:

  • chili crisp oil
  • sesame ginger vinaigrette
  • sesame oil
  • soy sauce
  • ponzu sauce

MEAL PREP AND LEFTOVER SALMON RICE BOWLS

Rice bowls are great for meal prep. This Blackened Salmon with Roasted Brussels Sprouts is a healthy and easy meal prep idea. Seal in airtight containers. Prepare meals for the entire week, or enjoy leftovers, for up to three days in the fridge.

Print
clock clock iconcutlery cutlery iconflag flag iconfolder folder iconinstagram instagram iconpinterest pinterest iconfacebook facebook iconprint print iconsquares squares iconheart heart iconheart solid heart solid icon
a blackened salmon rice bowl with roasted Brussels Sprouts topped with a mayo sriracha sauce

Blackened Salmon Rice Bowl


5 Stars 4 Stars 3 Stars 2 Stars 1 Star

No reviews

Description

This Blackened Salmon Rice Bowl recipe is super healthy, delicious, and so quick and easy to prepare. The flavor from the homemade blackening seasoning will blow you away. Additionally, roasting the Brussels Sprouts adds another dimension of both texture, and smokiness. This rice bowl recipe can also be adapted using your favorite protein. Blackened chicken and/or shrimp are great alternatives to the salmon.


Ingredients

Scale
  • 1 pound salmon, skinless
  • 2 teaspoons fresh lemon juice
  • 1 1/2 cups cooked rice
  • 3 tablespoons homemade blackening seasoning (see recipe below)
  • 1 pound Brussels sprouts, halved
  • 1 tablespoon olive oil
  • 1 teaspoon salt
  • 1 teaspoon black pepper
  • 1/4 cup mayo
  • 1 tablespoon sriracha
  • 1 to 2 tablespoons sweet chili sauce
  • 1 teaspoon sesame seeds (optional)

BLACKENING SEASONING

  • 1 tablespoon garlic powder
  • 1 tablespoon paprika
  • 1 tablespoon dried oregano
  • 2 teaspoons onion powder
  • 2 teaspoons dried thyme
  • 2 teaspoons black pepper
  • 2 teaspoons kosher salt
  • 1 to 2 teaspoons cayenne pepper

Instructions

  1. Prepare the rice. 
  2. Heat oven to 400°.
  3. Trim the ends of the Brussels sprouts and cut in half.
  4. Place on a sheet pan. Drizzle with olive oil.
  5. Season with salt and pepper. Toss to coat.
  6. Roast until browned. About 8 to 10 minutes, tossing a few times. 
  7. As the sprouts are roasting, combine all of the ingredients for the blackening season. Mix well.
  8. Cut the salmon into 1″ cubes.
  9. Place salmon in a bowl. Coat with the lemon juice.
  10. Sprinkle on the blackening season. Toss to coat. 
  11. Place salmon pieces on a parchment lined sheet pan.
  12. Once you remove the sprouts, reduce the oven temperature to 350°.
  13. Bake salmon bites for about 8 minutes. 
  14. Mix the ingredients for the sauce. 
  15. Add 1/2 cup rice to a serving bowl, with a third each of the salmon and sprouts.
  16. Drizzle on the spicy mayo.
  17. Sprinkle with sesame seeds (optional)
  18. ENJOY!

Notes

SEE POST FOR NOTES!

  • Prep Time: 10 minutes
  • Cook Time: 20 minutes
  • Category: Dinner
  • Method: Easy
  • Cuisine: Healthy

Nutrition

  • Serving Size: 1 serving

GET TO KNOW ME!

a photo of me leaning against a brick wall with my logo, "Charlotte Fashion Plate" to the left of me

I am more than just recipes. I love fashion and style too! Most importantly, I love my Family (my Hubby and my Fur Babies). My Husband (aka my “Kitchen Bitch”) means the world to me. He’s pretty damn cool too. Not only is he one of the nicest guys you will ever meet, he also has had a lengthy career in professional hockey. Not only winning two Stanley Cups with the Pittsburgh Penguins in the early ’90’s, but most recently winning the Calder Cup with the Charlotte Checkers, amongst many other accolades. If you live in Charlotte and play hockey, or have a family member who plays, be sure to contact him!

Our life has changed dramatically in the past few years with the passing of our two goldendoodles, Vegas and Viva. We were lucky enough to have Vegas for five years (totally wish it was longer). Most recently, losing our Viva to a brain tumor in July of 2020. We welcomed our mini goldendoodle 7, almost seven years ago. We just added the amazing Hazel! Of course, I am always posting tons and tons of photos! Be sure to check out my recipe for Pet Bone Broth! This broth is super rich in nutrients and will provide your pet with a multitude of health benefits!

Let’s Get Social!

Be sure to follow me on social media! I’m always talking food, fashion, and family! I also love sharing some of my favorite Amazon Finds too. Click here to check out my Amazon page! FacebookInstagramTikTokTwitter and Pinterest! THANK YOU!