Ground Lamb Cabbage Rolls

A white bowl filled with two ground lamb cabbage rolls with potatoes.

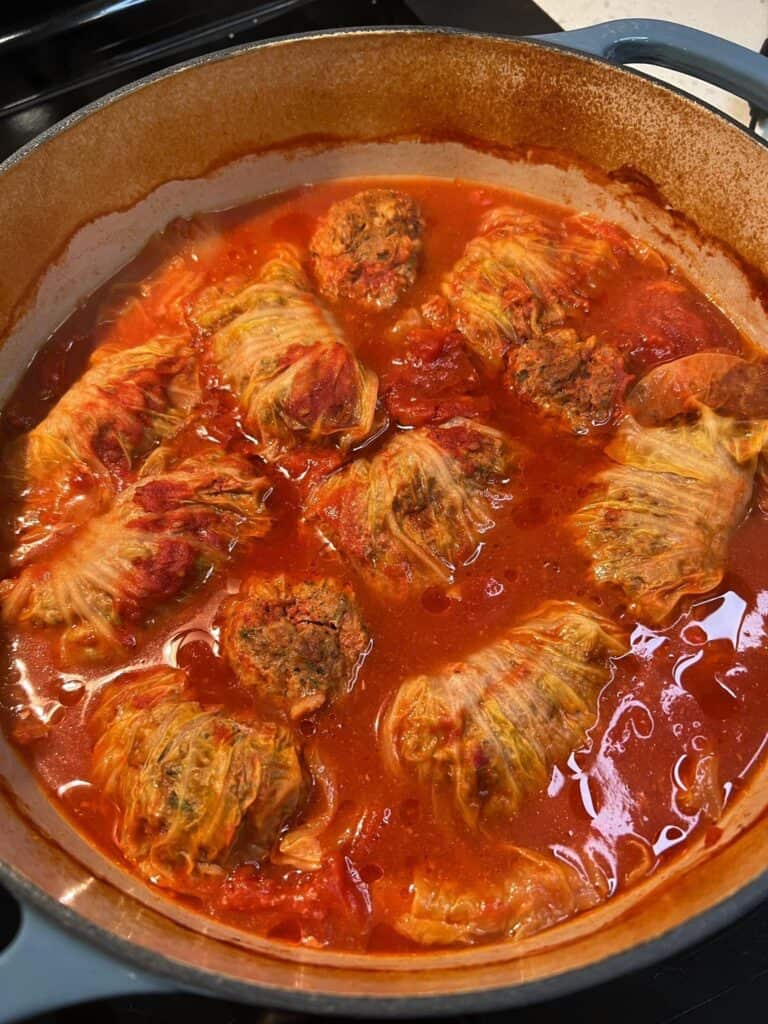
Take a classic comfort dish for a spin with this recipe for Ground Lamb Cabbage Rolls. These Mediterranean-Style Stuffed Cabbage Rolls are a hearty and flavorful meal that’s perfect for any occasion. With the health benefits of ground lamb and cabbage, this slow cooked recipe is not only delicious but also nutritious. Whether you’re a seasoned cook or just starting out, this one-pot recipe is sure to become a new favorite in your kitchen.

A white bowl filled with two ground lamb cabbage rolls with potatoes.

WHAT DOES GROUND LAMB TASTE LIKE?

If you’ve never tried ground lamb before, it’s worth giving it a try to see if you enjoy its rich, savory taste. Eating lamb is part of my Serbian heritage. In fact, I’m quite sure lamb was given to me in my baby bottle.

Ground lamb has a distinct flavor that sets it apart from other types of ground meat. The taste of ground lamb can be described as rich, slightly gamey, and savory. It has a strong, earthy flavor that is similar to that of lamb chops or other lamb cuts. Some people may find the taste of lamb to be a bit too strong, while others enjoy it as a flavorful alternative to beef or pork.

TIPS ON MAKING THE BEST GROUND LAMB CABBAGE ROLLS

Although not traditional, I loved changing up a classic Cabbage Roll recipe by substituting ground beef with ground lamb. In addition, the use of lamb called for a variety of spices that would not normally be used when making the traditional recipe.

Here are a few tips to use when making these Lamb Stuffed Cabbage Rolls:

  • Salt the water for wilting the cabbage
  • Do NOT boil the leaves…a simmer is all you need to wilt the cabbage leaves (this will only take a few minutes)
  • Boiling the delicate leaves will make them fall apart
  • Drain the leaves on paper towels to soak up any excess water
  • Add the seasonings to the ground lamb, first
  • Do NOT over mix the meat mixture
  • Add the leftover raw, inner cabbage leaves to the bottom of the oven-safe pot to ensure the potatoes do not burn
  • Season every layer with a touch of salt and pepper (including the chopped tomatoes)
  • You can use whole tomatoes…just crush with your hands prior to adding them to the pot
  • Roll the stuffed cabbage rolls as tight as you can
  • Add enough stock to the pot to at least cover the cabbage rolls by half
  • Form meatballs with any leftover meat and add them to the pot

HOW TO SERVE AND STORE LEFTOVER CABBAGE ROLLS

This Ground Lamb Cabbage dish is a hearty, one-pot meal. Serve the stuffed cabbage and potatoes with crusty bread, and/or a side salad. If you desire, top with sour cream or a yogurt sauce.

How to Store Cabbage Rolls

After making a delicious batch of Ground Lamb Cabbage Rolls, you may be wondering how to store them properly. Fortunately, cabbage rolls are easy to store and can be kept in the fridge or freezer for later consumption.

To store cabbage rolls in the fridge, place them in an airtight container. Make sure the cabbage rolls are completely cooled down before storing them in the fridge. Cabbage rolls can be stored in the fridge for up to 3-4 days. To reheat, place the cabbage rolls in a baking dish and cover with foil. Bake in the oven at 350°F for 15-20 minutes, or until heated through.

Freezing Cabbage Rolls

If you want to store cabbage rolls for a longer period of time, freezing them is a great option. To freeze cabbage rolls, place them in an airtight container, or freezer-safe bag. Cabbage rolls can be stored in the freezer for up to 2-3 months.

When reheating frozen cabbage rolls, it’s important to thaw them first. You can do this by placing them in the fridge overnight. Once thawed, place the cabbage rolls in a baking dish and cover with foil. Bake in the oven at 350°F for 25-30 minutes, or until heated through.

When storing and reheating cabbage rolls, it’s important to keep food safety in mind. Always make sure that the cabbage rolls are heated to an internal temperature of 165°F before consuming. This will help prevent any food-born illnesses and ensure that your cabbage rolls are safe to eat.

Print
clock clock iconcutlery cutlery iconflag flag iconfolder folder iconinstagram instagram iconpinterest pinterest iconfacebook facebook iconprint print iconsquares squares iconheart heart iconheart solid heart solid icon
A white bowl filled with two ground lamb cabbage rolls with potatoes.

Ground Lamb Cabbage Rolls


5 Stars 4 Stars 3 Stars 2 Stars 1 Star

No reviews

Description

Take a classic comfort dish for a spin with this recipe for Ground Lamb Cabbage Rolls. These Mediterranean-Style Stuffed Cabbage Rolls are a hearty and flavorful meal that’s perfect for any occasion. With the health benefits of ground lamb and cabbage, this slow cooked recipe is not only delicious but also nutritious. Whether you’re a seasoned cook or just starting out, this one-pot recipe is sure to become a new favorite in your kitchen.


Ingredients

Scale
  • 1 1/2 pounds ground lamb
  • 1 large head Napa cabbage
  • 1 28-ounce can whole or chopped tomatoes
  • 2 russet potatoes, peeled and thick-sliced
  • 2 1/2 teaspoons salt, divided
  • 1 teaspoon black pepper
  • 2 teaspoons cumin
  • 2 teaspoons ground coriander
  • 1 1/2 teaspoons dried oregano
  • 1/2 teaspoon crushed red pepper
  • 2 teaspoons lemon zest
  • 3 garlic cloves, minced
  • 1/4 white onion, minced
  • 3/4 cup cooked rice
  • 2 tablespoons fresh chopped parsley, plus more for garnish
  • 1 egg
  • 3 1/2 to 4 cups chicken stock

Instructions

  1. Preheat oven to 350°.
  2. Bring a pot or deep pan of water almost to a boil.
  3. Trim the bottom core of the Napa cabbage to release the leaves (you should get about 8 large leaves).
  4. Salt the water. Add the cabbage leaves and cook for about 2 minutes to wilt.
  5. Transfer onto paper towels to dry.
  6. Add the ground lamb to a large bowl. Sprinkle the meat with 1 teaspoon salt, the black pepper, cumin, coriander, and oregano. 
  7. Add the lemon zest, minced garlic and onions, cooked rice, fresh parsley and egg.
  8. Mix just until fully incorporated (Do NOT over mix). 
  9. Lay down one wilted cabbage leave onto a flat surface.
  10. Trim away any hard core.
  11. Grab some of the meat mixture and place on the core end. 
  12. Roll once, grab the sides and fold them on the top. Continue rolling to form.
  13. Finish the remaining. 
  14. Form meatballs with any of the remaining meat mixture.
  15. Line the bottom of an oven-safe, heavy bottom pot with the leftover raw cabbage leaves.
  16. Add the sliced potatoes in a single layer. Season with a touch of salt and pepper.
  17. Spoon on about 3/4 of the chopped tomatoes. Season with a sprinkling of salt.
  18. Place the cabbage rolls. Top with the remaining tomatoes. 
  19. Pour in the stock (Enough to cover the cabbage rolls by half).
  20. Cover and bake for 2 hours. 
  21. Serve the cabbage rolls with the melty potatoes. Garnish with fresh chopped parsley and cracked black pepper.
  22. ENJOY!

Notes

  • salt the water used to wilt the cabbage
  • do NOT boil the leaves as this may cause them to fall apart
  • one large head of Napa cabbage should yield about 8 usable leaves
  • do NOT over mix the ground lamb mixture
  • recipe will yield about 4 to 5 servings
  • see post for additional tips and notes
  • Prep Time: 15 minutes
  • Cook Time: 2 hours
  • Category: Dinner
  • Method: Moderate
  • Cuisine: Polish/Serbian

Nutrition

  • Serving Size: 2 rolls

GET TO KNOW ME!

A photo of me in a black floral dress cooking at the stovetop at Williams-Sonoma

I am more than just recipes. I love fashion and style too! Most importantly, I love my Family (my Hubby and my Fur Babies). My Husband (aka my “Kitchen Bitch”) means the world to me. He’s pretty damn cool too. Not only is he one of the nicest guys you will ever meet, he also has had a lengthy career in professional hockey. Not only winning two Stanley Cups with the Pittsburgh Penguins in the early ’90’s, but most recently winning the Calder Cup with the Charlotte Checkers, amongst many other accolades. If you live in Charlotte and play hockey, or have a family member who plays, be sure to contact him!

Our life has changed dramatically in the past few years with the passing of our two goldendoodles, Vegas and Viva. We were lucky enough to have Vegas for five years (totally wish it was longer). Most recently, losing our Viva to a brain tumor in July of 2020. We welcomed our mini goldendoodle 7, almost seven years ago. We just added the amazing Hazel! Of course, I am always posting tons and tons of photos! Be sure to check out my recipe for Pet Bone Broth! This broth is super rich in nutrients and will provide your pet with a multitude of health benefits!

Let’s Get Social!

Be sure to follow me on social media! I’m always talking food, fashion, and family! I also love sharing some of my favorite Amazon Finds too. Click here to check out my Amazon page! FacebookInstagramTikTokTwitter and Pinterest! THANK YOU!
Tomato Braised Lentils

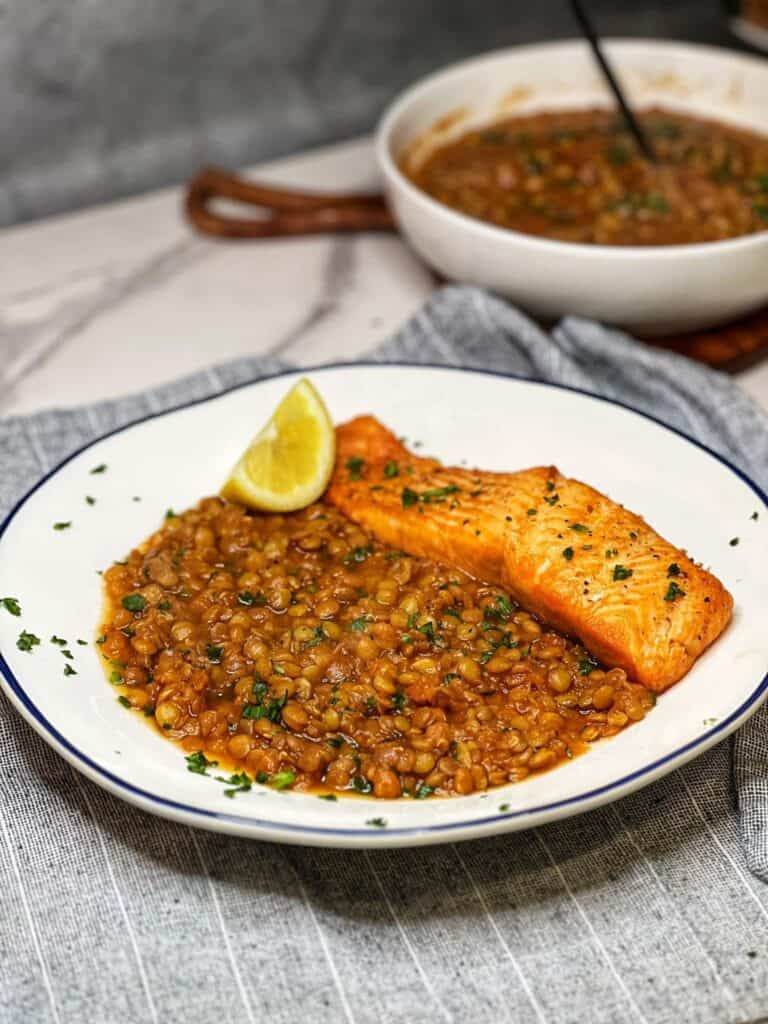
A white bowl filled with tomato braised lentils that are garnished with fresh parsley.

Tomato Braised Lentils are a nourishing and healthy side dish, or vegetarian meal. These tiny legumes are slowly simmered in an herb-infused, tomatoey broth. Once cooked, the lentils are tender and creamy, yet hold their shape. Lentils are a perfect pairing with your favorite protein. Leftovers are even better the next day!

A white bowl filled with tomato braised lentils that are garnished with fresh parsley.

Lentils 101

Although not new, lentils are quickly surpassing chickpeas as the go-to superfood in pastas, chips and even pet food.

Lentils are a a tiny, round-shaped legume that has long been a staple in Indian cuisine (daal). In addition, these protein-packed lentils play a huge role in vegan cooking as a plant-based source of protein. They are grown in pods and come in a variety of sizes and colors (green, brown, black, red, yellow and green). Also, lentils are gluten-free!

Why You Should Make This Lentils Recipe

  • Packed with Plant-Based Protein: Lentils are an excellent source of plant-based protein, making this dish perfect for vegans and vegetarians. It’s a filling, nutritious meal for any diet. These powerful legumes contain 18 grams of protein in one cup.
  • Rich in Fiber and Nutrients: Lentils are naturally high in fiber, aiding digestion and promoting heart health. Combined with tomatoes, which are full of antioxidants like lycopene, this tomato braised lentils recipe provides a nutrient-rich option for healthy eating. Lentils are generous in polyphenols. Polyphenols fight off harmful agents in the body.
  • Budget-Friendly and Easy to Make: Lentils are a cost-effective protein source, and the recipe uses affordable pantry staples like canned tomatoes and basic spices. Perfect for a quick, budget-conscious meal.
  • Comforting and Hearty: Slow-cooked lentils in a rich tomato sauce create a comforting, hearty dish that’s ideal for chilly nights. It’s satisfying enough to be a main course, or served as a side dish.
  • Great for Meal Prep: Tomato braised lentils store well in the fridge or freezer, making them perfect for meal prepping. They taste even better the next day, allowing you to enjoy leftovers throughout the week.
  • Versatile and Customizable: This recipe is easy to adjust with different herbs, spices, or added vegetables, making it versatile for a range of tastes. Pair it with rice, crusty bread, or your favorite protein.

What is Braising?

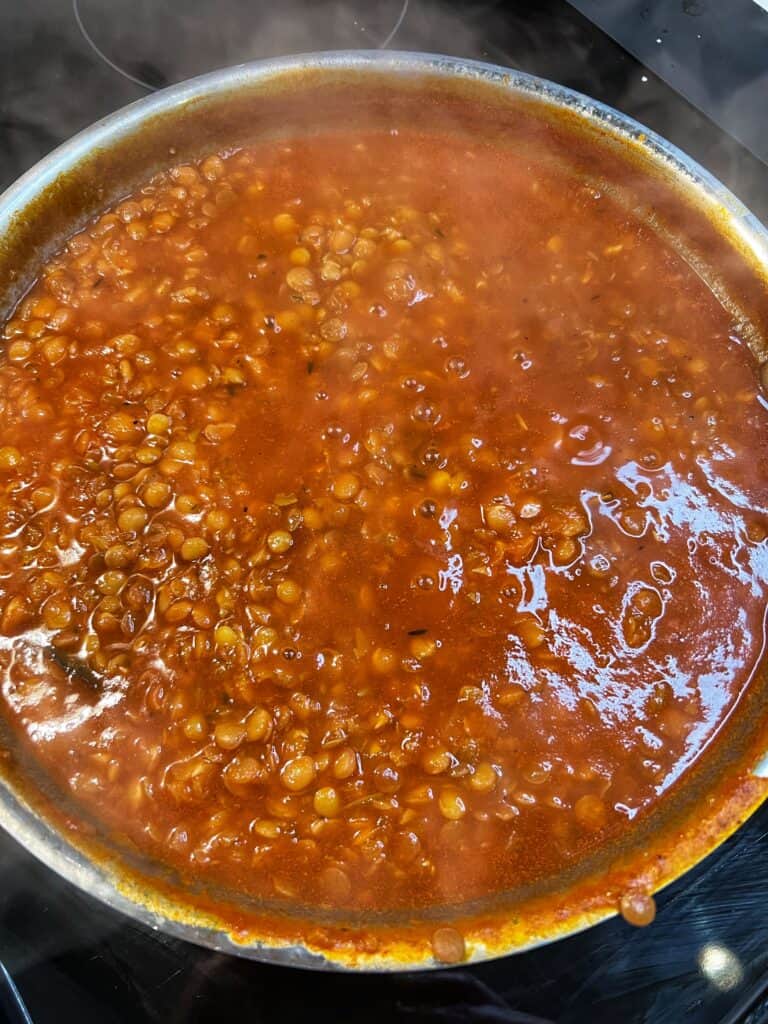
Braising is a cooking technique that begins with browning, and ends with steaming. In the case of this recipe for Tomato Braised Lentils, the mirepoix is sautéed with the legumes, then combined with liquid and covered to steam.

Stewing and braising are similar techniques. However, stewing calls for the use of more liquid.

Tips on Making the Best Tomato Braised Lentils

  • Lentil: French green lentils work really well in this lentil recipe. Green lentils or black lentils are great substitutes.
  • Mirepoix: Feel free to add or substitute with leeks and/or fennel.
  • Sherry Wine: This is NOT cooking sherry. White wine, red wine or marsala wine are suitable for substituting.
  • Vegetable Stock: Easily substitute with chicken stock
  • Tomato Passata: Use crushed, diced or tomato sauce, as substitutes
  • Fresh Herbs: Use whatever you have in your pantry (rosemary, thyme, parsley)

How to Prepare Tomato Braised Lentils

  1. Rinse and drain the lentils.
  2. Heat the oil in a deep sauté pan.
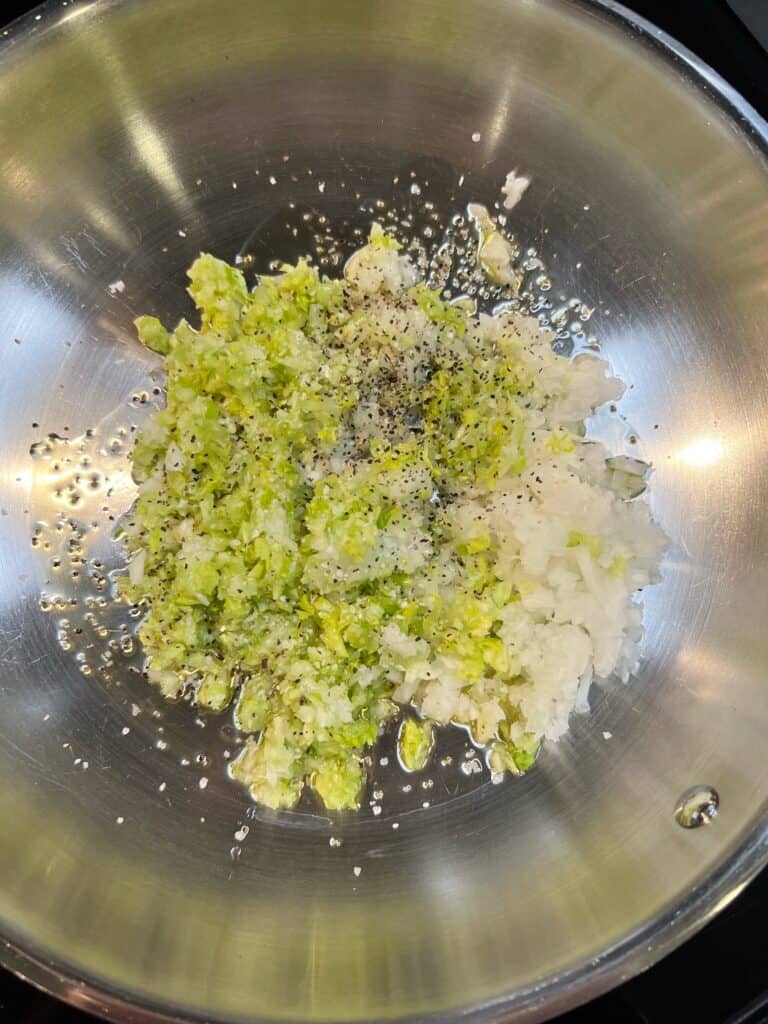
  3. Add in the onion, celery and carrot. Season with salt and pepper.
  4. Sauté for a few minutes to soften the vegetables.
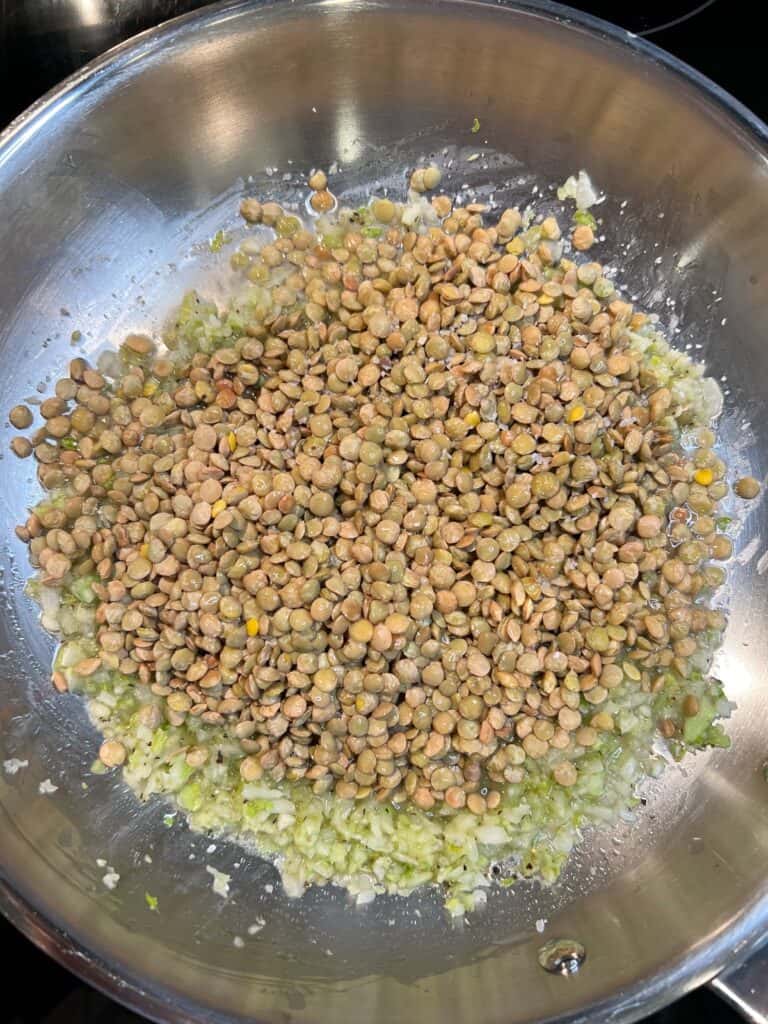
  5. Add in the lentils, garlic and white wine.
  6. Allow the wine to cook off for a few minutes.
  7. Add in the tomato purée. Season again with salt and pepper.
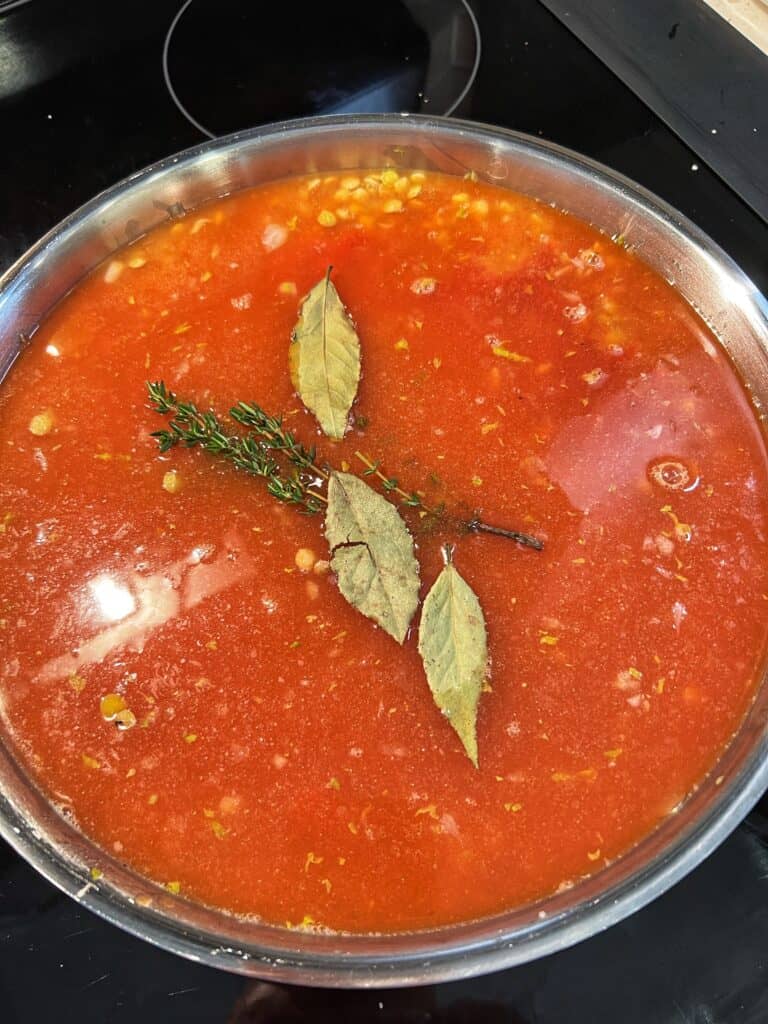
  8. Pour in the stock along with the fresh herbs and bay leaves.
  9. Cover and simmer for about 15 to 20 minutes, or until the lentils are tender.
  10. Remove and discard the bay leaves and any woody stems of the herbs.
  11. Stir in fresh parsley.

How to Serve and Store Tomato Braised Lentils

These creamy, Tomato Braised Lentils can be enjoyed as a vegetarian side dish, or meal with roasted vegetables.

Alternatively, these braised lentils make for a perfect pairing with:

  • Store in the fridge for up to 3 to 4 days.
  • Freeze for up to three months.
  • Reheat on stovetop or microwave.
  • Leftovers can also be repurposed into a salad, as a base for fried or poached eggs, or mixed with wilted greens.
Print
clock clock iconcutlery cutlery iconflag flag iconfolder folder iconinstagram instagram iconpinterest pinterest iconfacebook facebook iconprint print iconsquares squares iconheart heart iconheart solid heart solid icon
A white bowl filled with tomato braised lentils that are garnished with fresh parsley.

Tomato Braised Lentils


5 Stars 4 Stars 3 Stars 2 Stars 1 Star

No reviews

Description

Tomato Braised Lentils are a nourishing and healthy side dish, or vegetarian meal. These tiny legumes are slowly simmered in an herb-infused, tomatoey broth. Once cooked, the lentils are tender and creamy, yet hold their shape. Leftovers are even better the next day!


Ingredients

Scale
  • 1 cup French green lentils, rinsed and drained
  • 2 tablespoon olive oil
  • 1/2 white onion, minced
  • 1 large celery stalk, minced
  • 1 carrot, minced
  • 1 teaspoon salt
  • 1 teaspoon black pepper
  • 1/4 cup white wine
  • 2 garlic cloves, minced
  • 8 ounces tomato passata (purée)
  • 3 cups vegetable or chicken stock
  • 2 to 3 fresh thyme and/or rosemary sprigs
  • 2 bay leaves
  • 1 tablespoon fresh parsley, for garnish

Instructions

  1. Rinse and drain the lentils.
  2. Heat the oil in a deep sauté pan.
  3. Add in the onion, celery and carrot. Season with salt and pepper.
  4. Sauté for a few minutes to soften the vegetables.
  5. Add in the lentils, garlic and white wine.
  6. Allow the wine to cook off for a few minutes.
  7. Add in the tomato purée. Season again with salt and pepper.
  8. Pour in the stock along with the fresh herbs and bay leaves.
  9. Cover and simmer for about 15 to 20 minutes, or until the lentils are tender.
  10. Remove and discard the bay leaves and any woody stems of the herbs.
  11. Stir in fresh parsley.
  12. Serve alone as a vegetarian dish, or side dish. 
  13. ENJOY!

Equipment

Notes

  • French green lentils work really well in this lentil recipe. Green or black lentils are great substitutions.
  • Feel free to add or substitute the celery and onions with leeks and/or fennel.
  • Do not use sherry cooking wine.
  • White wine, red wine or marsala wine are suitable for substituting.
  • Easily substitute the vegetable stock with chicken stock.
  • Use crushed, diced or tomato sauce, as substitutes.
  • Use whatever you have in your pantry (rosemary, thyme, parsley).
  • Avoid simmering to hard. You want the lentils to retain their shape and not become mushy.
  • Serve these tomato braised lentils alone, or alongside your favorite protein.
  • Prep Time: 10 minutes
  • Cook Time: 30 minutes
  • Category: Side dish
  • Method: Easy
  • Cuisine: Vegetarian

Nutrition

  • Serving Size: 3/4 cup

GET TO KNOW ME!

I am more than just recipes. I love fashion and style too! Most importantly, I love my Family (my Hubby and my Fur Babies). My Husband (aka my “Kitchen Bitch”) means the world to me. He’s pretty damn cool too. Not only is he one of the nicest guys you will ever meet, he also has had a lengthy career in professional hockey. Not only winning two Stanley Cups with the Pittsburgh Penguins in the early ’90’s, but most recently winning the Calder Cup with the Charlotte Checkers, amongst many other accolades. If you live in Charlotte and play hockey, or have a family member who plays, be sure to contact him!

Our life has changed dramatically in the past few years with the passing of our two goldendoodles, Vegas and Viva. We were lucky enough to have Vegas for five years (totally wish it was longer). Most recently, losing our Viva to a brain tumor in July of 2020. We welcomed our mini goldendoodle 7, almost seven years ago. We just added the amazing Hazel! Of course, I am always posting tons and tons of photos! Be sure to check out my recipe for Pet Bone Broth! This broth is super rich in nutrients and will provide your pet with a multitude of health benefits!

Let’s Get Social!

Be sure to follow me on social media! I’m always talking food, fashion, and family! I also love sharing some of my favorite Amazon Finds too. Click here to check out my Amazon page! FacebookInstagramTikTokTwitter and Pinterest! THANK YOU!
Easy Crockpot Lentil Soup

Have you heard? Eating lentils brings wealth and prosperity in the New Year! So, I’ve created an easy way to enjoy these protein-packed legumes that’s both hearty, and delicious. Honestly, this Easy Crockpot Lentil Soup can be enjoyed all year long. Brown the coin-shaped sausages for additional flavor and toss them into a slow cooker with the remaining ingredients. After four to five hours, dinner is done! Maybe, just maybe, lentils will become YOUR new favorite legume. This healthy, slow-cooker soup makes for the perfect weeknight meal.

a bowl of Easy Crockpot Lentil Soup with bread in the background

ITALIAN TRADITION OF EATING LENTILS ON NEW YEARS EVE

Eating lentils right after midnight is an Italian tradition that dates back to Roman times. The flat, coin-shape of the lentil is believed to resemble Roman coins and are typically served with some type of pork. Cotechino con lenticchie (sausages and green lentils) is most popular. The sausages are cut into circles to also resemble coins for financial wealth and prosperity for the upcoming year.

WHAT ARE LENTILS

Lentils are a a tiny, round-shaped legume that has long been a staple in Indian cuisine (daal). In addition, lentils play a huge roll in vegan cooking as a plant-based source of protein. They are grown in pods and come in a variety of sizes and colors (green, brown, black, red, yellow and green). Also, lentils are gluten-free!

lentils sitting in a mesh strainer

Health benefits of eating lentils

Lentils are packed full of goodness. These powerful legumes contain 18 grams of protein in one cup. They are full of fiber, a great source of protein and are generous in polyphenols. Polyphenols fight off harmful agents in the body.

OTHER GOOD LUCK FOODS FOR THE NEW YEAR!

Ok, so let’s be honest. You may get a different answer depending on where you grew up. Having grown up in the north, pork and sauerkraut has always been our “good luck” food to ring in the New Year. Seriously, I can remember attending New Year’s Eve parties where big roasting pans full of roast pork and sauerkraut where brought out just past midnight.

BLACK-EYED PEAS – said to bring good luck in the form of money

ROUND SWEETS – represent a circle of luck

HEARTY GREENS – eat cabbage or kale for prosperity

CORNBREAD – it’s golden hue represents gold and riches in the new year

GRAPES – In Spain and Mexico, people eat 12 grapes at the stroke of midnight for luck

NOODLES – super long noodles bring long life in the New Year

POMEGRANATE SEEDS – eat for fertility and life

FISH – symbolizes abundance

CHAMPAGNE – wealth and nobility

PRETZELS – a German tradition for luck and prosperity

TIPS ON MAKING EASY CROCKPOT LENTIL SOUP

Follow these simple tips to prepare this healthy bean soup:

  • although browning the smoked sausage is not mandatory, the process does provide for another level of flavor
  • easily substitute with your favorite sausage, or leave out the sausage for a vegetarian lentil soup
  • rinse the lentils to remove any dirt and/or debris
  • adjust cook time if substituting other types of lentils (red will cook more quickly and green may need a bit more time)
  • use a food processor to mince the vegetables (makes for a better consistency)
  • substitute crushed tomatoes with whole (just crush them once you add to the slow cooker)
  • fresh rosemary can be great substitute for fresh thyme (or use both)
  • add spinach (at the end)
  • reduce cooking time by preparing on the stovetop in an enameled cast iron pot
  • serve with buttery bread for dipping and/or a side salad

STORAGE AND FREEZING

This dairy-free soup is great for meal prep and will last in the fridge up to five days. Alternatively, this easy crockpot lentil soup is a great freezer-meal soup and will last up to three months in the freezer.

Print
clock clock iconcutlery cutlery iconflag flag iconfolder folder iconinstagram instagram iconpinterest pinterest iconfacebook facebook iconprint print iconsquares squares iconheart heart iconheart solid heart solid icon
a bowl of Easy Crockpot Lentil Soup with bread in the background

Easy Crockpot Lentil Soup


5 Stars 4 Stars 3 Stars 2 Stars 1 Star

No reviews

Description

Have you heard? Eating lentils brings wealth and prosperity in the New Year! So, I’ve created an easy way to enjoy these protein-packed legumes that’s both hearty, and delicious. Honestly, this Easy Crockpot Lentil Soup can be enjoyed all year long. Brown the coin-shaped sausages for additional flavor and toss them into a slow cooker with the remaining ingredients. After four to five hours, dinner is done! Maybe, just maybe, lentils will become YOUR new favorite legume. This healthy, slow-cooker soup makes for the perfect weeknight meal.


Ingredients

Scale
  • 1 pound brown lentils, rinsed
  • 1 pound smoked sausage, cut into circles
  • 2 stalks celery with leaves, minced
  • 1/2 onion, minced
  • 1 large carrot, minced
  • 20 ounces crushed tomatoes
  • 5 to 6 cups chicken or vegetable stock
  • 5 sprigs thyme 
  • 2 bay leaves
  • 1 teaspoon salt
  • 1 teaspoon black pepper

Instructions

  1. Cut the sausage into circles and brown in a pan.
  2. Rinse the lentils.
  3. Mince the carrots, celery and onion.
  4. Once the sausages have browned, add them to the crockpot with the remaining ingredients, including the lentils.
  5. Add a bit of stock to the pan you cooked the sausages to remove the brown bits. Add to the crockpot.
  6. Cook on high 4 to 5 hours. 
  7. Check the liquid levels a few times. Add more stock, as needed.
  8. Soup is done when the lentils are tender.
  9. Remove and discard the bay leaves and thyme stalks.
  10. Serve in bowls with fresh bread for a hearty meal.
  11. ENJOY!

Notes

SEE POST FOR NOTES AND TIPS!

  • Prep Time: 10 minutes
  • Cook Time: 4 hours, 30 minutes
  • Category: Soup, Bisque
  • Method: Easy
  • Cuisine: American

Nutrition

  • Serving Size: 1 bowl

GET TO KNOW ME!

I am more than just recipes. I love fashion and style too! Most importantly, I love my Family (my Hubby and my Fur Babies). My Husband (aka my “Kitchen Bitch”) means the world to me. He’s pretty damn cool too. Not only is he one of the nicest guys you will ever meet, he also has had a lengthy career in professional hockey. Not only winning two Stanley Cups with the Pittsburgh Penguins in the early ’90’s, but most recently winning the Calder Cup with the Charlotte Checkers, amongst many other accolades. If you live in Charlotte and play hockey, or have a family member who plays, be sure to contact him!

Our life has changed dramatically in the past few years with the passing of our two goldendoodles, Vegas and Viva. We were lucky enough to have Vegas for five years (totally wish it was longer). Most recently, losing our Viva to a brain tumor in July of 2020. We welcomed our mini goldendoodle 7, almost seven years ago. We just added the amazing Hazel! Of course, I am always posting tons and tons of photos! Be sure to check out my recipe for Pet Bone Broth! This broth is super rich in nutrients and will provide your pet with a multitude of health benefits!

Let’s Get Social!

Be sure to follow me on social media! I’m always talking food, fashion, and family! I also love sharing some of my favorite Amazon Finds too. Click here to check out my Amazon page! FacebookInstagramTikTokTwitter and Pinterest! THANK YOU!
Paleo Chicken Chile Verde Soup

A bowl of paleo chicken chile verde soup topped with avocado, sour cream and jalapeño slices with a bag of Kevin's Natural Foods in the background

Whether you are following the “caveman diet” or not, you are going to thoroughly enjoy this Paleo Chicken Chile Verde Soup. Guess what? This tasty and healthy, paleo chicken verde soup can be on your dinner table in under 15 minutes with the help from Kevin’s Natural Foods’ new Meal Prep Entrees. Just add a few simple ingredients you probably have stocked in your pantry, your favorite paleo-friendly toppings and dinner is done!

A bowl of paleo chicken chile verde soup topped with avocado, sour cream and jalapeño slices with a bag of Kevin's Natural Foods in the background

KEVIN’S NATURAL FOODS

Kevin’s Natural Foods has “Hacked Healthy!” Their mission is to empower people to eat a clean diet without having to sacrifice flavor. Their new line of Heat & Eat Entrees are perfect for people on the go who want a quick and healthy meal that is both gluten-free and paleo! All of Kevin’s meal prep entrees are fully-cooked, and can be on your table in five minutes!

Order online now in bundles of 8, 16 or 24. Starting as low as $99, these meal prep entrees make for a great, quick and healthy meal that can also be served as an emergency meal, when time is just not on your side. These healthy, prepackaged meals will last in your fridge for up to 30 days, or can also be frozen to enjoy later!

Each of Kevin’s meal prep entrees alone, are enough for 2 to 3 servings.

Whether you are choosing a beef or chicken entree, the sous-vide meat is flavorful, and tender. The savory sauces will have you mystified as to how something so healthy, can taste so incredible.

Be sure to check out Kevin’s Natural Foods complete line of not only super flavorful, but also clean eating product offerings. Give them a follow on FacebookInstagram and Pinterest. Another bonus, Kevin’s sous-vide entrees are Certified Gluten-Free and Paleo and Keto Certified!

Kevin’s Natural Foods Chicken Chile Verde

Kevin’s Chicken Chile Verde Meal Prep Entree, when used to create this caveman diet friendly soup, is enough for 5 to 6 servings. Thus, making for a great weekly meal prep idea.

Tender chicken is paired with a tasty sauce made from tomatillos, roasted poblanos and traditional Mexican spices. The sous-vide chicken is fully-cooked. The chile verde sauce packet is all the flavoring you will need to create this delicious paleo chicken verde soup. Simply drain the sous-vide stock from the chicken, shred and add to the soup!

a package of Kevin's Natural Foods Chicken Chile Verde meal prep entree

WHAT IS THE PALEO OR CAVEMAN DIET

The paleo or, as it’s often referred, the caveman diet resembles the foods that our ancestors used to hunt and gather many, many years ago. This is NOT one of those “calorie-counting” diets.

As long as you follow these two simple rules, you are basically following a paleo meal plan:

  • EAT meat, fish, vegetables and fruits, seeds, nuts, spices, herbs, healthy fats and oils.
  • AVOID processed foods, sugar, grains, dairy, beans, artificial sweeteners, vegetable oils and trans fats.

KEEP THE SOUP INGREDIENTS PALEO-FRIENDLY and DAIRY-FREE

All of the remaining ingredients to create and garnish this tasty and nutritious chicken soup should be paleo-friendly:

Organic Chicken Stock – Use a high-quality stock that is free from additives and preservatives (homemade is best).

Vegetables – Add as many vegetables as you want. Vegetables are the cornerstone of any paleo diet!

Dairy-Free – Don’t skip the dollop of sour cream. Use a dairy-free AND soy-free, plant-based sour cream that is paleo-friendly!

Pepitas (Pumpkin Seeds) – Replace fried tortilla strips with roasted pepitas for the most perfect crunch and added texture. Pepitas are paleo-friendly and are packed full of nutrients and quality fats.

STORING LEFTOVER PALEO CHICKEN VERDE SOUP

This dairy-free, paleo-friendly soup will last in the fridge for up to five days making this a perfect weekly meal prep recipe idea. Since this Chicken Soup is so very easy to prepare, freezing is not recommended. However, you can freeze for up to three months in a tightly sealed container.

Print
clock clock iconcutlery cutlery iconflag flag iconfolder folder iconinstagram instagram iconpinterest pinterest iconfacebook facebook iconprint print iconsquares squares iconheart heart iconheart solid heart solid icon
A bowl of paleo chicken chile verde soup topped with avocado, sour cream and jalapeño slices with a bag of Kevin's Natural Foods in the background

Paleo Chicken Chile Verde Soup


5 Stars 4 Stars 3 Stars 2 Stars 1 Star

No reviews

Description

Whether you are following the “caveman diet” or not, you are going to thoroughly enjoy this Paleo Chicken Chile Verde Soup. Guess what? This tasty and healthy, paleo chicken verde soup can be on your dinner table in under 15 minutes with the help from Kevin’s Natural Foods’ new Meal Prep Entrees. Just add a few simple ingredients you probably have stocked in your pantry, your favorite paleo-friendly toppings and dinner is done!


Ingredients

Scale
  • 1 package Kevin’s Natural Foods Chicken Chile Verde Meal Prep Entree
  • 4 cups organic chicken stock
  • 1 tablespoon olive oil
  • 1 garlic clove, minced
  • 2 tablespoons onion minced
  • 3/4 cup cherry tomatoes, halved
  • 1/2 teaspoon salt
  • 1 teaspoon pepper
  • 2 bay leaves
  • 2 to 3 tablespoons fresh cilantro, chopped
  • juice of 1/2 lime

SUGGESTED TOPPINGS:

  • sliced avocado
  • dollop of dairy-free sour cream
  • pepitas
  • sliced jalapeños 
  • lime wedges

Instructions

  1. Heat the olive oil in a soup pot.
  2. Add the onions, garlic and tomatoes. Season with salt and pepper.
  3. Sauté for 3 minutes.
  4. While the vegetables are sautéing, drain the sous-vide liquid from the chicken and shred.
  5. Add the chicken stock to the soup and blend with an immersion blender.
  6. Add the chile verde sauce packet to the soup, along with the bay leaves and simmer for just about five minutes.
  7. Add the shredded chicken and fresh cilantro. Allow the chicken to warm through. 
  8. Remove the bay leaves.
  9. Serve in bowls topped with sliced avocado, dairy-free sour cream, sliced jalapeños, and pepitas for crunch.
  10. ENJOY!

Notes

SEE POST FOR NOTES AND TIPS ON ENJOYING A PALEO AND DAIRY-FREE DIET!

  • nutrition information does not include garnishes
  • Prep Time: 3 minutes
  • Cook Time: 10 minutes
  • Category: Soup, Bisque
  • Method: Easy
  • Cuisine: Mexican

Nutrition

  • Serving Size: 1 bowl

GET TO KNOW ME!

I am more than just recipes. I love fashion and style too! Most importantly, I love my Family (my Hubby and my Fur Babies). My Husband (aka my “Kitchen Bitch”) means the world to me. He’s pretty damn cool too. Not only is he one of the nicest guys you will ever meet, he also has had a lengthy career in professional hockey. Not only winning two Stanley Cups with the Pittsburgh Penguins in the early ’90’s, but most recently winning the Calder Cup with the Charlotte Checkers, amongst many other accolades. If you live in Charlotte and play hockey, or have a family member who plays, be sure to contact him!

Our life has changed dramatically in the past few years with the passing of our two goldendoodles, Vegas and Viva. We were lucky enough to have Vegas for five years (totally wish it was longer). Most recently, losing our Viva to a brain tumor in July of 2020. We welcomed our mini goldendoodle 7, almost seven years ago. We just added the amazing Hazel! Of course, I am always posting tons and tons of photos! Be sure to check out my recipe for Pet Bone Broth! This broth is super rich in nutrients and will provide your pet with a multitude of health benefits!

Let’s Get Social!

Be sure to follow me on social media! I’m always talking food, fashion, and family! I also love sharing some of my favorite Amazon Finds too. Click here to check out my Amazon page! FacebookInstagramTikTokTwitter and Pinterest! THANK YOU!

Peppercorn Steak Tips with Dairy-Free Cauliflower Risotto

Kevin's peppercorn beef tips on a bed of dairy free cauliflower risotto

Would you believe me if I told you this incredible, Gluten-Free Recipe for Peppercorn Steak Tips with Dairy-Free Cauliflower Risotto can be on your dinner table in under 15 minutes? It’s true. Simply, pair Kevin’s Natural Foods’ new 5-minute, meal prep Peppercorn Steak Tips with a quick, homemade Dairy-Free Cauliflower Risotto. See, a healthy, gluten-free and dairy-free diet can be incredibly delicious, quick and easy to prepare. These guilt-free, sous-vide entrees from Kevin’s will allow any home chef to whip up a yummy, Michelin-style meal in minutes!

Kevin's peppercorn beef tips on a bed of dairy free cauliflower risotto

KEVIN’S NATURAL FOODS

Kevin’s Natural Foods has “Hacked Healthy!” Their mission is to empower people to eat a clean diet without having to sacrifice flavor. Their new line of Heat & Eat Entrees are perfect for people on the go who want a quick and healthy meal that is both gluten-free and paleo! All of Kevin’s meal prep entrees are fully-cooked, and can be on your table in five minutes!

Order online now in bundles of 8, 16 or 24. Starting as low as $99, these meal prep entrees make for a great, quick and healthy meal that can also be served as an emergency meal, when time is just not on your side. These healthy, prepackaged meals will last in your fridge for up to 30 days, or can also be frozen to enjoy later!

Whether you are choosing a beef or chicken entree, the sous-vide meat is flavorful, and tender. The savory sauces will have you mystified as to how something so healthy, can taste so incredible.

Be sure to check out Kevin’s Natural Foods complete line of not only super flavorful, but also clean eating product offerings. Give them a follow on FacebookInstagram and Pinterest. Another bonus, Kevin’s sous-vide entrees are Certified Gluten-Free and Paleo and Keto Certified!

Kevin’s Peppercorn Steak Tips

Who doesn’t love when someone cooks a healthy and delicious meal, just for you? Exactly what Kevins’ has done with their new meal prep entrees.

You are going to love Kevin’s Peppercorn Steak Tips! The sous-vide steak tips are 100% made with grass-fed beef. They are fully-cooked, and so incredibly tender. Simply, drain off the sous-vide liquid and serve in a hot pan lined with oil for less than two minutes!

The Peppercorn Sauce tastes just like homemade. It’s a rich, savory cream sauce made with crushed peppercorns and tasty beef stock.

a package of Kevin's Natural Foods Peppercorn Steak Tips meal prep laying on a counter with sliced mushrooms in the background

DAIRY-FREE CAULIFLOWER RISOTTO

With just a few more minutes and a few extra steps, you can create an entire gluten-free and dairy-free meal. Simply, pair Kevin’s Peppercorn Steak Tips with my recipe for this Creamy, Dairy-free Cauliflower Risotto.

Sliced mushrooms are seared to perfection and combined with dairy-free cream cheese and dairy-free heavy whipping cream to create a creamy and delicious base for cauliflower rice. It will only take about five minutes to come together!

Don’t like mushrooms, substitute with cut asparagus or fresh cut green beans.

dairy-free cauliflower rice in a pan with mushrooms

Cauliflower Rice

For ease, use frozen cauliflower rice that can be steamed in the microwave while you are preparing the mushrooms. As an alternative, use packaged cauliflower rice.

Although a bit more time-consuming, make your own by grating or ricing a head of steamed cauliflower.

Dairy-Free Cream Cheese and Dairy-Free Whipping Cream

Are you wondering how to choose the right dairy-free option? Look to the label! For the sake of this recipe, look for dairy-free alternatives that are both gluten-free and soy-free!

TIPS ON LIVING GLUTEN-FREE

The protein gluten may cause certain people to have digestive issues. The symptoms of a gluten aversion can range from uncomfortable gastrointestinal issues to the more severe, celiac disease. Celiac disease is an autoimmune disorder. Basically, the body attacks itself after ingesting foods containing gluten.

Gluten is found in most grains and wheat. In addition, gluten can be used as an additive to various processed foods. So, it’s important to read labels.

Here are a few tips for a gluten-free diet:

  • increase protein consumption
  • decrease sugar intake
  • increase fiber intake
  • store gluten and gluten-free foods separately to avoid cross-contamination
  • avoid bread made with wheat and grains
  • research restaurant menus

LEFTOVER PEPPERCORN STEAK TIPS AND DAIRY-FREE CAULIFLOWER RISOTTO

Each of Kevin’s meal prep entrees alone, can feed two hungry adults. With the addition of the Dairy-Free Cauliflower Risotto, you can yield approximately, three prep meals for one individual. Store in an air-tight container and place in fridge up to 4 to 5 days. The lack of dairy will extend the shelf life of this incredibly delicious, gluten-free meal.

Print
clock clock iconcutlery cutlery iconflag flag iconfolder folder iconinstagram instagram iconpinterest pinterest iconfacebook facebook iconprint print iconsquares squares iconheart heart iconheart solid heart solid icon
Kevin's peppercorn beef tips on a bed of dairy free cauliflower risotto

Peppercorn Steak Tips with Dairy-Free Cauliflower Risotto


5 Stars 4 Stars 3 Stars 2 Stars 1 Star

No reviews

Description

Would you believe me if I told you this incredible, gluten-free recipe for Peppercorn Steak Tips with Dairy-Free Cauliflower Risotto can be on your dinner table in under 15 minutes? It’s true. Simply, pair Kevin’s Natural Foods’ new 5-minute, meal prep Peppercorn Steak Tips with a quick, homemade Dairy-Free Cauliflower Risotto. See, a healthy, gluten-free and dairy-free diet can be incredibly incredibly delicious and easy to prepare!


Ingredients

Scale
  • 1 package Kevin’s Natural Foods Peppercorn Steak Tips
  • 8 ounces baby bella or button mushrooms, sliced
  • 10 ounces riced cauliflower
  • 2 1/2 tablespoons olive oil, divided
  • 2 garlic cloves, minced
  • 1 teaspoon salt
  • 1 teaspoon black pepper
  • 1/4 cup Pinot Grigio or chicken stock
  • 2 tablespoons dairy-free, plant based cream cheese
  • 1/2 cup dairy-free whipping cream
  • 2 tablespoons fresh parsley, chopped
  • drizzle of finishing oil, optional

Instructions

  1. Drain the sous vide liquid from the steak (allow to drain as you prep the other ingredients)
  2. Heat one tablespoon of olive oil in a pan to medium-high.
  3. Add the sliced mushrooms. Season with salt and pepper.
  4. Sauté for about two minutes. 
  5. As the mushrooms are sautéing, prepare the cauliflower rice (according to package directions and undercook by a minute)
  6. Add the minced garlic and cook for another 30 seconds. 
  7. Add the wine. Cook for another minute or two.
  8. Turn off heat and whisk in the dairy-free cream cheese and dairy-free heavy whipping cream.
  9. Once a creamy sauce forms, gently mix in the cauliflower rice and fresh chopped parsley.
  10. In a separate pan, heat the remaining olive oil on medium-high. 
  11. Add the steak tips and sear for two minutes. 
  12. Pour in the Peppercorn Sauce packet. Cook for another minute.
  13. Plate the creamy cauliflower risotto and top with a few generous spoonfuls of the tender Peppercorn Steak Tips.
  14. Garnish with fresh parsley and a drizzle of finishing oil (optional).
  15. ENJOY!
@charlottefashionplate

Gluten-free and Dairy-free Dinner Idea in under 15 minutes using @kevins.natural.foods Peppercorn Steak Tips Meal Prep Entree! #glutenfree #glutenfreerecipes #15minutemeal #dairyfree #ReasonForBooking #CODSquadUp #recipe #mealprepideas #foodtiktok #foodblogger

♬ Taste It – Ikson

Notes

SEE POST FOR NOTES AND MORE TIPS ON LIVING AND EATING GLUTEN-FREE!

  • Prep Time: 2
  • Cook Time: 10 minutes
  • Category: Dinner
  • Method: Easy
  • Cuisine: American

Nutrition

  • Serving Size: 1 serving

GET TO KNOW ME!

a photo of me leaning against a brick wall with my logo, "Charlotte Fashion Plate" to the left of me

I am more than just recipes. I love fashion and style too! Most importantly, I love my Family (my Hubby and my Fur Babies). My Husband (aka my “Kitchen Bitch”) means the world to me. He’s pretty damn cool too. Not only is he one of the nicest guys you will ever meet, he also has had a lengthy career in professional hockey. Not only winning two Stanley Cups with the Pittsburgh Penguins in the early ’90’s, but most recently winning the Calder Cup with the Charlotte Checkers, amongst many other accolades. If you live in Charlotte and play hockey, or have a family member who plays, be sure to contact him!

Our life has changed dramatically in the past few years with the passing of our two goldendoodles, Vegas and Viva. We were lucky enough to have Vegas for five years (totally wish it was longer). Most recently, losing our Viva to a brain tumor in July of 2020. We welcomed our mini goldendoodle 7, almost seven years ago. We just added the amazing Hazel! Of course, I am always posting tons and tons of photos! Be sure to check out my recipe for Pet Bone Broth! This broth is super rich in nutrients and will provide your pet with a multitude of health benefits!

Let’s Get Social!

Be sure to follow me on social media! I’m always talking food, fashion, and family! I also love sharing some of my favorite Amazon Finds too. Click here to check out my Amazon page! FacebookInstagramTikTokTwitter and Pinterest! THANK YOU!

Fresh Salsa Chorizo Meatloaf

Fresh salsa meatloaf roasted in a cast iron pan with carrots and onions and a container of salsa in the background

Take your Classic Meatloaf recipe for a spin! Fresh Salsa Chorizo Meatloaf is a flavorful, hearty dinner full of ground beef, pork, chorizo, and studded with fresh vegetables. The right amount of spice from the chorizo sausage combines perfectly with Sam’s Fresh Medium Salsa for a wonderful explosion of flavor. What a time saver using the fresh salsa. No need to chop vegetables. The Pico de Gallo style salsa is full of tomatoes, onions, bell peppers, jalapeños, and fresh cilantro.

SAM’S FRESH SALSA

So, let’s talk about Sam’s Fresh Salsa. Their mission and priority has always been to “ensure consistent quality in their produce.” Sam’s award-winning fresh salsas are created using the freshest of produce.

Find Sam’s Fresh Salsa products at ShopRite, Acme and Safeway. For a complete list of retailers, click here! If not available in your local market, ask them to carry Sam’s Fresh Salsa products. Follow Sam’s Fresh Salsa on Facebook and Instagram!

me holding a container of Sam's Fresh Medium Salsa

MEATLOAF

Did you know meatloaf originated in Germany? Meatloaf become popular in America as German immigrants made their way to America.

Consequently, meatloaf became a favored dish during the Great Depression. As meat became scarce, grains and leftover ingredients were added to whatever meat was on hand to “bulk” up the recipe. Tomatoes and/or tomato sauce was then poured on top to not only provide additional flavor, but to also keep the meatloaf moist and tender.

Chorizo Meatloaf

Honestly, some of us can agree that traditional meatloaf can be quite boring, right? Not anymore, now that we have this recipe for Fresh Salsa Chorizo Meatloaf! Chorizo is a well seasoned pork sausage that is very popular in Spanish and Mexican cuisine.

I used Mexican chorizo in this dish. This type of fatty sausage has a very distinct red tint from the various spices used to make it.

NOTE: Spanish chorizo and Mexican chorizo are very different. Mexican chorizo is raw and fresh. Unlike most sausages, the casing is inedible. Thankfully, you will find most Mexican chorizo is sold in a tube, sans the casing.

TIPS ON MAKING THE BEST FRESH SALSA CHORIZO MEATLOAF

As mentioned earlier, the use of fresh salsa as a main ingredient to prepare the meatloaf will be a huge time saver, and flavor builder. The fresh salsa contains the ingredients you would normally spend time chopping.

Additionally, the juices from the salsa help to keep this flavor-packed meatloaf moist and tender as it bakes. Also, this tangy meatloaf recipe does not call for eggs. You do not need them. The salsa and cream soaked bread are the perfect binders.

Here are a few more tips:

  • meatloaf mix (find in the meat section) can be substituted for ground beef and pork
  • use 80/20 beef (the more fat, the more flavor)
  • do NOT skip the bread soaking step (I even do this for Meatballs)
  • a crusty bread works better than sandwich bread
  • milk can be substituted for the heavy whipping cream
  • do NOT overwork the meat
  • as the meatloaf bakes, you will need to drain off some of the fat
  • cook meatloaf to an internal temperature of 165° using an instant-read thermometer placed in the center of the loaf
  • add vegetables to the baking pan (potatoes, carrots, onions, garlic)
  • form two loaves for faster a faster bake

HOW TO SERVE AND STORE LEFTOVER SALSA MEATLOAF

Traditionally, serve this tasty, spicy meatloaf on top of creamy mashed potatoes with a side of roasted vegetables, or consider these other options as perfect pairings:

  • macaroni and cheese
  • rice
  • mashed cauliflower
  • green beans or peas
  • scalloped potatoes
  • fried potatoes
  • roasted potatoes

Thankfully, leftover Fresh Salsa Chorizo Meatloaf will last up to three days in the fridge. Leftovers will make for great meatloaf sandwiches the next day. Additionally, cut up the chorizo meatloaf and serve as a topping for nachos, with extra Sam’s Fresh Salsa, of course!

If stored properly, leftover meatloaf can last up to three months in the freezer.

Print
clock clock iconcutlery cutlery iconflag flag iconfolder folder iconinstagram instagram iconpinterest pinterest iconfacebook facebook iconprint print iconsquares squares iconheart heart iconheart solid heart solid icon
Fresh salsa meatloaf roasted in a cast iron pan with carrots and onions and a container of salsa in the background

Fresh Salsa Chorizo Meatloaf


5 Stars 4 Stars 3 Stars 2 Stars 1 Star

No reviews

Description

Take your classic meatloaf recipe for a spin! Fresh Salsa Chorizo Meatloaf is a flavorful, hearty dinner full of ground beef, pork, chorizo, and studded with fresh vegetables. The right amount of spice from the sausage combines perfectly with Sam’s Fresh Medium Salsa for a wonderful explosion of flavor. What a time saver using the fresh salsa. No need to chop vegetables. The Pico de Gallo style salsa is full of tomatoes, onions, bell peppers, jalapeños, and fresh cilantro.


Ingredients

Scale
  • 1 pound ground beef (80/20)
  • 1/2 pound ground pork
  • 6 ounces Mexican chorizo, out of casing
  • 2 slices bread, torn into bite-sized pieces
  • 1/3 cup heavy whipping cream or milk
  • 1 teaspoon salt
  • 1 teaspoon black pepper
  • 1/2 teaspoon garlic powder
  • 1/2 teaspoon onion powder
  • 3 tablespoons Sam’s Fresh Salsa (Medium or Mild)
  • 2 tablespoons fresh cilantro, chopped
  • 8 to 10 baby carrots
  • 1/2 red onion, quartered
  • 2 garlic cloves, halved
  • 2 teaspoons olive oil

Instructions

  1. Preheat oven to 350°.
  2. Tear the bread into a large bowl and allow to soak in the heavy cream for a few minutes (the mixture should be paste-like)
  3. To the same bowl, add the ground meats, chorizo, fresh cilantro, and salsa. 
  4. Season with salt, pepper, garlic and onion powder.
  5. Use your hands to evenly incorporate the ingredients.
  6. Do NOT over mix.
  7. Form into a loaf. Place in a cast iron, or baking pan.
  8. Add the carrots, onions and garlic around the meatloaf. 
  9. Sprinkle the vegetables with a touch of olive oil and season with salt and pepper.
  10. Cover, or tent with tin foil.
  11. Bake for about 45 minutes, or until the internal temperature reaches 165° using an instant-read thermometer
  12. Remove from oven and allow to rest at least five minutes prior to cutting.
  13. Cut into generous, thick slices.
  14. Suggested serving on top of creamy mashed potatoes with a spoonful of the roasted vegetables.
  15. Garnish with a few spoonfuls of fresh salsa and chopped cilantro.
  16. ENJOY!

Notes

  • Depending on the fat content of the meat, you may have to remove a bit of fat while the meatloaf is baking (check at the 25 minute marker).
  • SEE POST FOR ADDITIONAL NOTES AND TIPS!
  • Prep Time: 10 minutes
  • Cook Time: 1 hour
  • Category: Dinner
  • Method: Easy
  • Cuisine: American

Nutrition

  • Serving Size: 2 slices

GET TO KNOW ME!

a photo of me leaning against a brick wall with my logo, "Charlotte Fashion Plate" to the left of me

I am more than just recipes. I love fashion and style too! Most importantly, I love my Family (my Hubby and my Fur Babies). My Husband (aka my “Kitchen Bitch”) means the world to me. He’s pretty damn cool too. Not only is he one of the nicest guys you will ever meet, he also has had a lengthy career in professional hockey. Not only winning two Stanley Cups with the Pittsburgh Penguins in the early ’90’s, but most recently winning the Calder Cup with the Charlotte Checkers, amongst many other accolades. If you live in Charlotte and play hockey, or have a family member who plays, be sure to contact him!

Our life has changed dramatically in the past few years with the passing of our two goldendoodles, Vegas and Viva. We were lucky enough to have Vegas for five years (totally wish it was longer). Most recently, losing our Viva to a brain tumor in July of 2020. We welcomed our mini goldendoodle 7, almost seven years ago. We just added the amazing Hazel! Of course, I am always posting tons and tons of photos! Be sure to check out my recipe for Pet Bone Broth! This broth is super rich in nutrients and will provide your pet with a multitude of health benefits!

Let’s Get Social!

Be sure to follow me on social media! I’m always talking food, fashion, and family! I also love sharing some of my favorite Amazon Finds too. Click here to check out my Amazon page! FacebookInstagramTikTokTwitter and Pinterest! THANK YOU!

Creamy Chicken Broccoli Pie

a creamy chicken broccoli pie baked and opened with a gold spoon to show the filling sitting on a piece of crumbled parchment paper

It’s Fall, and I could not be more excited! So, when I was approached to enter a blogger recipe challenge for Wick’s Pies, I knew I was going to recreate my homemade Chicken and Broccoli Pot Pie recipe using Wick’s Pies’ 9″ Dough Circles! See, growing up chicken pot pies were a treat. Even though our Mom cooked for us almost every single day, every so often, she would let us pick out a frozen pot pie at the grocery store. One day, I picked a new brand and was so upset that there was not a bottom crust. Who would do that? I made sure that every single centimeter of this Creamy Chicken Broccoli Pie was covered in Wick’s Pies’ flaky, and buttery crust!

Chicken Pot Pie is classic comfort food perfect as a cold weather meal. If you have yet to try a homemade savory pie, you really should. Be sure to check out the video tutorial in the recipe. You will be amazed just how easy it is transform a traditional recipe into one with more of a modern twist using rotisserie chicken and frozen pie crust.

a small creamy chicken broccoli pot pie just finished baking and sitting on top of crumbled parchment paper

Wick’s Pies

Wick’s Pies was started in the mid-1940’s by Duane “Wick” Wickersham. They were, and are still, well-known for their Sugar Cream Pies. It’s a family-owned and operated business that employees over 70 people. Staying true to their values of making high-quality products with exceptional customer service, Wick’s has grown the business to wholesalers and online customers.

If you are ever in, or near Winchester, Indiana be sure to stop by Mrs. Wick’s Restaurant to taste a few of their amazing pies, or take a few home!

Be sure to follow Wick’s Pies on FacebookInstagram, and Twitter!

HOMEMADE CREAMY CHICKEN BROCCOLI PIE

There is nothing better on a chilly evening than curling up to Homemade Chicken Pot Pie. Preparing this classic dish at home is so much better than frozen or store-bought. The center of this savory pot pie is so creamy and that flaky crust, so satisfying.

Pot Pies are a great way to use leftovers. For ease of this recipe, rotisserie chicken saved me a lot of time. Also, think about Turkey Pot Pies using leftovers from that Thanksgiving dinner.

What I love most about Pot Pies is that you can adjust the filling to your liking. Hence, the reason I used some of my favorite ingredients. This Chicken Broccoli Pot Pie is so versatile.

WHAT IS A POT PIE

Chicken Pot Pie is probably the most popular type of pot pies. Although most traditional Chicken Pot Pies contain potatoes, celery, carrots, onions and/or peas, modern versions can vary significantly in both ingredients, and preparation.

Take note, in the recipe I only use celery as flavoring. Feel free to dice up and add to the filling!

Pot pies are meant to be loaded with vegetables and protein. However, you can easily make a vegetarian pot pie by omitting the meat, adding more vegetables and substituting with vegetable stock.

In addition, try making a Pot Pie using the following:

  • turkey, ham, or beef
  • seafood
  • onions
  • carrots
  • mushroom
  • celery
  • peas

Rotisserie Chicken for Pot Pies

As a timesaver, go ahead and grab a few rotisserie chickens from your local market. Dice the breast meat and use in this fabulous recipe for Creamy Chicken Broccoli Pie. As an alternative, poach two chicken breasts in chicken stock for about 12 to 15 minutes. Save the stock to form the rich gravy.

DOES THE SIZE OF THE POT PIE MATTER?

Did you notice those cute individual pie dishes? They were the perfect size to enjoy this Homemade Chicken Pot Pie as an individual serving. However, using a more traditional pie plate (9″), or even a cast iron pan will also work. Honestly, I love having my own little pie to enjoy!

TIPS ON MAKING THE BEST BROCCOLI CHICKEN POT PIE

Here are a few tips to make this recipe for my Broccoli Chicken Pot Pie come out quick, easy and delicious for you:

  • cut broccoli into tiny pieces
  • use rotisserie chicken
  • use pre-made pie crust from Wick’s Pies
  • let the flavors develop in the pot for at least 10 minutes prior to adding the heavy whipping cream
  • melt the cheese slowly
  • taste for salt along the cooking process
  • if at any point, the mixture is too thick, add a touch more stock or whipping cream

FAQ – POT PIE

Can homemade pot pies be frozen?

Absolutely! Allow the saucy filling to cool down. Form the pie crust on the bottom of the pie dish (I would use aluminum pie pans for freezing). Fill. Add the top layer of crust. Pinch the edges to seal. Cover tightly with foil and plastic wrap. Place in freezer bags. Freeze up to three months.

Remove from the freezer about 20 minutes prior to baking. Bake at 350 for about 15 minutes. Increase the heat to 425° and bake for another 30 minutes.

How do I know the pot pie has baked long enough?

When the filling is bubbling from the center, this is a pretty good indicator that the Pot Pie is done. Keep in mind, the filling is already fully-cooked.

If you choose not to have a pie crust base, bake time will decrease to about 20 minutes.

If the pot pie is browning too much around the edges, use a pie shield or gently place tin foil over the edges.

WHAT TO SERVE WITH CREAMY CHICKEN BROCCOLI PIE

Pot Pies are a hearty dish, full of protein and vegetables. Serve alone as a main dish, or pair with:

  • side salad
  • mashed potatoes (if potatoes are not part of the filling)
  • roasted vegetables
  • apple sauce or baked apples
Print
clock clock iconcutlery cutlery iconflag flag iconfolder folder iconinstagram instagram iconpinterest pinterest iconfacebook facebook iconprint print iconsquares squares iconheart heart iconheart solid heart solid icon
a creamy chicken broccoli pie baked and opened with a gold spoon to show the filling sitting on a piece of crumbled parchment paper

Creamy Chicken Broccoli Pie


5 Stars 4 Stars 3 Stars 2 Stars 1 Star

No reviews

Description

It’s Fall, and I could not be more excited! So, when I was approached to enter a blogger recipe challenge for Wick’s Pies, I knew I was going to recreate my homemade Chicken and Broccoli Pot Pie recipe using Wick’s Pies’ 9″ Dough Circles! 

Chicken Pot Pie is classic comfort food that is a perfect cold weather meal. If you have yet to try a homemade savory pie, you really need to add to your list. Be sure to check out the video tutorial in the recipe. You will be amazed just how easy it is transform a traditional recipe into one with more of a modern twist!


Ingredients

Scale
  •  1 1/2 cups shredded chicken
  • 4 9″ pie crust rounds from Wick’s Pies
  • 2 tablespoons olive oil
  • 1 tablespoon butter
  • 1 shallot, diced
  • 1 medium potato, tiny dice
  • 1 teaspoon kosher salt, more for taste
  • 1 teaspoon black pepper
  • 1 teaspoon garlic powder
  • 1 teaspoon paprika
  • 1 celery stalk, cut into large pieces (or small dice if you are not removing)
  • 1 cup broccoli, cut into tiny pieces
  • 2 tablespoons flour
  • 2 1/2 cups chicken stock, plus
  • 2 tablespoons cream of chicken soup (optional)
  • 2 bay leaves
  • 1/2 cup heavy whipping cream
  • 1/3 cup Gruyère cheese, shredded
  • 1 egg, beaten
  • fresh parsley, for garnish (optional)

Instructions

  • Heat oven to 375°.
  • Remove the Wick’s Pies crust from the freezer and thaw on a flat surface as you prepare the filling.
  • Heat oil and butter in a pot or deep pan.
  • Add the broccoli, shallots, potatoes and celery.
  • Season with salt, pepper, garlic powder and paprika.
  • Soften the vegetables for about five minutes on medium heat. Do NOT brown the shallots.
  • Sprinkle the vegetables with the flour.
  • Cook for a minute or two to cook off the raw flour taste.
  • Add the chicken stock. 
  • Turn up the heat to almost a boil.
  • Scrape up the bits from the bottom.
  • Add in the bay leaves.
  • Reduce heat and simmer for ten minutes. (If the mixture seems too thick, add a touch more stock).
  • While the sauce is simmering, lightly flour a flat surface.
  • Lay on one of the pie crust rounds.
  • Flatten just a little with rolling pin. (see video)
  • Place pie dish in the center. Pull the crust up the height of the dish for measure and cut out the circle of dough.
  • Lightly butter the pie dish.
  • Form the dough into the dish. Do the same with the second one. 
  • Measure the width for the top crust (be sure to account for the filling) and cut two circles from the remaining two crusts.
  • Remove the bay leaves and celery stalk. Add in the cream of chicken soup if desired.
  • Pour the heavy whipping cream into the simmered sauce. Heat through. 
  • Slowly incorporate the cheese. 
  • Add in the diced chicken. 
  • Taste for salt.  
  • Ladle in the broccoli chicken mixture into the pie dishes. I like to pile mine high!
  • Brush the edges with egg wash.
  • Lay down the top crust on each.
  • Pinch the edges all around to seal.
  • Brush the entire surface with egg wash.
  • Cut a slit in the top crust for venting.
  • Bake for 30 to 35 minutes, or until the pie crust is golden brown.
  • Garnish with fresh chopped parsley.
  • ENJOY!

Notes

SEE POST FOR NOTES AND TIPS!

  • Prep Time: 10 minutes
  • Cook Time: 50
  • Category: Dinner
  • Method: Moderate
  • Cuisine: American

Nutrition

  • Serving Size: 1 pie

GET TO KNOW ME!

a photo of me leaning against a brick wall with my logo, "Charlotte Fashion Plate" to the left of me

I am more than just recipes. I love fashion and style too! Most importantly, I love my Family (my Hubby and my Fur Babies). My Husband (aka my “Kitchen Bitch”) means the world to me. He’s pretty damn cool too. Not only is he one of the nicest guys you will ever meet, he also has had a lengthy career in professional hockey. Not only winning two Stanley Cups with the Pittsburgh Penguins in the early ’90’s, but most recently winning the Calder Cup with the Charlotte Checkers, amongst many other accolades. If you live in Charlotte and play hockey, or have a family member who plays, be sure to contact him!

Our life has changed dramatically in the past few years with the passing of our two goldendoodles, Vegas and Viva. We were lucky enough to have Vegas for five years (totally wish it was longer). Most recently, losing our Viva to a brain tumor in July of 2020. We welcomed our mini goldendoodle 7, almost seven years ago. We just added the amazing Hazel! Of course, I am always posting tons and tons of photos! Be sure to check out my recipe for Pet Bone Broth! This broth is super rich in nutrients and will provide your pet with a multitude of health benefits!

Let’s Get Social!

Be sure to follow me on social media! I’m always talking food, fashion, and family! I also love sharing some of my favorite Amazon Finds too. Click here to check out my Amazon page! FacebookInstagramTikTokTwitter and Pinterest! THANK YOU!

Paneer Cauliflower Rice Arancini

a white platter with three paneer cauliflower rice arancini sitting on top with marinara sauce and garnished with fresh basil with a package of Gobi paneer in the background

Paneer Cauliflower Rice Arancini is my appetizer submission for Karoun Dairies’ Blogger Recipe Challange and it is FABULOUS! Honestly, I am amazed how much this vegetarian version of Cauliflower Rice Arancini tastes so much like the traditional Italian appetizer.

Cauliflower rice is mixed with a blend of ingredients not only to bind, but to also add so much flavor. Gopi Paneer, although not much of a melting cheese, became super smooth and creamy, and complimented these rice balls so perfectly.

a white platter with three paneer cauliflower rice arancini sitting on top with marinara sauce and garnished with fresh basil with a package of Gobi paneer in the background

KAROUN DAIRIES GOPI PANEER

In keeping with a “traditional, healthy Mediterranean diet, one that is rich in nutritious cheeses and yogurts,” Karoun Dairies’ food products are only made using “fresh, growth hormone-free, real California milk.”

For a list of Karoun’s product offerings, click here. To find these amazing products locally, click here!

Be sure to follow Karoun Dairies on FacebookInstagram and Twitter!

Me holding a block of Karoun Dairies Gobi Paneer

WHAT IS PANEER CHEESE?

Paneer (ponir), also known as Indian cottage cheese is a fresh cheese (as opposed to aged) that is made by curdling milk with some type of vegetable-based acid. Lemon juice is commonly used.

Paneer is a non-melting cheese, but becomes soft when heated. So, even though you won’t get a big cheese pull opening into one of these rice balls, you will love the creamy texture from the Gopi Paneer.

a white platter with three paneer cauliflower rice arancini sitting on top with marinara sauce and garnished with fresh basil with a package of Gobi paneer in the background

WHAT ARE ARANCINI?

Arancini di riso are a staple in Sicilian cuisine. Rice balls are stuffed, coated and deep fried. Traditionally, arancini are stuffed with meat sauce, mozzarella cheese and oftentimes, peas.

In keeping with a bit of Italian tradition, marinara sauce was used in this recipe for Paneer Cauliflower Rice Arancini, as a binder. Paneer cheese is often used as a substitute for meat. So, it was only fitting that I keep this recipe vegetarian-friendly and replace the meat with this versatile, firm cheese.

Gopi Paneer is a perfect meat substitute for curry and vegetable dishes.

WHAT IS CAULIFLOWER RICE

Cauliflower rice is cauliflower that has been processed to mimic the texture of rice. It is a healthier, and keto-friendly option. For ease, I recommend using packaged or frozen.

TIPS ON MAKING PANEER CAULIFLOWER RICE ARANCINI

Risotto (usually day old) is typically used to make arancini. Arborio rice, the rice used to make risotto, is quite starchy and will easily mold around the cheese.

However, cauliflower rice contains very little starch. So, in order to mold around the paneer, cauliflower rice will need the help of binding agents to form balls.

Here are a few tips to ensure these Paneer Stuffed Rice Balls hold together:

  • drain excess water from the cauliflower once heated (according to package directions)
  • add in the Parmesan cheese while the rice is still warm
  • slowly incorporate the flour (you can always add, but you can’t take away)
  • if the rice is still not binding, add a touch more flour
  • completely wrap the cauliflower rice around the piece of paneer
  • allow to set up in the fridge after you have molded each cauliflower rice ball
  • oil should not be too hot
  • hands off the arancini balls as they are frying until ready to flip, or turn

How to cook paneer cauliflower rice arancini

Traditional arancini are prepared in a deep fryer. However, this recipe will also work in an air fryer, or traditional oven. Air fryer arancini should take about 10 minutes at 400°. Be sure to spray the tops with a bit of cooking spray.

HOW TO SERVE PANEER STUFFED ARANCINI

Pair this Paneer Cauliflower Arancini appetizer with a great dipping sauce:

  • marinara
  • tzatziki
  • labne sauce
  • aioli
  • hummus
  • tahini

If serving as a main dish, these Paneer Stuffed Rice Balls would go well with:

  • salad
  • pita
  • sautéd spinach
  • roasted vegetables
  • grilled vegetables

GLUTEN-FREE PANEER CAULIFLOWER RICE ARANCINI

To make these cauliflower rice balls gluten-free, replace the all-purpose flour and breadcrumbs with gluten-free alternatives.

HOW TO STORE LEFTOVER CAULIFLOWER ARANCINI

In the fridge, arancini will last up to four days, if stored properly. Yes, you can freeze these Paneer Cauliflower Rice Arancini. Flash freeze after each rice ball has cooled completely. It’s best to fry prior to freezing.

To reheat, place back in the deep fryer, or bake in the oven.

Print
clock clock iconcutlery cutlery iconflag flag iconfolder folder iconinstagram instagram iconpinterest pinterest iconfacebook facebook iconprint print iconsquares squares iconheart heart iconheart solid heart solid icon
a white platter with three paneer cauliflower rice arancini sitting on top with marinara sauce and garnished with fresh basil with a package of Gobi paneer in the background

Paneer Cauliflower Rice Arancini


5 Stars 4 Stars 3 Stars 2 Stars 1 Star

No reviews

Description

Paneer Cauliflower Rice Arancini is my appetizer submission for Karoun Dairies’ Blogger Recipe Challange and it is FABULOUS! Honestly, I was amazed how much this vegetarian version of Cauliflower Rice Arancini tasted so much like the traditional Italian appetizer.

Cauliflower rice is mixed with a blend of ingredients not only to bind, but to also add so much flavor. Gobi Paneer, although not much of a melting cheese, became super smooth and creamy, and complimented these rice balls so perfectly.


Ingredients

Scale
  • 16 ounces cauliflower rice, warm
  • 3 to 4 ounces Gopi Paneer
  • 2 tablespoons marinara
  • 1/2 cup Parmesan cheese, plus more for garnish
  • 1/2 teaspoon black pepper
  • 1 teaspoon garlic powder
  • 1 teaspoon flour, plus
  • 1/2 cup seasoned bread crumbs
  • 1/2 cup panko
  • 2 tablespoons Parmesan cheese
  • 2 eggs
  • 1 tablespoon milk or cream
  • 1/2 teaspoon salt
  • 1/2 teaspoon black pepper
  • oil for frying
  • 1 tablespoon fresh basil, for garnish
  • marinara for serving

Instructions

  1. Cook the cauliflower rice according to package directions.
  2. Drain any excess liquid and place into a bowl.
  3. Add the Parmesan cheese, two tablespoons of marinara, black pepper, and garlic powder.
  4. Mix. Check consistency.
  5. Add the flour. If the rice forms a ball, not need to add more flour. If not, add flour until the rice binds.
  6. Place two spoonfuls of the cauliflower rice mixture into the palm of your hand.
  7. Place a small chunk of Gopi Paneer in the center.
  8. Wrap the rice around the cheese to form a ball. Finish with the remaining rice mixture.
  9. Place on platter and into fridge for at least 10 minutes to set.
  10. Heat enough oil in a pan for a medium fry. Oil should not be too hot!
  11. Mix the both bread crumbs and the Parmesan cheese in a separate bowl.
  12. In another bowl, whisk together the eggs, cream, salt and pepper.
  13. Dredge each rice ball into the egg. Fully coat in the bread crumb mixture.
  14. Fry until golden brown. 
  15. Salt immediately.
  16. To serve, add a spoonful of marinara onto a plate. Place a rice ball.
  17. Garnish with fresh basil and freshly grated Parmesan cheese.
  18. ENJOY!

Notes

SEE POST FOR NOTES AND TIPS!

  • Prep Time: 20 minutes
  • Cook Time: 8 minutes
  • Category: Appetizer
  • Method: Moderate
  • Cuisine: Vegetarian

Nutrition

  • Serving Size: 1 serving

GET TO KNOW ME!

a photo of me leaning against a brick wall with my logo, "Charlotte Fashion Plate" to the left of me

I am more than just recipes. I love fashion and style too! Most importantly, I love my Family (my Hubby and my Fur Babies). My Husband (aka my “Kitchen Bitch”) means the world to me. He’s pretty damn cool too. Not only is he one of the nicest guys you will ever meet, he also has had a lengthy career in professional hockey. Not only winning two Stanley Cups with the Pittsburgh Penguins in the early ’90’s, but most recently winning the Calder Cup with the Charlotte Checkers, amongst many other accolades. If you live in Charlotte and play hockey, or have a family member who plays, be sure to contact him!

Our life has changed dramatically in the past few years with the passing of our two goldendoodles, Vegas and Viva. We were lucky enough to have Vegas for five years (totally wish it was longer). Most recently, losing our Viva to a brain tumor in July of 2020. We welcomed our mini goldendoodle 7, almost seven years ago. We just added the amazing Hazel! Of course, I am always posting tons and tons of photos! Be sure to check out my recipe for Pet Bone Broth! This broth is super rich in nutrients and will provide your pet with a multitude of health benefits!

Let’s Get Social

Be sure to follow me on social media! I’m always talking food, fashion, and family! I also love sharing some of my favorite Amazon Finds too. Click here to check out my Amazon page! FacebookInstagramTikTokTwitter and Pinterest! THANK YOU!

Homemade Creamy Mushroom Soup

A small white bowl filled with Homemade Creamy Mushroom Soup garnished with olive oil, fresh thyme, black pepper and crispy mushrooms.

Homemade Creamy Mushroom Soup is a rich, velvety soup made from fresh, wholesome ingredients. It is known for its comforting, earthy flavor profile. This mushroom soup’s simplicity in preparation is a testament to its versatility. It’s a perfect starter for a dinner party, or as a quick and easy weeknight meal. Say goodbye to store-bought soups filled with preservatives and additives, and embrace a homemade, healthier alternative.

A small white bowl filled with Homemade Creamy Mushroom Soup garnished with olive oil, fresh thyme, black pepper and crispy mushrooms.

BEST MUSHROOMS FOR SOUP

Food markets currently offer a wide variety of mushrooms. So, how do you know what type of mushrooms are best for Creamy Mushroom Soup?

  • BUTTON MUSHROOMS are great as far as texture, but may not have as much flavor as other varieties of mushrooms.
  • CREMINI OR BABY BELLA MUSHROOMS are brown in color and due to their age, have more flavor than button mushrooms. Cremini mushrooms are always a great substitute for button mushrooms, and vice-versa.
  • SHIITAKE AND OYSTER MUSHROOMS can also be used for this hearty, Creamy Mushroom Soup. However, the chewiness of these mushroom varieties will alter the texture of the soup.

How to clean mushrooms:

  1. Inspect the Mushrooms: Examine each mushroom individually. Look for any visible dirt, blemishes, or dark spots. If you find damaged areas, cut them off with a knife.
  2. Avoid Soaking: Mushrooms are porous and can absorb water, which affects the texture and flavor. Avoid soaking them in water.
  3. Use a Brush: Instead of rinsing, use a mushroom brush to gently sweep away dirt and debris.
  4. Damp Cloth Method: If the mushrooms are not heavily soiled, you can use a damp paper towel or a clean kitchen towel to gently wipe the mushrooms, removing any dirt.
  5. Trim Stems (Optional): If the stems are tough or dirty, you can trim them slightly.
  6. Dry Thoroughly: After cleaning, place the mushrooms on a clean, dry towel to air dry for a few minutes. Pat them gently with a paper towel to remove excess moisture.
  7. Use Immediately: Once cleaned and dried, the mushrooms are ready to use in your favorite recipes. If you don’t plan to use them immediately, store them in a paper bag in the refrigerator. Avoid storing them in airtight containers as it can promote moisture and lead to spoilage.

HOW TO MAKE CREAMY MUSHROOM SOUP

  • Clean the mushrooms and slice.
  • Sauté the minced celery and shallots in the butter in a soup pot.
  • Add the mushrooms and fresh thyme. Season with salt and pepper. Allow to sweat down for about 15 minutes.
  • Dust with the flour. Cook off the raw flour taste for a few minutes.
  • Pour in the chicken stock. Simmer for 10-15 minutes.
  • Incorporate the heavy whipping cream and fresh chopped parsley. Simmer for another 5 minutes.
  • Crisp the reserved sliced mushrooms in a non-stick pan (optional).
  • Serve hot garnished with fresh thyme and a drizzle of olive oil.

TIPS FOR MAKING THE BEST HOMEMADE CREAMY MUSHROOM SOUP

As mentioned above, this delicious Mushroom Soup recipe is super quick and easy-to-prepare. The finished consistency would remind you of a Mushroom Chowder or Mushroom Bisque. Here are few tips to ensure this Cream of Mushroom Soup comes out perfectly, every single time:

  • To save time, purchase pre-sliced mushrooms
  • If you have time, slice on your own (be consistent with knife cuts)
  • Clean the mushrooms thoroughly
  • Allow the mushrooms to sweat down to at least half their size prior to dusting with flour
  • White or yellow onions can be substituted for shallots
  • Substitute the chicken stock with vegetable stock to create a vegetarian mushroom soup
  • Alternatively, use beef stock instead of chicken stock for a heartier soup
  • Once the stock has been incorporated, simmer until the soup has thickened
  • Half-and-half, coconut milk, sour cream, soy milk or a non-dairy heavy cream are great substitutes for heavy whipping cream (substitutes may alter the thickness of the soup)
  • Fresh thyme is best, but dried thyme can be used instead
  • For a creamier soup, blend prior to serving
  • Taste for salt throughout the cooking process
  • Optionally, garnish with a nice finishing oil and fresh chopped parsley

WHAT TO SERVE WITH CREAMY MUSHROOM SOUP

Creamy Mushroom Soup can be enjoyed as a meal, starter, or as a side dish. Here are some great ways to serve up this delicious and hearty soup:

  • with a sandwich
  • enjoyed with crusty bread
  • serve garnished with croutons (see below how I made my cheesy puff pastry croutons)
  • pair with a side salad or roasted vegetables
  • enjoy a cup as a start to a meal
  • pour inside a crispy puff pastry shell

How to make my cheesy puff pastry croutons

Grab a sheet of puff pastry. Cover half with shredded Gruyère cheese. Fold over. Press to seal the edges. Cut the pastry into small squares (the size of a crouton). Place on a parchment lined baking sheet. Brush the squares with an egg wash. Bake at 400° for about 15 minutes.

How to make a crispy puff pastry topping for Creamy Mushroom Soup!

Creating this crispy puff pastry topping looks difficult, but it’s really easy. Leave the mushroom soup as is, or pulse the soup with an immersion blender. (NOTE: Nutrition info does not include the puff pastry topping!)

Here’s what to do next:

  • Heat oven to 425°
  • Use only oven-safe soup bowls
  • Grab a sheet of cold puff pastry and turn out on a lightly dusted, flat surface
  • Turn the bowl upside down onto the dough
  • Using a knife, cut the dough about 3″ all around the bowl
  • Fill the soup bowls and place on a parchment lined baking pan
  • Brush the top of the puff pastry with an egg wash
  • Place dough (egg wash side up) on top of the bowl…do NOT allow the dough to touch the surface of the mushroom soup
  • Fold the dough around the edges of the bowl
  • Bake for 15 minutes, or until golden brown
creamy mushroom soup in a white bowl baked with a puff pastry topping

STORING LEFTOVER CREAMY MUSHROOM SOUP

As for storing this heavenly mushroom soup, simply transfer any leftovers into an airtight container and refrigerate for up to 3 days. Alternatively, freeze it in individual portions for a quick, reheatable meal.

To reheat, gently warm the soup on the stovetop over low heat, stirring occasionally to maintain its creamy consistency. A dollop of sour cream or a sprinkle of grated Parmesan cheese can revive its flavors, making it taste just as good as the day you made it.

MORE MUSHROOM RECIPE TO LOVE

Looking for more mushroom recipes? Check these out:

Print
clock clock iconcutlery cutlery iconflag flag iconfolder folder iconinstagram instagram iconpinterest pinterest iconfacebook facebook iconprint print iconsquares squares iconheart heart iconheart solid heart solid icon
A small white bowl filled with Homemade Creamy Mushroom Soup garnished with olive oil, fresh thyme, black pepper and crispy mushrooms.

Homemade Creamy Mushroom Soup


5 Stars 4 Stars 3 Stars 2 Stars 1 Star

No reviews

Description

Homemade Creamy Mushroom Soup is a rich, velvety soup made from fresh, wholesome ingredients. It is known for its comforting, earthy flavor profile. This mushroom soup’s simplicity in preparation is a testament to its versatility. It’s a perfect starter for a dinner party, or as a quick and easy weeknight meal.


Ingredients

Scale
  • 1 1/2 to 2 pounds baby bella (cremini) mushrooms, sliced (reserve about 1/2 cup)
  • 6 tablespoons butter
  • 1 shallot, minced
  • 1 stalk celery minced
  • 1 teaspoon kosher salt
  • 1 teaspoon black pepper
  • 1 tablespoon fresh thyme leaves, plus more for garnish
  • 6 tablespoons flour
  • 4 cups chicken stock
  • 1 cup heavy whipping cream
  • 2 tablespoons fresh parsley, chopped
  • 1 tablespoon olive oil
  • 1 teaspoon finishing oil, for garnish (optional)

Instructions

  1. Clean mushrooms and slice. Be sure to reserve about 1/2 cup to crisp up and use as a garnish.
  2. Melt the butter in a soup pot with the minced shallots and celery.
  3. Allow the vegetables to soften for a few minutes.
  4. Add the sliced mushrooms.
  5. Season with kosher salt, black pepper and fresh thyme.
  6. Allow the mushrooms to cook down for about 10 to 15 minutes.
  7. Dust the mushrooms with flour. Stir.
  8. Allow the raw flour taste to cook off for about two minutes.
  9. Pour in the stock. Scrape up the bits from the bottom.
  10. Simmer on medium-low for another 15 minutes.
  11. Incorporate the heavy whipping cream. 
  12. Simmer another 5 minutes. 
  13. Taste for salt.
  14. As the soup is in its final simmer, crisp up the reserved mushrooms in a pan with the oil. 
  15. Stir in the fresh chopped parsley.
  16. Pour into individual cups or bowls. 
  17. Garnish with fresh thyme, fresh parsley, drizzle of finishing oil, a few crispy mushrooms and croutons (optional).
  18. ENJOY!

Notes

  • To save time, purchase pre-sliced mushrooms.
  • Button mushrooms are a great alternative to cremini mushrooms.
  • If slicing, be consistent with knife cuts.
  • White or yellow onions can be used instead of shallots.
  • Use vegetable stock and a non-dairy heavy cream to make this a Vegan Mushroom Soup.
  • Half and half, coconut milk, sour cream and or soy milk can be used instead of heavy whipping cream.
  • Blend prior to serving for a creamier mushroom soup.
  • Taste for salt throughout the cooking process.
  • See post for additional notes/tips.
  • Leftovers can be stored in the fridge for up to 3 days, or frozen for up to 3 months.
  • Reheat gently on the stove.
  • Prep Time: 5 minutes
  • Cook Time: 35 minutes
  • Category: Soup, Bisque
  • Method: Easy
  • Cuisine: American

Nutrition

  • Serving Size: 1 serving

GET TO KNOW ME!

A photo of me in a black floral dress cooking at the stovetop at Williams-Sonoma

WELCOME! My name is Melissa Latin aka. Charlotte Fashion Plate. Happy to meet you! I am more than just recipes. I love fashion and style too! Most importantly, I love my Family (my Hubby and my Fur Babies). My Husband (aka my “Kitchen Bitch”) means the world to me. He’s pretty damn cool too. Not only is he one of the nicest guys you will ever meet, he also has had a lengthy career in professional hockey. Not only winning two Stanley Cups with the Pittsburgh Penguins in the early ’90’s, but most recently winning the Calder Cup with the Charlotte Checkers, amongst many other accolades. If you live in Charlotte and play hockey, or have a family member who plays, be sure to contact him!

Our life has changed dramatically in the past few years with the passing of our two goldendoodles, Vegas and Viva. We were lucky enough to have Vegas for five years (totally wish it was longer). Most recently, losing our Viva to a brain tumor in July of 2020. We welcomed our mini goldendoodle 7, almost seven years ago. We just added the amazing Hazel! Of course, I am always posting tons and tons of photos! Be sure to check out my recipe for Pet Bone Broth! This broth is super rich in nutrients and will provide your pet with a multitude of health benefits!

Let’s Get Social!

Be sure to follow me on social media! I’m always talking food, fashion, and family! I also love sharing some of my favorite Amazon Finds too. Click here to check out my Amazon page! FacebookInstagramTikTokTwitter and Pinterest! THANK YOU!