Olive Oil Potato Salad

Olive Oil Potato Salad in a glass bowl.

Whether you’re planning a summer barbecue, a picnic in the park, or a relaxed dinner at home, this Olive Oil Potato Salad is an ideal choice. Its mayo-free goodness, vibrant flavors, and adaptability to different serving temperatures make it a standout dish for the season. As the salad sits, the flavors meld together, resulting in a harmonious combination of textures and tastes. Unlike traditional Potato Salads that are typically chilled, this recipe is best enjoyed warm or at room temperature.

Olive Oil Potato Salad in a glass bowl.

WHY POTATO WITHOUT MAYO?

When it comes to potato salads, the traditional creamy dressing often relies heavily on mayonnaise. While mayo certainly has its place, this Olive Oil Potato Salad takes a different approach, offering a lighter and healthier alternative. By substituting mayo with extra-virgin olive oil, the saturated fat content is reduced, without compromising flavor.

This easy Potato Salad recipe is a must-try for salad enthusiasts and potato lovers alike.

A summertime staple is excellent for potlucks, picnics, or outdoor gatherings, as it can be prepared in advance and maintains its deliciousness throughout the event. The absence of mayo also ensures food safety, allowing guests to indulge without worry.

WHAT MAKES THIS POTATO SALAD A PERFECT SUMMER SIDE DISH?

  • Mayo-Free Delight: Say goodbye to heavy, mayo-laden potato salads. This recipe focuses on the natural flavors of the ingredients, allowing the potatoes and seasonings to shine.
  • Light and Fresh: With a lighter dressing, this Olive Oil Potato Salad won’t weigh you down on hot summer days. It’s a refreshing and satisfying option that still delivers on taste.
  • Versatile Serving Options: This salad can be enjoyed warm, or at room temperature, making it a versatile option for outdoor gatherings or potlucks.
  • Potluck Winner: Since this Potato Salad doesn’t contain mayo, there’s no need to worry about it sitting out during a summer party. It remains delicious and safe to serve throughout the event.
  • Pairing Perfection: The flavors in this potato salad complement a wide range of summer dishes, including grilled meats, fresh seafood, and vibrant vegetable platters.

INGREDIENTS FOR OLIVE OIL POTATO SALAD

  • Potatoes: Yukon gold or red potatoes work best in this salad recipe. Use peeled or unpeeled potatoes, cut into cubes.
  • Olive oil: Choose a good-quality olive oil as this is the main condiment.
  • Seasonings and Spices: Although this Potato Salad is simply seasoned with paprika, salt and pepper, feel free to add your own blend of spices.
  • Onions: Minced white onion can be substituted for red onion.
  • Herbs: Add dill or your favorite herbs.

For a refreshing twist, add a squeeze of lemon!

HOW TO SERVE OLIVE OIL POTATO SALAD

The Olive Oil Potato Salad is incredibly versatile and pairs well with a variety of main dishes. Consider serving it alongside:

  • grilled meats, such as chicken, steak, or seafood
  • vegetarian options like grilled vegetables or a medley of roasted seasonal produce
  • a larger spread, accompanied by crusty bread or a selection of artisanal cheeses.
A cooked filet mignon and olive oil potato salad sitting on a white, oblong plate with a caprese stack salad in the background

STORAGE AND LEFTOVERS

Proper storage is key to maintaining the freshness and quality of your Olive Oil Potato Salad. To ensure its deliciousness even after preparation, follow these simple guidelines:

  1. Refrigeration: If you have leftovers or plan to make the salad in advance, store it in an airtight container and place it in the refrigerator. The chilled environment helps preserve the flavors and keeps the ingredients fresh. Make sure the salad is properly cooled before refrigeration to avoid any condensation that can affect the texture.
  2. Consume within a Few Days: While the Olive Oil Potato Salad can be refrigerated, it’s best to consume it within two to three days for optimal taste and texture. As time passes, the potatoes may start to lose their firmness, and the flavors might diminish.
  3. Stir Before Serving: Before serving the refrigerated salad, allow to come to room temperature. Give it a gentle stir to redistribute the dressing and ensure all the flavors are well combined.
  4. Adjust Seasonings, if Needed: If you find that the flavors have mellowed or need a little extra kick after refrigeration, feel free to adjust the seasonings accordingly. Add a pinch of salt, a squeeze of lemon juice, or a sprinkle of fresh herbs to revitalize the taste and elevate the salad.
  5. Avoid Freezing: Due to the nature of potatoes, freezing the Olive Oil Potato Salad is not recommended. Potatoes have a high water content, and freezing can cause them to become mushy.
Print
clock clock iconcutlery cutlery iconflag flag iconfolder folder iconinstagram instagram iconpinterest pinterest iconfacebook facebook iconprint print iconsquares squares iconheart heart iconheart solid heart solid icon
Olive Oil Potato Salad in a glass bowl.

Olive Oil Potato Salad


5 Stars 4 Stars 3 Stars 2 Stars 1 Star

No reviews

Description

Whether you’re planning a summer barbecue, a picnic in the park, or a relaxed dinner at home, this Olive Oil Potato Salad is an ideal choice. Its mayo-free goodness, vibrant flavors, and adaptability to different serving temperatures make it a standout dish for the season. As the salad sits, the flavors meld together, resulting in a harmonious combination of textures and tastes. Unlike traditional Potato Salads that are typically chilled, this recipe is best enjoyed warm or at room temperature.


Ingredients

Scale
  • 5 medium-sized Yukon gold potatoes, peeled and cubed
  • 1 1/2 teaspoons salt, divided
  • 1/2 to 3/4 cup olive oil
  • 1/4 red onion, minced
  • 2 teaspoons paprika
  • 1 teaspoon black pepper
  • 2 tablespoons fresh parsley, chopped

Instructions

  1. Peel and cube the potatoes into bite-sized pieces.
  2. Soft boil with one teaspoon of salt until fork tender.
  3. While the potatoes are cooking, combine the 1/2 cup of olive oil with the remaining ingredients in a large bowl. Mix well.
  4. Drain the potatoes.
  5. Add them to the bowl and gently fold them in, covering with the olive oil mixture.
  6. Add the remaining olive oil, as needed.
  7. Taste for salt.
  8. Serve and ENJOY!

Notes

  • be consistent with the potato cuts
  • don’t forget to add salt to the water for boiling
  • boil the potatoes until just fork tender (not too soft)
  • gently fold the potatoes into the olive oil mixture
  • taste for salt before serving
  • can be served warm, or room temperature
  • store leftovers in the fridge and allow to come back to room temperature prior to serving
  • see post for additional notes, substitutions and tips!
  • Prep Time: 10 minutes
  • Cook Time: 15 minutes
  • Category: Side dish
  • Method: Easy
  • Cuisine: American

Nutrition

  • Serving Size: 2/3 cup

GET TO KNOW ME!

A photo of me in a black floral dress cooking at the stovetop at Williams-Sonoma

I am more than just recipes. I love fashion and style too! Most importantly, I love my Family (my Hubby and my Fur Babies). My Husband (aka my “Kitchen Bitch”) means the world to me. He’s pretty damn cool too. Not only is he one of the nicest guys you will ever meet, he also has had a lengthy career in professional hockey. Not only winning two Stanley Cups with the Pittsburgh Penguins in the early ’90’s, but most recently winning the Calder Cup with the Charlotte Checkers, amongst many other accolades. If you live in Charlotte and play hockey, or have a family member who plays, be sure to contact him!

Our life has changed dramatically in the past few years with the passing of our two goldendoodles, Vegas and Viva. We were lucky enough to have Vegas for five years (totally wish it was longer). Most recently, losing our Viva to a brain tumor in July of 2020. We welcomed our mini goldendoodle 7, almost seven years ago. We just added the amazing Hazel! Of course, I am always posting tons and tons of photos! Be sure to check out my recipe for Pet Bone Broth! This broth is super rich in nutrients and will provide your pet with a multitude of health benefits!

Let’s Get Social!

Be sure to follow me on social media! I’m always talking food, fashion, and family! I also love sharing some of my favorite Amazon Finds too. Click here to check out my Amazon page! FacebookInstagramTikTokTwitter and Pinterest! THANK YOU!
Easy Roasted Potato Salad

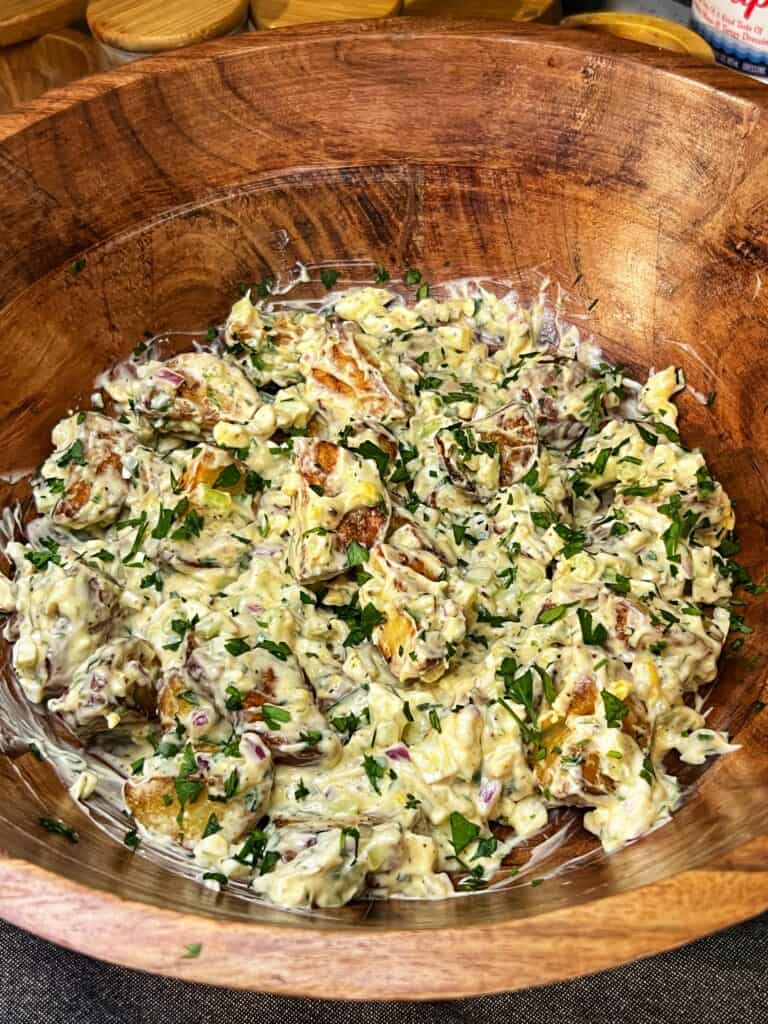
A wooden bowl filled with Easy Roasted Potato Salad

Roasting potatoes for a potato salad is a simple and delicious way to elevate this classic dish. By bringing out the natural sweetness of the potatoes and adding extra flavor and texture, roasting can take a potato salad to a whole new level. This dish is both versatile and delicious, making it the perfect accompaniment to any meal. Whether you’re serving it alongside a hearty grilled steak or a light summer salad, this Easy Roasted Potato Salad is sure to impress your guests.

A wooden bowl filled with Easy Roasted Potato Salad

ADVANTAGES OF ROASTING POTATOES FOR POTATO SALAD

Roasting potatoes brings out their natural sweetness and gives them a crispy exterior. This adds texture and depth to the dish, making it more interesting and flavorful. When roasting potatoes for a potato salad, it’s important to evenly coat them in oil and seasoning. This will help them roast evenly and develop a nice crispy exterior.

Other advantages include:

  • roasting potatoes for a potato salad allows you to use different types of potatoes
  • allows you to experiment with different flavors and seasonings (add garlic and/or herbs while roasting)
  • you can use a wider variety of dressings (a classic vinaigrette or pesto dressing would work beautifully)
  • makes for a great presentation

INGREDIENTS FOR EASY ROASTED POTATO SALAD

The ingredients for this Easy Roasted Potato Salad is very similar to my Classic Potato Salad, with just a few exceptions:

Potatoes – Skin-on, baby red potatoes can be substituted with Yukon gold, or even sweet potatoes.

Spice Blend – Use mine, or roast the potatoes with your favorite spices. Add a few cloves of garlic for another level of flavor.

Dressing – The classic mayo-based dressing can be replaced with a vinaigrette, for a lighter version.

Vegetables – In addition to the celery and red onion, add some of your favorite vegetables (eg. carrots, dill pickles, relish).

Hardboiled Eggs – Eggs are typically a part of a Classic Potato Salad, but feel free to leave out.

Herbs – In addition to the fresh parsley, add dill or other herbs.

TIP: A cast iron pan is perfect for roasting potatoes. Use it, if you have one!

INSTRUCTIONS

  1. Preheat your oven to 400°F.
  2. In a large bowl, toss your baby red potatoes with olive oil, salt, pepper, paprika, garlic powder and onion powder. Arrange them on an oil coated cast iron pan or baking sheet lined with parchment paper, making sure they are not too crowded.
  3. Roast the potatoes for about 25-30 minutes, or until they are golden brown and crispy.
  4. As the potatoes are roasting, prepare the hardboiled eggs.
  5. In a large salad bowl, mix together the Miracle Whip (mayo), sour cream, Dijon, black pepper, minced celery, minced red onion and chopped fresh parsley.
  6. Chop the hardboiled eggs and fold them into the dressing.
  7. Once the potatoes are done, remove them from the oven and let them cool for a few minutes. Then, transfer them to the bowl.
  8. Gently coat the roasted potatoes with the dressing.
  9. Taste for salt.
  10. Garnish with fresh chopped parsley.
  11. Serve this Easy Roasted Potato Salad warm or chilled, and ENJOY!

HOW TO SERVE AND STORE POTATO SALAD

One of the best things about this Easy Roasted Potato Salad is that it can be served warm, or cold. If you’re serving it warm, be sure to let the potatoes cool for a few minutes before adding the dressing. This will prevent the dressing from becoming too warm and running off the potatoes.

If you’re serving it cold, refrigerate the potato salad for a few hours before serving to allow the flavors to meld together.

Roasted Potato Salad is a versatile dish that can be served in many different ways. Here are some ideas for how to serve this potato dish:

  • on it’s own as a vegetarian meal
  • alongside grilled meats (steak, chicken, fish, pork)
  • on a salad
  • in a wrap
  • as a side with a sandwich

Storing Leftover Roasted Potato Salad

If you have leftover Roasted Potato Salad, you’ll want to make sure to store it properly to keep it fresh and safe to eat. Here are some tips for storing roasted potato salad:

  1. Refrigerate promptly: If you’re not going to eat this Easy Roasted Potato salad right away, be sure to refrigerate it as soon as possible. Bacteria can grow rapidly at room temperature, so it’s important to get the potato salad into the refrigerator within 2 hours of making it.
  2. Use an airtight container: To keep the roasted potato salad fresh, store it in an airtight container. This will help prevent it from drying out or absorbing other odors in the fridge.
  3. Keep it separate from other foods: When storing roasted potato salad in the fridge, be sure to keep it separate from other foods. This will help prevent cross-contamination and the spread of bacteria.
  4. Label and date: To keep track of how long the roasted potato salad has been in the fridge, be sure to label the container with the date you made it. Leftover roasted potato salad will keep for up to 3-4 days in the fridge.
  5. Don’t freeze: Roasted potato salad doesn’t freeze well, so it’s best to avoid freezing it. The texture and flavor can be affected by freezing, and the potatoes may become mushy when thawed.
Print
clock clock iconcutlery cutlery iconflag flag iconfolder folder iconinstagram instagram iconpinterest pinterest iconfacebook facebook iconprint print iconsquares squares iconheart heart iconheart solid heart solid icon
A wooden bowl filled with Easy Roasted Potato Salad

Easy Roasted Potato Salad


5 Stars 4 Stars 3 Stars 2 Stars 1 Star

No reviews

Description

Roasting potatoes for a potato salad is a simple and delicious way to elevate this classic dish. By bringing out the natural sweetness of the potatoes and adding extra flavor and texture, roasting can take a potato salad to a whole new level.


Ingredients

Scale
  • 6 to 8 baby red potatoes, skin-on
  • 2 tablespoons olive oil
  • 1 teaspoon salt
  • 1 teaspoon black pepper
  • 1 teaspoon garlic powder
  • 1 teaspoon onion powder
  • 1/2 teaspoon paprika
  • 2 eggs, for hardboiling
  • 3/4 cup Miracle Whip or mayo
  • 1/3 cup sour cream
  • 1 tablespoon Dijon mustard
  • 1 teaspoon black pepper
  • 1 1/2 stalks celery, minced
  • 1/4 red onion, minced
  • 2 tablespoons fresh chopped parsley, plus more for garnish

Instructions

  1. Heat oven to 400°.
  2. Rinse and dry the potatoes. Cut into large chunks.
  3. Add the potatoes to a large bowl. Pour on the olive oil.
  4. Season with the salt, pepper, paprika, garlic and onion powders.
  5. Mix well to fully coat the potatoes.
  6. Place the potatoes into an oil-lined cast iron pan, or parchment-lined baking sheet.
  7. Roast for about 20-25 minutes, or until tender and golden brown (flip with a spatula a few times while roasting).
  8. As the potatoes are roasting, make the hardboiled eggs.
  9. In a large salad bowl, combine the Miracle Whip (mayo), sour cream, Dijon, black pepper, celery, onions and fresh parsley.
  10. Chop the eggs and gently fold them into the dressing.
  11. Once the potatoes are done roasting, allow them to cool for about five minutes before adding them to the bowl.
  12. Gently mix (fold) in the potatoes to fully coat in the dressing.
  13. Taste for salt.
  14. Garnish with fresh chopped parsley.
  15. Serve warm, or cold.
  16. ENJOY!

Notes

  • keep the skin on the potatoes for added texture and flavor
  • coating the potatoes in oil and seasoning will help them roast evenly and develop a nice crispy exterior
  • if you can, use a cast iron pan to roast the potatoes
  • adding sour cream to the mayo is a game-changer
  • reduce the amount of mayo and sour cream for a lighter dressing
  • allow the potatoes to cool for about 5 minutes prior to adding them to the mixture
  • can serve this potato salad warm, or cold
  • see more tips and notes in post
  • Prep Time: 10 minutes
  • Cook Time: 25 minutes
  • Category: Side dish
  • Method: Easy
  • Cuisine: American

Nutrition

  • Serving Size: 3/4 cup

GET TO KNOW ME!

A photo of me in a black floral dress cooking at the stovetop at Williams-Sonoma

I am more than just recipes. I love fashion and style too! Most importantly, I love my Family (my Hubby and my Fur Babies). My Husband (aka my “Kitchen Bitch”) means the world to me. He’s pretty damn cool too. Not only is he one of the nicest guys you will ever meet, he also has had a lengthy career in professional hockey. Not only winning two Stanley Cups with the Pittsburgh Penguins in the early ’90’s, but most recently winning the Calder Cup with the Charlotte Checkers, amongst many other accolades. If you live in Charlotte and play hockey, or have a family member who plays, be sure to contact him!

Our life has changed dramatically in the past few years with the passing of our two goldendoodles, Vegas and Viva. We were lucky enough to have Vegas for five years (totally wish it was longer). Most recently, losing our Viva to a brain tumor in July of 2020. We welcomed our mini goldendoodle 7, almost seven years ago. We just added the amazing Hazel! Of course, I am always posting tons and tons of photos! Be sure to check out my recipe for Pet Bone Broth! This broth is super rich in nutrients and will provide your pet with a multitude of health benefits!

Let’s Get Social!

Be sure to follow me on social media! I’m always talking food, fashion, and family! I also love sharing some of my favorite Amazon Finds too. Click here to check out my Amazon page! FacebookInstagramTikTokTwitter and Pinterest! THANK YOU!
Tomato Braised Lentils

A white bowl filled with tomato braised lentils that are garnished with fresh parsley.

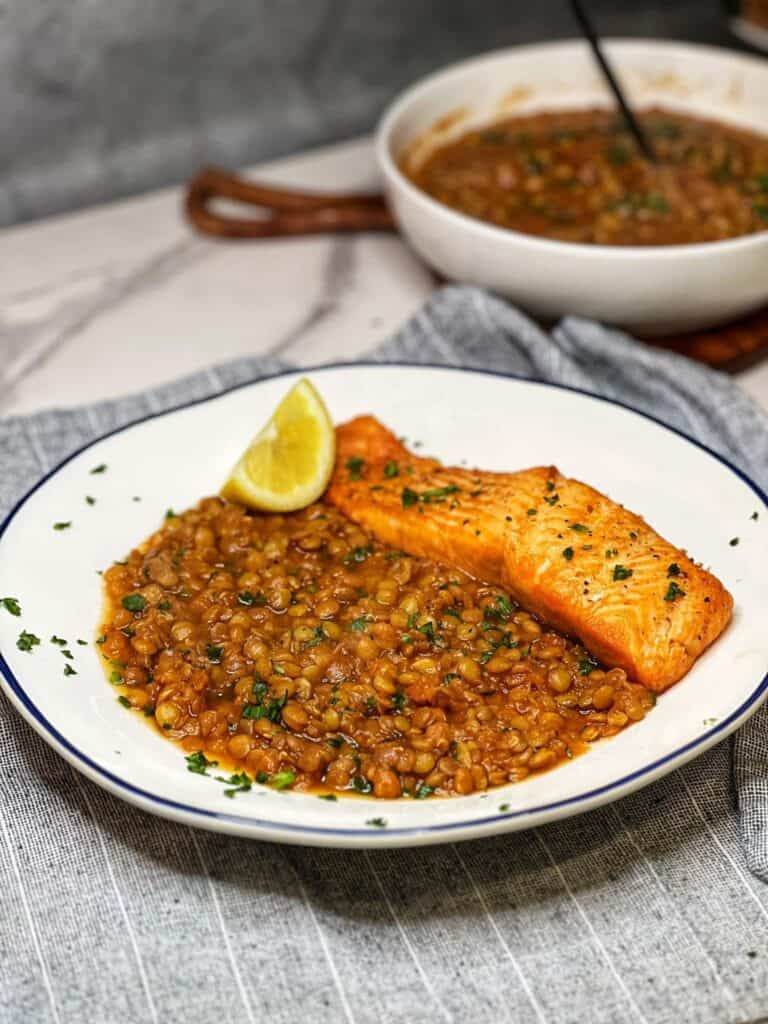
Tomato Braised Lentils are a nourishing and healthy side dish, or vegetarian meal. These tiny legumes are slowly simmered in an herb-infused, tomatoey broth. Once cooked, the lentils are tender and creamy, yet hold their shape. Lentils are a perfect pairing with your favorite protein. Leftovers are even better the next day!

A white bowl filled with tomato braised lentils that are garnished with fresh parsley.

Lentils 101

Although not new, lentils are quickly surpassing chickpeas as the go-to superfood in pastas, chips and even pet food.

Lentils are a a tiny, round-shaped legume that has long been a staple in Indian cuisine (daal). In addition, these protein-packed lentils play a huge role in vegan cooking as a plant-based source of protein. They are grown in pods and come in a variety of sizes and colors (green, brown, black, red, yellow and green). Also, lentils are gluten-free!

Why You Should Make This Lentils Recipe

  • Packed with Plant-Based Protein: Lentils are an excellent source of plant-based protein, making this dish perfect for vegans and vegetarians. It’s a filling, nutritious meal for any diet. These powerful legumes contain 18 grams of protein in one cup.
  • Rich in Fiber and Nutrients: Lentils are naturally high in fiber, aiding digestion and promoting heart health. Combined with tomatoes, which are full of antioxidants like lycopene, this tomato braised lentils recipe provides a nutrient-rich option for healthy eating. Lentils are generous in polyphenols. Polyphenols fight off harmful agents in the body.
  • Budget-Friendly and Easy to Make: Lentils are a cost-effective protein source, and the recipe uses affordable pantry staples like canned tomatoes and basic spices. Perfect for a quick, budget-conscious meal.
  • Comforting and Hearty: Slow-cooked lentils in a rich tomato sauce create a comforting, hearty dish that’s ideal for chilly nights. It’s satisfying enough to be a main course, or served as a side dish.
  • Great for Meal Prep: Tomato braised lentils store well in the fridge or freezer, making them perfect for meal prepping. They taste even better the next day, allowing you to enjoy leftovers throughout the week.
  • Versatile and Customizable: This recipe is easy to adjust with different herbs, spices, or added vegetables, making it versatile for a range of tastes. Pair it with rice, crusty bread, or your favorite protein.

What is Braising?

Braising is a cooking technique that begins with browning, and ends with steaming. In the case of this recipe for Tomato Braised Lentils, the mirepoix is sautéed with the legumes, then combined with liquid and covered to steam.

Stewing and braising are similar techniques. However, stewing calls for the use of more liquid.

Tips on Making the Best Tomato Braised Lentils

  • Lentil: French green lentils work really well in this lentil recipe. Green lentils or black lentils are great substitutes.
  • Mirepoix: Feel free to add or substitute with leeks and/or fennel.
  • Sherry Wine: This is NOT cooking sherry. White wine, red wine or marsala wine are suitable for substituting.
  • Vegetable Stock: Easily substitute with chicken stock
  • Tomato Passata: Use crushed, diced or tomato sauce, as substitutes
  • Fresh Herbs: Use whatever you have in your pantry (rosemary, thyme, parsley)

How to Prepare Tomato Braised Lentils

  1. Rinse and drain the lentils.
  2. Heat the oil in a deep sauté pan.
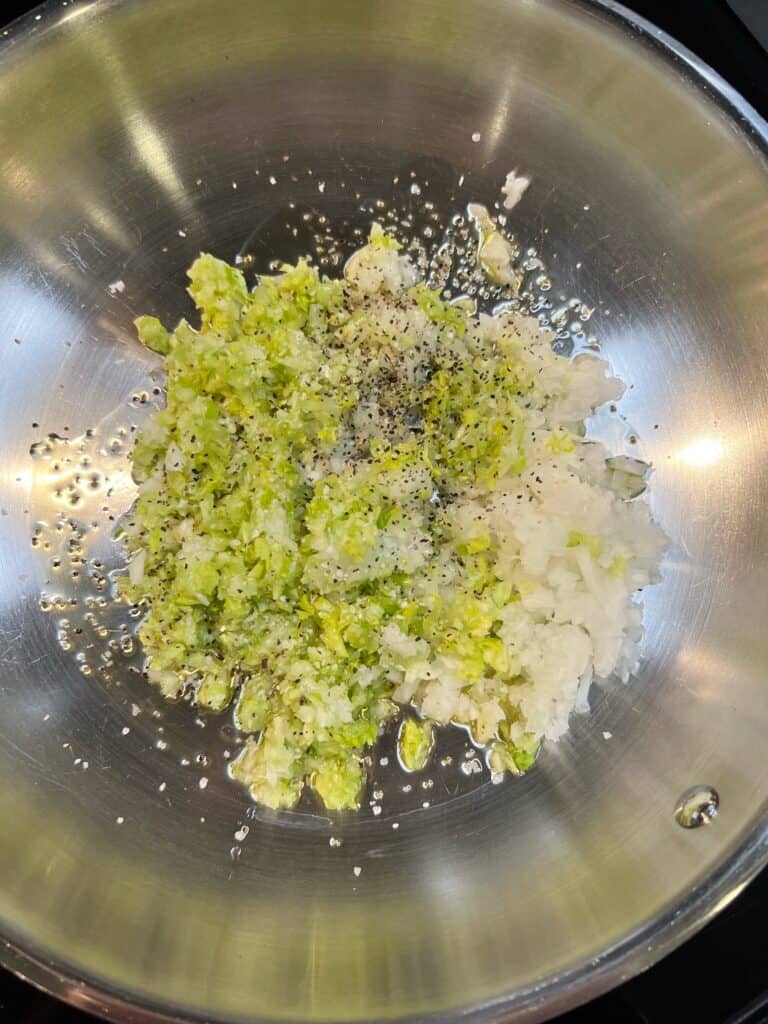
  3. Add in the onion, celery and carrot. Season with salt and pepper.
  4. Sauté for a few minutes to soften the vegetables.
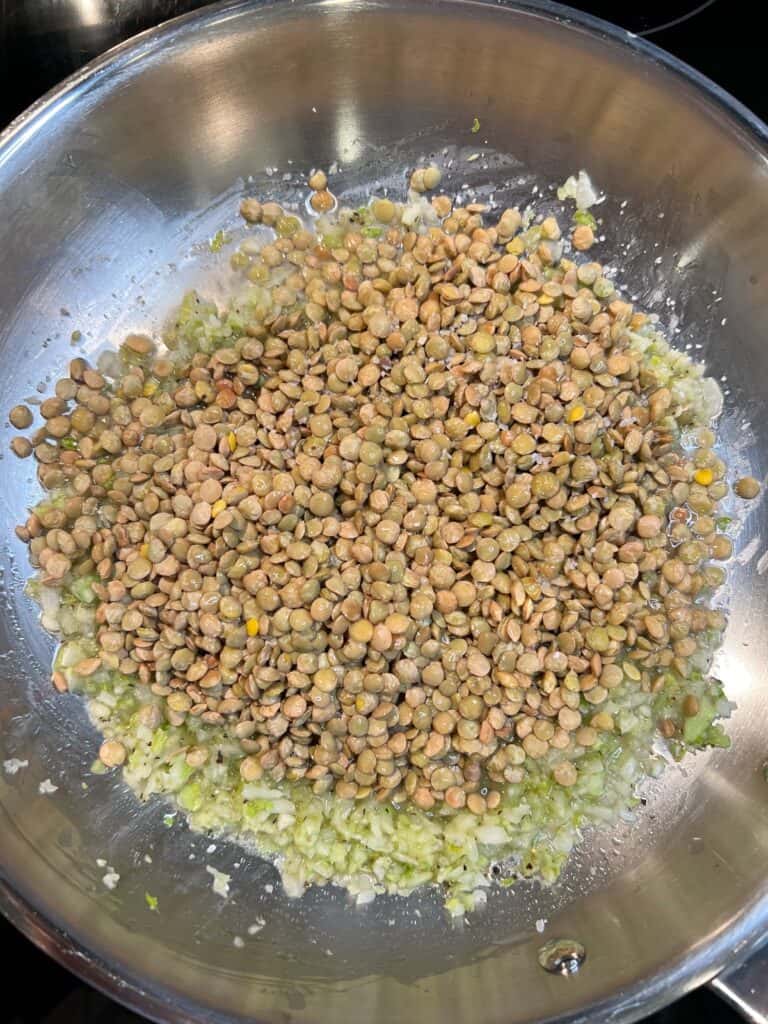
  5. Add in the lentils, garlic and white wine.
  6. Allow the wine to cook off for a few minutes.
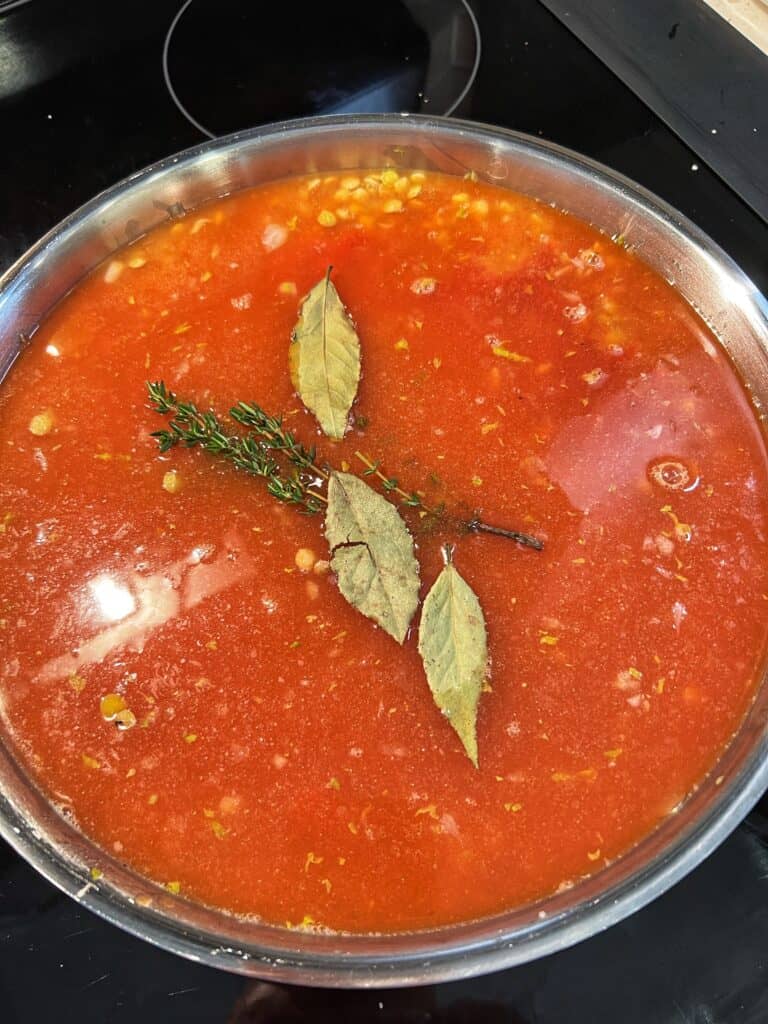
  7. Add in the tomato purée. Season again with salt and pepper.
  8. Pour in the stock along with the fresh herbs and bay leaves.
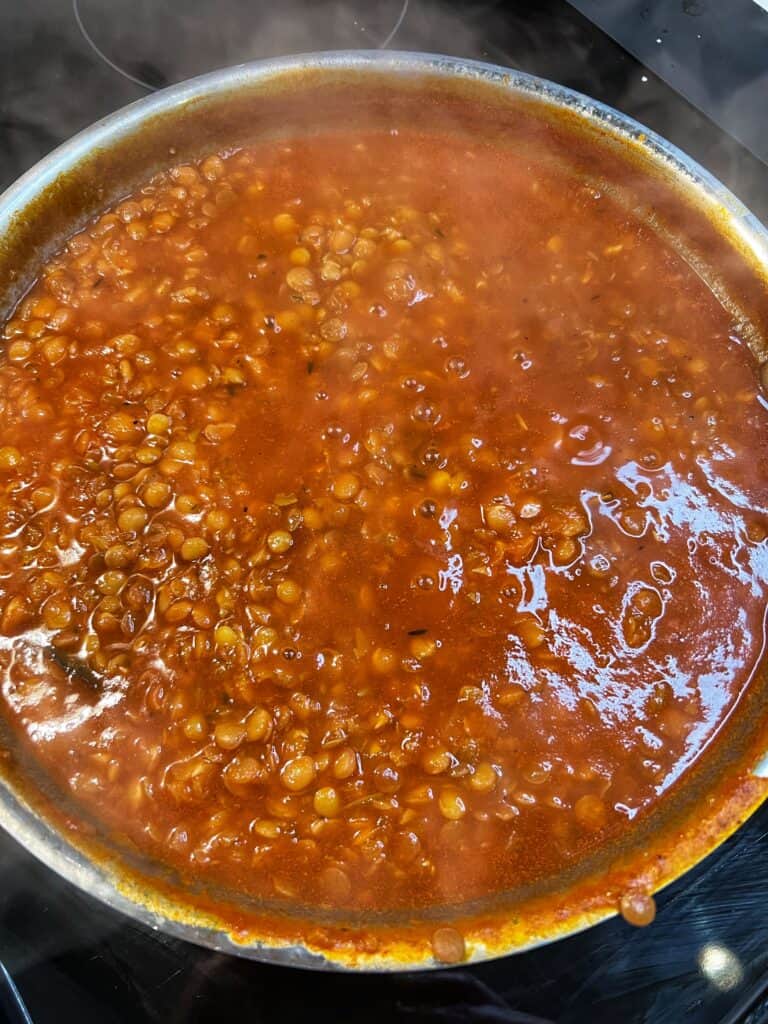
  9. Cover and simmer for about 15 to 20 minutes, or until the lentils are tender.
  10. Remove and discard the bay leaves and any woody stems of the herbs.
  11. Stir in fresh parsley.

How to Serve and Store Tomato Braised Lentils

These creamy, Tomato Braised Lentils can be enjoyed as a vegetarian side dish, or meal with roasted vegetables.

Alternatively, these braised lentils make for a perfect pairing with:

  • Store in the fridge for up to 3 to 4 days.
  • Freeze for up to three months.
  • Reheat on stovetop or microwave.
  • Leftovers can also be repurposed into a salad, as a base for fried or poached eggs, or mixed with wilted greens.
Print
clock clock iconcutlery cutlery iconflag flag iconfolder folder iconinstagram instagram iconpinterest pinterest iconfacebook facebook iconprint print iconsquares squares iconheart heart iconheart solid heart solid icon
A white bowl filled with tomato braised lentils that are garnished with fresh parsley.

Tomato Braised Lentils


5 Stars 4 Stars 3 Stars 2 Stars 1 Star

No reviews

Description

Tomato Braised Lentils are a nourishing and healthy side dish, or vegetarian meal. These tiny legumes are slowly simmered in an herb-infused, tomatoey broth. Once cooked, the lentils are tender and creamy, yet hold their shape. Leftovers are even better the next day!


Ingredients

Scale
  • 1 cup French green lentils, rinsed and drained
  • 2 tablespoon olive oil
  • 1/2 white onion, minced
  • 1 large celery stalk, minced
  • 1 carrot, minced
  • 1 teaspoon salt
  • 1 teaspoon black pepper
  • 1/4 cup white wine
  • 2 garlic cloves, minced
  • 8 ounces tomato passata (purée)
  • 3 cups vegetable or chicken stock
  • 2 to 3 fresh thyme and/or rosemary sprigs
  • 2 bay leaves
  • 1 tablespoon fresh parsley, for garnish

Instructions

  1. Rinse and drain the lentils.
  2. Heat the oil in a deep sauté pan.
  3. Add in the onion, celery and carrot. Season with salt and pepper.
  4. Sauté for a few minutes to soften the vegetables.
  5. Add in the lentils, garlic and white wine.
  6. Allow the wine to cook off for a few minutes.
  7. Add in the tomato purée. Season again with salt and pepper.
  8. Pour in the stock along with the fresh herbs and bay leaves.
  9. Cover and simmer for about 15 to 20 minutes, or until the lentils are tender.
  10. Remove and discard the bay leaves and any woody stems of the herbs.
  11. Stir in fresh parsley.
  12. Serve alone as a vegetarian dish, or side dish. 
  13. ENJOY!

Equipment

Notes

  • French green lentils work really well in this lentil recipe. Green or black lentils are great substitutions.
  • Feel free to add or substitute the celery and onions with leeks and/or fennel.
  • Do not use sherry cooking wine.
  • White wine, red wine or marsala wine are suitable for substituting.
  • Easily substitute the vegetable stock with chicken stock.
  • Use crushed, diced or tomato sauce, as substitutes.
  • Use whatever you have in your pantry (rosemary, thyme, parsley).
  • Avoid simmering to hard. You want the lentils to retain their shape and not become mushy.
  • Serve these tomato braised lentils alone, or alongside your favorite protein.
  • Prep Time: 10 minutes
  • Cook Time: 30 minutes
  • Category: Side dish
  • Method: Easy
  • Cuisine: Vegetarian

Nutrition

  • Serving Size: 3/4 cup

GET TO KNOW ME!

I am more than just recipes. I love fashion and style too! Most importantly, I love my Family (my Hubby and my Fur Babies). My Husband (aka my “Kitchen Bitch”) means the world to me. He’s pretty damn cool too. Not only is he one of the nicest guys you will ever meet, he also has had a lengthy career in professional hockey. Not only winning two Stanley Cups with the Pittsburgh Penguins in the early ’90’s, but most recently winning the Calder Cup with the Charlotte Checkers, amongst many other accolades. If you live in Charlotte and play hockey, or have a family member who plays, be sure to contact him!

Our life has changed dramatically in the past few years with the passing of our two goldendoodles, Vegas and Viva. We were lucky enough to have Vegas for five years (totally wish it was longer). Most recently, losing our Viva to a brain tumor in July of 2020. We welcomed our mini goldendoodle 7, almost seven years ago. We just added the amazing Hazel! Of course, I am always posting tons and tons of photos! Be sure to check out my recipe for Pet Bone Broth! This broth is super rich in nutrients and will provide your pet with a multitude of health benefits!

Let’s Get Social!

Be sure to follow me on social media! I’m always talking food, fashion, and family! I also love sharing some of my favorite Amazon Finds too. Click here to check out my Amazon page! FacebookInstagramTikTokTwitter and Pinterest! THANK YOU!
Easy Crockpot Lentil Soup

Have you heard? Eating lentils brings wealth and prosperity in the New Year! So, I’ve created an easy way to enjoy these protein-packed legumes that’s both hearty, and delicious. Honestly, this Easy Crockpot Lentil Soup can be enjoyed all year long. Brown the coin-shaped sausages for additional flavor and toss them into a slow cooker with the remaining ingredients. After four to five hours, dinner is done! Maybe, just maybe, lentils will become YOUR new favorite legume. This healthy, slow-cooker soup makes for the perfect weeknight meal.

a bowl of Easy Crockpot Lentil Soup with bread in the background

ITALIAN TRADITION OF EATING LENTILS ON NEW YEARS EVE

Eating lentils right after midnight is an Italian tradition that dates back to Roman times. The flat, coin-shape of the lentil is believed to resemble Roman coins and are typically served with some type of pork. Cotechino con lenticchie (sausages and green lentils) is most popular. The sausages are cut into circles to also resemble coins for financial wealth and prosperity for the upcoming year.

WHAT ARE LENTILS

Lentils are a a tiny, round-shaped legume that has long been a staple in Indian cuisine (daal). In addition, lentils play a huge roll in vegan cooking as a plant-based source of protein. They are grown in pods and come in a variety of sizes and colors (green, brown, black, red, yellow and green). Also, lentils are gluten-free!

lentils sitting in a mesh strainer

Health benefits of eating lentils

Lentils are packed full of goodness. These powerful legumes contain 18 grams of protein in one cup. They are full of fiber, a great source of protein and are generous in polyphenols. Polyphenols fight off harmful agents in the body.

OTHER GOOD LUCK FOODS FOR THE NEW YEAR!

Ok, so let’s be honest. You may get a different answer depending on where you grew up. Having grown up in the north, pork and sauerkraut has always been our “good luck” food to ring in the New Year. Seriously, I can remember attending New Year’s Eve parties where big roasting pans full of roast pork and sauerkraut where brought out just past midnight.

BLACK-EYED PEAS – said to bring good luck in the form of money

ROUND SWEETS – represent a circle of luck

HEARTY GREENS – eat cabbage or kale for prosperity

CORNBREAD – it’s golden hue represents gold and riches in the new year

GRAPES – In Spain and Mexico, people eat 12 grapes at the stroke of midnight for luck

NOODLES – super long noodles bring long life in the New Year

POMEGRANATE SEEDS – eat for fertility and life

FISH – symbolizes abundance

CHAMPAGNE – wealth and nobility

PRETZELS – a German tradition for luck and prosperity

TIPS ON MAKING EASY CROCKPOT LENTIL SOUP

Follow these simple tips to prepare this healthy bean soup:

  • although browning the smoked sausage is not mandatory, the process does provide for another level of flavor
  • easily substitute with your favorite sausage, or leave out the sausage for a vegetarian lentil soup
  • rinse the lentils to remove any dirt and/or debris
  • adjust cook time if substituting other types of lentils (red will cook more quickly and green may need a bit more time)
  • use a food processor to mince the vegetables (makes for a better consistency)
  • substitute crushed tomatoes with whole (just crush them once you add to the slow cooker)
  • fresh rosemary can be great substitute for fresh thyme (or use both)
  • add spinach (at the end)
  • reduce cooking time by preparing on the stovetop in an enameled cast iron pot
  • serve with buttery bread for dipping and/or a side salad

STORAGE AND FREEZING

This dairy-free soup is great for meal prep and will last in the fridge up to five days. Alternatively, this easy crockpot lentil soup is a great freezer-meal soup and will last up to three months in the freezer.

Print
clock clock iconcutlery cutlery iconflag flag iconfolder folder iconinstagram instagram iconpinterest pinterest iconfacebook facebook iconprint print iconsquares squares iconheart heart iconheart solid heart solid icon
a bowl of Easy Crockpot Lentil Soup with bread in the background

Easy Crockpot Lentil Soup


5 Stars 4 Stars 3 Stars 2 Stars 1 Star

No reviews

Description

Have you heard? Eating lentils brings wealth and prosperity in the New Year! So, I’ve created an easy way to enjoy these protein-packed legumes that’s both hearty, and delicious. Honestly, this Easy Crockpot Lentil Soup can be enjoyed all year long. Brown the coin-shaped sausages for additional flavor and toss them into a slow cooker with the remaining ingredients. After four to five hours, dinner is done! Maybe, just maybe, lentils will become YOUR new favorite legume. This healthy, slow-cooker soup makes for the perfect weeknight meal.


Ingredients

Scale
  • 1 pound brown lentils, rinsed
  • 1 pound smoked sausage, cut into circles
  • 2 stalks celery with leaves, minced
  • 1/2 onion, minced
  • 1 large carrot, minced
  • 20 ounces crushed tomatoes
  • 5 to 6 cups chicken or vegetable stock
  • 5 sprigs thyme 
  • 2 bay leaves
  • 1 teaspoon salt
  • 1 teaspoon black pepper

Instructions

  1. Cut the sausage into circles and brown in a pan.
  2. Rinse the lentils.
  3. Mince the carrots, celery and onion.
  4. Once the sausages have browned, add them to the crockpot with the remaining ingredients, including the lentils.
  5. Add a bit of stock to the pan you cooked the sausages to remove the brown bits. Add to the crockpot.
  6. Cook on high 4 to 5 hours. 
  7. Check the liquid levels a few times. Add more stock, as needed.
  8. Soup is done when the lentils are tender.
  9. Remove and discard the bay leaves and thyme stalks.
  10. Serve in bowls with fresh bread for a hearty meal.
  11. ENJOY!

Notes

SEE POST FOR NOTES AND TIPS!

  • Prep Time: 10 minutes
  • Cook Time: 4 hours, 30 minutes
  • Category: Soup, Bisque
  • Method: Easy
  • Cuisine: American

Nutrition

  • Serving Size: 1 bowl

GET TO KNOW ME!

I am more than just recipes. I love fashion and style too! Most importantly, I love my Family (my Hubby and my Fur Babies). My Husband (aka my “Kitchen Bitch”) means the world to me. He’s pretty damn cool too. Not only is he one of the nicest guys you will ever meet, he also has had a lengthy career in professional hockey. Not only winning two Stanley Cups with the Pittsburgh Penguins in the early ’90’s, but most recently winning the Calder Cup with the Charlotte Checkers, amongst many other accolades. If you live in Charlotte and play hockey, or have a family member who plays, be sure to contact him!

Our life has changed dramatically in the past few years with the passing of our two goldendoodles, Vegas and Viva. We were lucky enough to have Vegas for five years (totally wish it was longer). Most recently, losing our Viva to a brain tumor in July of 2020. We welcomed our mini goldendoodle 7, almost seven years ago. We just added the amazing Hazel! Of course, I am always posting tons and tons of photos! Be sure to check out my recipe for Pet Bone Broth! This broth is super rich in nutrients and will provide your pet with a multitude of health benefits!

Let’s Get Social!

Be sure to follow me on social media! I’m always talking food, fashion, and family! I also love sharing some of my favorite Amazon Finds too. Click here to check out my Amazon page! FacebookInstagramTikTokTwitter and Pinterest! THANK YOU!
Blackened Salmon Rice Bowl

a blackened salmon rice bowl with roasted Brussels Sprouts topped with a mayo sriracha sauce

Oftentimes, we correlate healthy food, with tasteless food. This does NOT have to be the case. You just need to know how to impart flavor when creating healthy meals. This protein-packed, Blackened Salmon Rice Bowl recipe is super healthy, delicious, and so quick and easy to prepare. The flavor from the homemade blackening seasoning will blow you away. Additionally, roasting the Brussels Sprouts adds another dimension of both texture, and smokiness. This rice bowl recipe can also be adapted using your favorite protein. Blackened chicken and/or shrimp are great alternatives to the salmon.

a blackened salmon rice bowl with roasted Brussels Sprouts topped with a mayo sriracha sauce

LET’S TALK SALMON

Typically, Faroe Island salmon is my go-to when creating salmon recipes. This type of salmon is farm-raised. However, it is raised in a contained area of the salmon’s natural habitat. The fat lines in this salmon make it difficult to overcook, and become dry.

If you are looking for a sustainable, wild-caught salmon alternative, King (Chinook) salmon is a great option. Sockeye has a rich flavor and texture and can also be used in this Salmon Bowl recipe.

Salmon Substitutes

  • Arctic char
  • Steelhead

Protein Alternatives

If you are not a fan of salmon, try this Blackened Rice Bowl using:

  • chicken
  • shrimp
  • tuna
  • white fish (ie. cod, flounder, mahi, grouper)
  • beef

WHAT IS BLACKENING SEASONING

If you are looking to amp up any meal with big and bold flavors, a blackening seasoning blend will do the trick! Do not let the name fool you, most blackened seasonings are not “hot.” Yes, it is spicy and it does bring a little heat, but not overpowering like other fiery seasoning blends. However, if you are looking to add a blast of heat to your dish, you can easily adjust the spice blend.

Although this cajun-type of seasoning is available for purchase, I highly recommend making your own. Honestly, you likely have everything to make this delicious homemade seasoning in your spice drawer. Leftover seasoning can be sealed in an airtight container and will last up to three months in your pantry.

Just to clarify, the term blackening actually refers to the cooking technique, using a cast iron pan with high heat. Cooking the protein in this manner will give it a charred crust on both sides.

WHAT ABOUT THE RICE

Rice is so very easy to prepare and relatively inexpensive. A few months ago, I purchased this easy to use rice cooker. Bibigo Rice is my go-to for a yummy, microwavable rice option.

In my opinion, the choice of rice in this Blackened Salmon Recipe is just a matter of preference. We can debate all day about the health benefits of brown rice vs. white rice. Go with what you enjoy!

I would however, avoid using sushi rice. Sushi rice will only add a heaviness to this light and healthy dish. The following are all great rice options:

  • basmati
  • jasmine
  • black rice
  • brown rice
  • wild rice

Why limit these healthy dinner bowls to just plain rice? Try any of these as the base to your Salmon Bowl:

LET’S TALK VEGGIES FOR BLACKENED SALMON RICE BOWLS

Roasted Brussels Sprouts added the perfect amount of smokiness and texture to this dish. Honestly, if you are looking for additional or alternative(s) vegetable options for this Blackened Salmon Rice Bowl, the sky is the limit. Again, a matter of preference. Here are a few options:

  • broccoli
  • cauliflower
  • mushrooms
  • carrots
  • zucchini
  • kimchi
  • cucumber
  • edamame

HOW TO MAKE THE BEST BLACKENED SALMON RICE BOWL

Here are a few tips to how to make this Blackened Salmon Rice Bowl recipe come out perfectly, every single time:

  • timing is everything (if cooking rice, as opposed to using a microwavable option, do this first)
  • use skinless salmon
  • cut salmon into equal, bite-sized pieces
  • roast the Brussels Sprouts while you are preparing the salmon, blackening seasoning and sauce.
  • adjust the spice level of the blackening seasoning to your liking
  • salmon bites can also be prepared in the air fryer or traditional cast iron pan

Air Fryer Salmon Bites

Using the air frying to prepare these spicy salmon bites can be a time saver, as they can air fry while the Brussels Sprouts are roasting.

Here’s how:

  • preheat the air fryer to 390°
  • spray the inside of the basket with non-stick spray
  • place the salmon bites (may have to prepare in batches depending on the size of the air-fryer)
  • air fry the salmon for about 8 to 10 minutes, flipping halfway (internal temperature should be 145° for salmon that is not sushi-grade

HOW TO MAKE THE SPICY SWEET MAYO SAUCE

The sauce is made by combining kewpie mayo (can use regular mayo) with sriracha and sweet chili sauce. Honestly, the taste of this sriracha mayo is out of this world. However, it will add a few more calories and fat to the dish. So, use just a touch. As an alternative, you can top this Salmon Bowl with:

  • chili crisp oil
  • sesame ginger vinaigrette
  • sesame oil
  • soy sauce
  • ponzu sauce

MEAL PREP AND LEFTOVER SALMON RICE BOWLS

Rice bowls are great for meal prep. This Blackened Salmon with Roasted Brussels Sprouts is a healthy and easy meal prep idea. Seal in airtight containers. Prepare meals for the entire week, or enjoy leftovers, for up to three days in the fridge.

Print
clock clock iconcutlery cutlery iconflag flag iconfolder folder iconinstagram instagram iconpinterest pinterest iconfacebook facebook iconprint print iconsquares squares iconheart heart iconheart solid heart solid icon
a blackened salmon rice bowl with roasted Brussels Sprouts topped with a mayo sriracha sauce

Blackened Salmon Rice Bowl


5 Stars 4 Stars 3 Stars 2 Stars 1 Star

No reviews

Description

This Blackened Salmon Rice Bowl recipe is super healthy, delicious, and so quick and easy to prepare. The flavor from the homemade blackening seasoning will blow you away. Additionally, roasting the Brussels Sprouts adds another dimension of both texture, and smokiness. This rice bowl recipe can also be adapted using your favorite protein. Blackened chicken and/or shrimp are great alternatives to the salmon.


Ingredients

Scale
  • 1 pound salmon, skinless
  • 2 teaspoons fresh lemon juice
  • 1 1/2 cups cooked rice
  • 3 tablespoons homemade blackening seasoning (see recipe below)
  • 1 pound Brussels sprouts, halved
  • 1 tablespoon olive oil
  • 1 teaspoon salt
  • 1 teaspoon black pepper
  • 1/4 cup mayo
  • 1 tablespoon sriracha
  • 1 to 2 tablespoons sweet chili sauce
  • 1 teaspoon sesame seeds (optional)

BLACKENING SEASONING

  • 1 tablespoon garlic powder
  • 1 tablespoon paprika
  • 1 tablespoon dried oregano
  • 2 teaspoons onion powder
  • 2 teaspoons dried thyme
  • 2 teaspoons black pepper
  • 2 teaspoons kosher salt
  • 1 to 2 teaspoons cayenne pepper

Instructions

  1. Prepare the rice. 
  2. Heat oven to 400°.
  3. Trim the ends of the Brussels sprouts and cut in half.
  4. Place on a sheet pan. Drizzle with olive oil.
  5. Season with salt and pepper. Toss to coat.
  6. Roast until browned. About 8 to 10 minutes, tossing a few times. 
  7. As the sprouts are roasting, combine all of the ingredients for the blackening season. Mix well.
  8. Cut the salmon into 1″ cubes.
  9. Place salmon in a bowl. Coat with the lemon juice.
  10. Sprinkle on the blackening season. Toss to coat. 
  11. Place salmon pieces on a parchment lined sheet pan.
  12. Once you remove the sprouts, reduce the oven temperature to 350°.
  13. Bake salmon bites for about 8 minutes. 
  14. Mix the ingredients for the sauce. 
  15. Add 1/2 cup rice to a serving bowl, with a third each of the salmon and sprouts.
  16. Drizzle on the spicy mayo.
  17. Sprinkle with sesame seeds (optional)
  18. ENJOY!

Notes

SEE POST FOR NOTES!

  • Prep Time: 10 minutes
  • Cook Time: 20 minutes
  • Category: Dinner
  • Method: Easy
  • Cuisine: Healthy

Nutrition

  • Serving Size: 1 serving

GET TO KNOW ME!

a photo of me leaning against a brick wall with my logo, "Charlotte Fashion Plate" to the left of me

I am more than just recipes. I love fashion and style too! Most importantly, I love my Family (my Hubby and my Fur Babies). My Husband (aka my “Kitchen Bitch”) means the world to me. He’s pretty damn cool too. Not only is he one of the nicest guys you will ever meet, he also has had a lengthy career in professional hockey. Not only winning two Stanley Cups with the Pittsburgh Penguins in the early ’90’s, but most recently winning the Calder Cup with the Charlotte Checkers, amongst many other accolades. If you live in Charlotte and play hockey, or have a family member who plays, be sure to contact him!

Our life has changed dramatically in the past few years with the passing of our two goldendoodles, Vegas and Viva. We were lucky enough to have Vegas for five years (totally wish it was longer). Most recently, losing our Viva to a brain tumor in July of 2020. We welcomed our mini goldendoodle 7, almost seven years ago. We just added the amazing Hazel! Of course, I am always posting tons and tons of photos! Be sure to check out my recipe for Pet Bone Broth! This broth is super rich in nutrients and will provide your pet with a multitude of health benefits!

Let’s Get Social!

Be sure to follow me on social media! I’m always talking food, fashion, and family! I also love sharing some of my favorite Amazon Finds too. Click here to check out my Amazon page! FacebookInstagramTikTokTwitter and Pinterest! THANK YOU!
EASY SEAFOOD PAELLA

a pan of easy seafood paella filled with mussels, clams, lemon wedges and shrimp sitting on blue concrete

Seafood Paella is a classic Spanish dish that is meant to be shared, and enjoyed with others. Various regions across Spain will typically have their own traditional Seafood Paella recipe that may, or may not, include chicken and/or chorizo. Although somewhat untraditional, my recipe for Easy Seafood Paella is outstanding. By now, you should know that I always try to put a little spin on my recipes, to suit my liking. Honestly, I woke up this morning wanting to make this again. Even though this recipe is fairly easy to prepare, it will take some time to prep, and cook. Believe me, it will be worth every single second.

Imagine having a few guests over for dinner and preparing this Easy Seafood Paella around the grill with a couple bottles of fabulous red wine. This recipe will easily feed four to six adults. It truly is a one-pan wonder.

Of course, I created a short video on TikTok making this fabulous dish. See recipe below to view. If you have not yet signed up for this social media platform, use my code 5SSIS800K0H06 to create an account and follow me, Charlotte Fashion Plate.

a pan of easy seafood paella filled with mussels, clams, lemon wedges and shrimp sitting on blue concrete

HOW TO MAKE EASY SEAFOOD PAELLA

PREP THE INGREDIENTS

Prior to even lighting up the grill, or heating up the stovetop, be sure to first prep the ingredients. Have the bacon diced and the garlic and shallots minced. Another important step is to prep the seafood. Rid the clams and mussels of any dirt, or grit. For a complete guide on how to clean clams/mussels, click here.

Rinse the scallops and remove the foot. If you are using the large scallops like I did in this recipe, cut in half. For fish, cut into pieces. Cut the squid into rings. Feel free to toss in a few of the tentacles. Purchase shrimp that is already peeled and deveined. This will significantly shorten your prep time.

Lastly, try not to get “hung” up on the ingredient list. This recipe for Easy Seafood Paella is more focused on technique. If you notice the rice is absorbing the liquid too fast, feel free to add a touch more stock. Let your tastebuds be your guide. You got THIS!

PAELLA PAN

In my opinion, in order to create the most perfect Easy Seafood Paella, a Paella Pan is key. Honestly, they are relatively inexpensive. The Paella pan is typically 2″-2 1/2″ deep and is also wider than most cooking pans. It is constructed to perfectly cook (and toast) the rice for the most perfect Paella. If you must, substitute with cast iron. Keep in mind, using any other type of pan may warrant a slight change in the cooking method described here.

TO GRILL, OR NOT TO GRILL THE EASY SEAFOOD PAELLA

Traditionally, Paella is prepared outdoors, over hot coals. Alternative cooking methods, such as a gas grill, or even the stove-top will do. Basically, you just need to be able to regulate the heat source.

THE BASE

So, here is how I took this recipe for Easy Seafood Paella for a bit of a spin. The base included a few strips of bacon that I rendered down prior to adding the garlic, shallots (instead of onions) and anchovies. The smokiness and saltiness of the bacon added another dimension of flavor.

Ok, so I know I am going to get this question. Why did I not use saffron? Basically, I did not want to. As mentioned above, this is my take on a traditional recipe. Crushed red pepper flakes were used as a substitute. By all means, feel free to use saffron.

WHAT KIND OF RICE TO USE FOR EASY SEAFOOD PAELLA

Why is the selection of rice so important? In the final stages of preparation, you will be turning up the heat just a touch to “toast” up the bottom layer. The “socarrat” is the most coveted part of this dish. Most importantly, once the rice is initially toasted, be sure to evenly distribute the rice in the pan. After you add the liquids, the rice may move just a touch. If necessary, evenly distribute again. This will be the LAST time you will be stirring (moving) the rice.

Many would agree that the choice of rice is the one of the most important components of making Paella. The rice should be short-grained, and slightly rounded. This type of rice structure will easily absorb the liquid, but also retain a firmness.

Bomba is a Spanish rice that is typically used to make Paella. Since I could not locate Bomba, I was thinking of using either Basmati, or Jasmine. However, I came across this medium grain rice from Goya. It worked beautifully to create this Easy Seafood Paella. For a list of other Paella rice alternatives, see this article from The Spruce Eats.

FRESH QUALITY SEAFOOD AND SUBSTITUTIONS

Another very important part of this recipe, is to use super fresh, high-quality seafood. Nothing can ruin a dish quicker than using seafood that is of poor quality.

Traditionally, head-on prawns would be used. I substituted with tail-on shrimp that was peeled and deveined. Although most recipes do not include clams, I decided it was a must for me. You probably already know about my addiction to clams.

Instead of using a white fish to create this Easy Seafood Paella, I used U10-U12, dry-packed scallops. Halibut, seabass, and/or monkfish are more traditional and are great substitutes for the scallops.

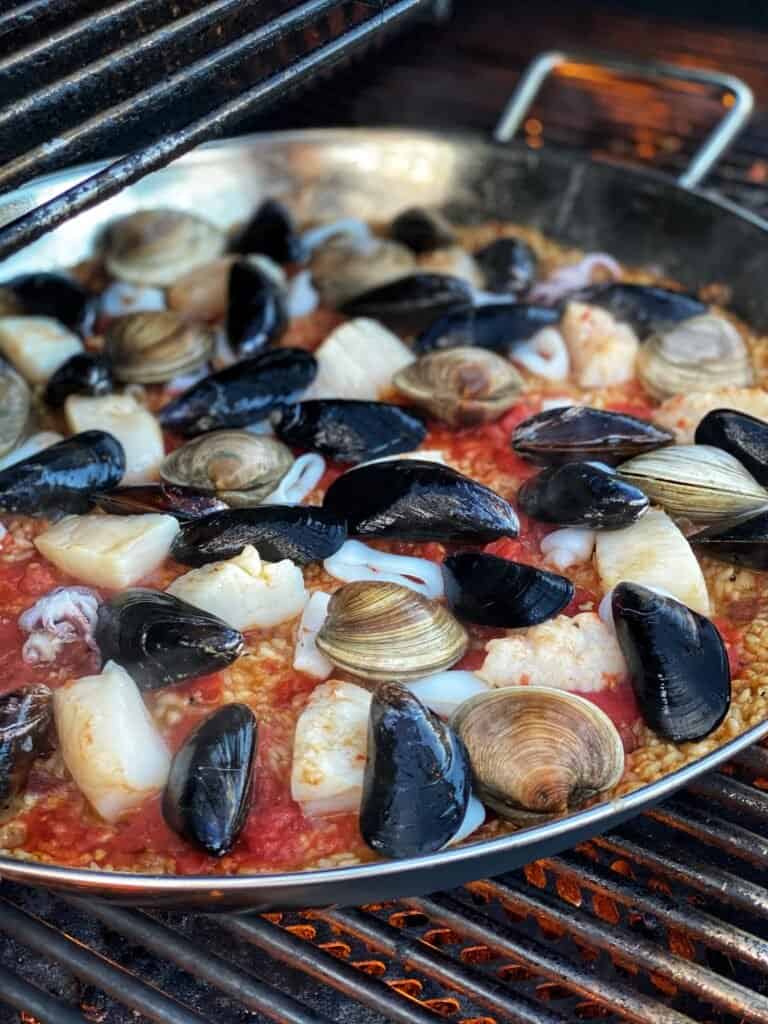
seafood cooking in a paella pan with rice on a grill

TO FINISH AND SERVE THE EASY SEAFOOD PAELLA

Be sure to turn up the heat in the last few minutes of cooking to put a nice crisp on the bottom layer of rice. Place this beautiful Easy Seafood Paella in the middle of the table (served in the pan) for all of your guests to enjoy. Not only is it super tasty, this dish is very pleasing to the eye. It’s quite ok if phones eat first!

As mentioned above, is a one-pan wonder! There is absolutely no need for a side dish. Grab a few bottles of great wine and possibly a baguette and ENJOY!

LEFTOVERS AND REHEATING

If there are any leftovers, which I highly doubt. They will last in the fridge up to two days. I would recommend removing the clam and mussel meat from the shells prior to storing. To reheat, I would highly recommend NOT using the microwave. Stovetop or oven will work perfectly. Freezing leftovers is not really an option.

Print
clock clock iconcutlery cutlery iconflag flag iconfolder folder iconinstagram instagram iconpinterest pinterest iconfacebook facebook iconprint print iconsquares squares iconheart heart iconheart solid heart solid icon
a pan of easy seafood paella filled with mussels, clams, lemon wedges and shrimp sitting on blue concrete

EASY SEAFOOD PAELLA


5 Stars 4 Stars 3 Stars 2 Stars 1 Star

No reviews

Description

Although not traditional, I think you will love my version of Easy Seafood Paella. The most perfect rice combines beautifully with super fresh seafood. It will have you wanting more. Follow this recipe and technique to achieve the most perfect rice and seafood combination.


Ingredients

Scale
  • 4 strips thick-cut bacon, diced
  • 2 TBLS olive oil, plus
  • 1 shallot, minced
  • 4 garlic cloves, minced
  • 6 anchovy filets in oil
  • 2 C Bomba or short-grained rice
  • 1 tsp kosher salt
  • 1 tsp black pepper
  • 1 tsp crushed red pepper flakes, optional
  • 2 bay leaves
  • 2 C chicken stock, plus
  • 1 8oz. bottle clam juice
  • 1/2 C dry sherry wine
  • 1 C crushed roma tomatoes
  • 8 scallops, cut in half
  • 1/2 lb. squid tubes, cut into circles
  • 1 dozen littleneck or middleneck clams, cleaned and rinsed
  • 1/2 to 1 lb. mussels, cleaned and rinsed
  • 1/2 lb. tail-on shrimp, peeled and deveined
  • 6 lemon wedges
  • 1/2 C fresh parsley, chopped

Instructions

  1. Heat up grill or stovetop to medium.
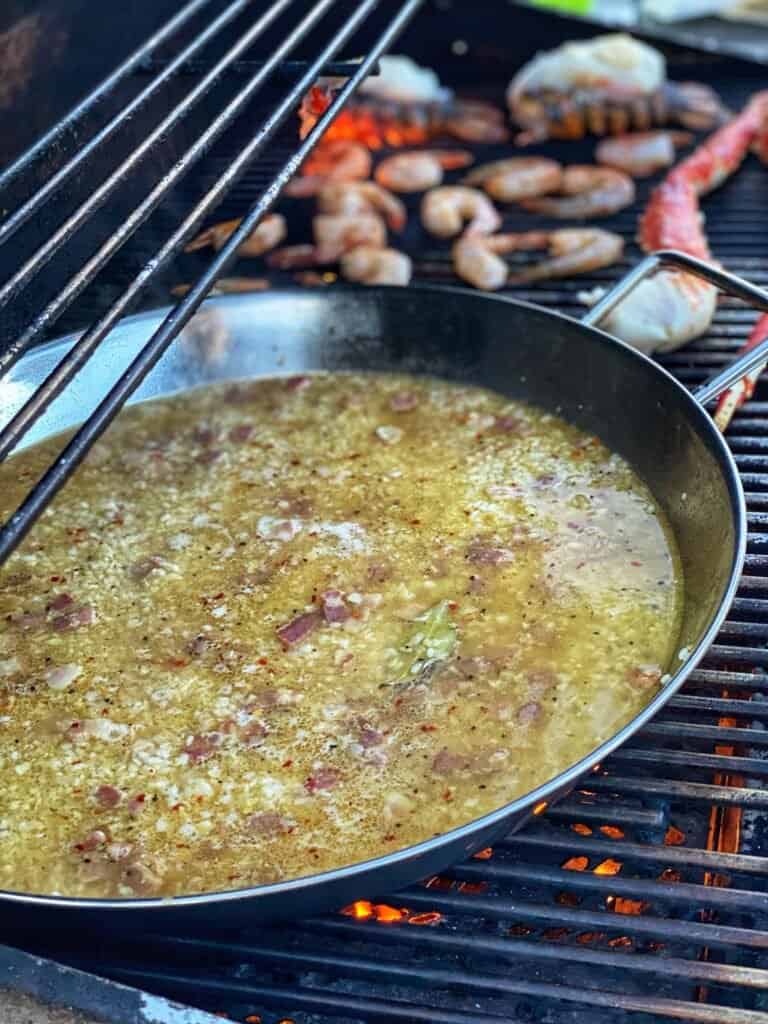
  2. Start rendering the bacon in a Paella pan
  3. Add the anchovies and break up to start melting.
  4. Add in the olive oil.
  5. Add in the shallots and garlic. Cook for about three minutes to soften. Do NOT brown.
  6. Add in the rice, kosher salt, black pepper, crushed red pepper and bay leaves. 
  7. Allow the rice and spices to toast up for a few minutes. 
  8. After toasting, distribute the rice evenly in the pan.
  9. Pour in the chicken stock, clam juice, dry sherry and tomatoes. 
  10. Evenly distribute the rice one last time. You will not be moving or stirring the rice again. 
  11. Allow to simmer for about 15 minutes.
  12. While the rice is simmering, put a bit of a char or grill marks on the shrimp. Do not fully cook. Transfer to a plate and reserve. 
  13. Check the liquid level of the rice. You may need to add a touch more chicken stock. 
  14. Place the scallops. Allow them to cook for a few minutes before flipping.
  15. Flip the scallops
  16. Add in the squid, clams and mussels. Place lid and allow the clams and mussels to open. 
  17. The time it takes to open up the clams and mussels will be enough to cook the squid.
  18. If you find the clams and/or mussels are having a difficult time opening, place on the grill and close lid.
  19. Transfer any clams/mussels back to the dish. 
  20. Add the shrimp and allow to finish cooking in the pan. The shrimp should not longer be translucent.
  21. Turn up the heat just a touch to achieve a nice crispy rice layer on the bottom. 
  22. Garnish with fresh lemon wedges and fresh parsley.
  23. ENJOY!

Notes

SEE POST FOR HELPFUL TIPS

  • Prep Time: 10 minutes
  • Cook Time: 30 minutes

LET’S GET SOCIAL!

I am more than just recipes. I love fashion and style too! Most importantly, I love my Family (my Hubby and my Fur Babies). My Husband (aka my “Kitchen Bitch”) means the world to me. He’s pretty damn cool too. Not only is he one of the nicest guys you will ever meet, he also has had a lengthy career in professional hockey. Not only winning two Stanley Cups with the Pittsburgh Penguins in the early ’90’s, but most recently winning the Calder Cup with the Charlotte Checkers, amongst many other accolades. If you live in Charlotte and play hockey, or have a family member who plays, be sure to contact him!

Our life has changed dramatically in the past few years with the passing of our two goldendoodles, Vegas and Viva. We were lucky enough to have Vegas for five years (totally wish it was longer). Most recently, losing our Viva to a brain tumor in July of 2020. We welcomed our mini goldendoodle 7, almost seven years ago. We just added the amazing Hazel! Of course, I am always posting tons and tons of photos! Be sure to check out my recipe for Pet Bone Broth! This broth is super rich in nutrients and will provide your pet with a multitude of health benefits!

FOLLOW ME!

Be sure to follow me on social media! I’m always talking food, fashion, and family! I also love sharing some of my favorite Amazon Finds too. Click here to check out my Amazon page! FacebookInstagramTikTokTwitter and Pinterest! THANK YOU!
KOREAN BBQ GRILLED OYSTERS

a platter of Korean bbq grilled oysters with a pouch of Kevin's sauce in the background

Many moons ago, we were traveling up the coast to San Fransisco and happened upon this roadside barbecue oyster shack. This was a no frills place lined with picnic tables and an open grill. That experience has been forever sketched in my memory. I think of it quite often. So, when I was challenged to create a seafood recipe using one of Kevin’s Natural Foods sauces, I knew exactly what I would be making. This recipe for Korean BBQ Grilled Oysters is a take on my lovely experience of enjoying barbecue grilled oysters during this trip. Let me tell you, they are AMAZING!

Honestly, the flavor packed into this pouch of Kevin’s Natural Foods Korean BBQ Sauce could make shoe leather taste fantastic. As soon as these beauties were perfectly grilled, I could not want to dive in. My only regret is that I should have prepared a few dozen. Not only is this recipe super simple and delicious, it is also Paleo, gluten-free and Keto thanks to Kevin’s mission to “eat clean without sacrificing flavor.”

me holding a pouch of Kevin's Natural Foods Korean BBQ Sauce

Be sure to check out Kevin’s Natural Foods complete line of not only super flavorful, but also clean eating product offerings. Give them a follow on FacebookInstagram and Pinterest. Another bonus, their products are gluten-free!

OYSTERS FOR MAKING KOREAN BBQ GRILLED OYSTERS

With so many oyster farms around the country, one can enjoy fresh oysters throughout the year. Forget about the so-called “oyster season.” If you are serving this as an appetizer, I would suggest preparing four to six oysters per person. Maybe a few more If you are serving oyster lovers. Believe me, you hardly stop eating them. Ask your local fishmonger to suggest the perfect oyster for grilling. Quite often, I use either Blue Points or James River.

For this recipe, I chose White Stone Oysters. They are a fairly large oyster that stand up well to the heat of the grill. Additionally, their shell is quite deep which allows it to hold in all of the flavor from the sauce.

SHUCKING OYSTERS

If for some reason you cannot buy the oysters shucked (on the half shell), there are two ways to get them open. First, you can shuck them yourself. This will require the use of an oyster shucking knife. Please do NOT use a regular knife or butter knife. This will only cause you pain. I mean this both literally, and figuratively!

Find the hinge. Place your shucking knife into the hinge and pop the knife up and down until the lid opens. Believe me, practice makes perfect. However, once you learn how to do this, it’s actually kind of fun. Be sure to use the oyster knife to release the oyster from its shell. In doing so, be sure to keep as much of the brine inside of the half shell as you can. This only provides for added flavor.

Secondly, you can place the oysters in the oven, or on the grill. In just a few minutes, you will see them start to open. Remove and take off the lid with the oyster knife. Just note, you only want the shell to pop. Leave them on too long, and they will cook through.

HOW TO PREPARE KOREAN BBQ GRILLED OYSTERS

Heat the grill to 400 degrees. If you do not have access to a grill, you can easily prepare this recipe using your oven. Once all of the oysters have been shucked. Place a teaspoon full of Kevin’s Natural Foods Korean BBQ Sauce on top of each oyster. Carefully place each half shell onto the grill grates. Steady them as best as you can to avoid the oysters from falling over and spilling out all of their goodness.

Place lid. It should only take about four to five minutes for the sauce to bubble up and caramelize. Carefully remove the oysters and place onto a platter. My trick is to place ice cream salt on the platter to help steady the oysters. Garnish each oyster with a cilantro leaf. Drizzle on a touch of organic sesame oil. Lastly, sprinkle with sesame seeds. I was lucky enough to have tuxedo sesame seeds in my pantry.

Serve immediately with fresh lemon wedges. ENJOY this recipe for Korean BBQ Grilled Oysters!

Please take a moment and check out my recipes for Tomatillo Taco Shredded Beef, Cilantro Lime Roasted Cauliflower and Thai Coconut Chicken Tagine. Of course, all of these recipes were created using Kevin’s Natural Foods Paleo-Keto Sauces. Oh, and did I mention, they are also gluten-free!

LET’S GET SOCIAL!

I am more than just recipes. I love fashion and style too! Most importantly, I love my Family. My Husband (aka my “Kitchen Bitch”) means the world to me. He’s pretty damn cool too. Not only is he one of the nicest guys you will ever meet, he also has had a lengthy career in professional hockey. Not only winning two Stanley Cups with the Pittsburgh Penguins in the early ’90’s, but most recently winning the Calder Cup with the Charlotte Checkers, amongst many other accolades. If you live in Charlotte and play hockey, or have a family member who plays, be sure to contact him. He is known as one of the best skate sharpeners in the world!

Our life has changed dramatically in the past few years with the passing of our two goldendoodles, Vegas and Viva. We were lucky enough to have Vegas for five years (totally wish it was longer). Most recently, losing our Viva to a brain tumor in July of 2020. We welcomed our mini goldendoodle 7, almost seven years ago. We just added the amazing Hazel! Be sure to check out my recipe for Pet Bone Broth! This broth is super rich in nutrients and will provide your pet with a multitude of health benefits!

FOLLOW ME!

Be sure to follow me on social media! I’m always talking food, fashion, and family! I also love sharing some of my favorite Amazon Finds too. Click here to check out my Amazon page! FacebookInstagramTikTokTwitter and Pinterest!

NAVY BEAN AND HAM SOUP

two bowls of navy bean and ham soup on a wooden board

Leftover ham from Easter? Or, maybe you are just looking for an amazing idea for a warm bowl of soup on a chilly fall or winter evening. This Navy Bean and Ham Soup is a great option. Feels so much like home. So, go grab your ham bone and a few bags of dried navy beans. Plan ahead because it is going to take about three hours. However, it will be all worth it when you will end up with a big pot of goodness!

If you like Lima Beans, you must check out my recipe for Lima Bean Soup. In my opinion, lima beans get a bad rap. For some of us maybe it was having to sit at the dinner table and gobble up all of those frozen lima beans on our plate. My Husband refuses to eat them. He has absolutely no idea what he is missing. I swear these are not the lima beans from your childhood. Give them a try!

two bowls of navy bean and ham soup on a wooden board

HOW TO PREPARE NAVY BEAN AND HAM SOUP

Place your beans in a bowl with cold water and salt. Allow the beans to soak for at least an hour. Heat up the olive oil in a large soup pot. I have been using this Lodge Enameled Cast Iron Pot a lot lately to prepare my soups. Add in the minced celery, carrots, onions and garlic. Want a super easy way to dice vegetables? Check this Chop ‘N Prep from Tupperware. It’s my new favorite kitchen gadget! Allow the vegetables to soften (not brown) for a few minutes. Coat the vegetables with the flour. Allow the raw taste of the flour to cook off for about a minute, or so.

Add in the chicken stock, water, bay leaves, ham and ham bone. Rinse the beans and add them to the pot. Season with black pepper. The soup should have enough salt from the ham. You can check the taste once the soup is finished. Bring to a boil. Turn heat down to a low simmer. Cover and allow to cook for at least three hours, or until the beans have fully softened, but are not falling apart. Stir occasionally.

a pot of ham and bean soup

To finish, remove and discard the bay leaves. Remove the ham bone. Cut any extra ham from the bone and place in soup. Add in the fresh parsley. I like my soup to have a touch of thickness. So, take a ladle full of broth and add to a bowl. Add in cornstarch to create a slurry. Heat the soup up to just under a boil. With a slotted spoon, stir in the slurry. Just enough to thicken slightly. Turn off heat. Serve and ENJOY!

LET’S GET SOCIAL!

I am more than just recipes. I love fashion and style too! Most importantly, I love my Family (my Hubby and my Fur Babies). My Husband (aka my “Kitchen Bitch”) means the world to me. He’s pretty damn cool too. Not only is he one of the nicest guys you will ever meet, he also has had a lengthy career in professional hockey. Not only winning two Stanley Cups with the Pittsburgh Penguins in the early ’90’s, but most recently winning the Calder Cup with the Charlotte Checkers, amongst many other accolades. If you live in Charlotte and play hockey, or have a family member who plays, be sure to contact him. He is known as one of the best skate sharpeners in the world!

Our life has changed dramatically in the past few years with the passing of our two goldendoodles, Vegas and Viva. We were lucky enough to have Vegas for five years (totally wish it was longer). Most recently, losing our Viva to a brain tumor in July of 2020. We welcomed our mini goldendoodle 7, almost seven years ago. We just added the amazing Hazel! Of course, I am always posting tons and tons of photos! Be sure to check out my recipe for Pet Bone Broth! This broth is super rich in nutrients and will provide your pet with a multitude of health benefits!

Be sure to follow me on social media! I’m always talking food, fashion, and family! I also love sharing some of my favorite Amazon Finds too. Click here to check out my Amazon page! FacebookInstagramTikTokTwitter and Pinterest!

HOMEMADE PITA

pita wrapped in a kitchen towel

What better way to enjoy Homemade Hummus or anything for that matter, than with your very own Homemade Pita bread? Well…I had a lot of help. As I have mentioned many times…I am not much of a baker. So, I decided to do a bit of research on Pinterest and found this recipe for Homemade Pita from “Let the Baking Begin”. Click here for original recipe. Thanks for sharing your amazing recipe! It was super easy to follow, and I really did not change a thing. It will take about 2 to 3 hours to complete, but oh so worth it. You can pass part of the time by making my Homemade Hummus…click here!

homemade pita wrapped in a kitchen towel

In a small bowl, combine the yeast, the one-half cup warm water and sugar. Allow to sit and foam up for about ten minutes. If you see no foam at the end, your yeast may be expired. You will need to start over.

yeast mixture in a white bowl for homemade pita

Once the yeast has proofed, in a larger bowl, or bowl to a stand mixer, add in the flour, salt, remaining one-half cup of warm water and the yeast mixture. Knead with dough hook if you are using a stand mixer until the dough is smooth and elastic (about ten minutes). I did mine by hand, and kneaded for the same amount of time. Once a nice dough has formed. Line a bowl and the dough with olive oil. Cover with a kitchen towel. Place in a warm area to double in size. Depending on the temperature, this can take up to two hours.

Once dough has doubled. Remove from bowl and place on floured surface.

Cut dough into eight equal portions. Form each piece of dough into a ball and flatten with a rolling pin to about 1/4″. Allow to sit for another thirty minutes.

With about 15 minutes left of proofing the pita rounds, preheat the oven to 500 degrees. Place a pizza stone or cast iron pan (upside down) in the oven to warm up. Once dough has fully proofed, quickly open up the oven door and place one pita round on the stone or cast iron pan. Allow to bake for three minutes. You can flip halfway through, as I did, to crisp up both sides. Remove and cover with kitchen towel. Repeat for the remaining pita rounds.

That’s it…you very own homemade pita bread! It was amazing to me that there was an actual pocket inside! Serve with whatever you desire. This sent my Hummus over the top! ENJOY!

LET’S GET SOCIAL!

I am more than just recipes. I love fashion and style too! Most importantly, I love my Family (my Hubby and my Fur Babies). My Husband (aka my “Kitchen Bitch”) means the world to me. He’s pretty damn cool too. Not only is he one of the nicest guys you will ever meet, he also has had a lengthy career in professional hockey. Not only winning two Stanley Cups with the Pittsburgh Penguins in the early ’90’s, but most recently winning the Calder Cup with the Charlotte Checkers, amongst many other accolades. If you live in Charlotte and play hockey, or have a family member who plays, be sure to contact him!

Our life has changed dramatically in the past few years with the passing of our two goldendoodles, Vegas and Viva. We were lucky enough to have Vegas for five years (totally wish it was longer). Most recently, losing our Viva to a brain tumor in July of 2020. We welcomed our mini goldendoodle 7, almost seven years ago. We just added the amazing Hazel! Of course, I am always posting tons and tons of photos! Be sure to check out my recipe for Pet Bone Broth! This broth is super rich in nutrients and will provide your pet with a multitude of health benefits!

FOLLOW ME!

Be sure to follow me on social media! I’m always talking food, fashion, and family! I also love sharing some of my favorite Amazon Finds too. Click here to check out my Amazon page! Facebook, Instagram, TikTok, Twitter and Pinterest! THANK YOU!