Easy Roasted Potato Salad

A wooden bowl filled with Easy Roasted Potato Salad

Roasting potatoes for a potato salad is a simple and delicious way to elevate this classic dish. By bringing out the natural sweetness of the potatoes and adding extra flavor and texture, roasting can take a potato salad to a whole new level. This dish is both versatile and delicious, making it the perfect accompaniment to any meal. Whether you’re serving it alongside a hearty grilled steak or a light summer salad, this Easy Roasted Potato Salad is sure to impress your guests.

A wooden bowl filled with Easy Roasted Potato Salad

ADVANTAGES OF ROASTING POTATOES FOR POTATO SALAD

Roasting potatoes brings out their natural sweetness and gives them a crispy exterior. This adds texture and depth to the dish, making it more interesting and flavorful. When roasting potatoes for a potato salad, it’s important to evenly coat them in oil and seasoning. This will help them roast evenly and develop a nice crispy exterior.

Other advantages include:

  • roasting potatoes for a potato salad allows you to use different types of potatoes
  • allows you to experiment with different flavors and seasonings (add garlic and/or herbs while roasting)
  • you can use a wider variety of dressings (a classic vinaigrette or pesto dressing would work beautifully)
  • makes for a great presentation

INGREDIENTS FOR EASY ROASTED POTATO SALAD

The ingredients for this Easy Roasted Potato Salad is very similar to my Classic Potato Salad, with just a few exceptions:

Potatoes – Skin-on, baby red potatoes can be substituted with Yukon gold, or even sweet potatoes.

Spice Blend – Use mine, or roast the potatoes with your favorite spices. Add a few cloves of garlic for another level of flavor.

Dressing – The classic mayo-based dressing can be replaced with a vinaigrette, for a lighter version.

Vegetables – In addition to the celery and red onion, add some of your favorite vegetables (eg. carrots, dill pickles, relish).

Hardboiled Eggs – Eggs are typically a part of a Classic Potato Salad, but feel free to leave out.

Herbs – In addition to the fresh parsley, add dill or other herbs.

TIP: A cast iron pan is perfect for roasting potatoes. Use it, if you have one!

INSTRUCTIONS

  1. Preheat your oven to 400°F.
  2. In a large bowl, toss your baby red potatoes with olive oil, salt, pepper, paprika, garlic powder and onion powder. Arrange them on an oil coated cast iron pan or baking sheet lined with parchment paper, making sure they are not too crowded.
  3. Roast the potatoes for about 25-30 minutes, or until they are golden brown and crispy.
  4. As the potatoes are roasting, prepare the hardboiled eggs.
  5. In a large salad bowl, mix together the Miracle Whip (mayo), sour cream, Dijon, black pepper, minced celery, minced red onion and chopped fresh parsley.
  6. Chop the hardboiled eggs and fold them into the dressing.
  7. Once the potatoes are done, remove them from the oven and let them cool for a few minutes. Then, transfer them to the bowl.
  8. Gently coat the roasted potatoes with the dressing.
  9. Taste for salt.
  10. Garnish with fresh chopped parsley.
  11. Serve this Easy Roasted Potato Salad warm or chilled, and ENJOY!

HOW TO SERVE AND STORE POTATO SALAD

One of the best things about this Easy Roasted Potato Salad is that it can be served warm, or cold. If you’re serving it warm, be sure to let the potatoes cool for a few minutes before adding the dressing. This will prevent the dressing from becoming too warm and running off the potatoes.

If you’re serving it cold, refrigerate the potato salad for a few hours before serving to allow the flavors to meld together.

Roasted Potato Salad is a versatile dish that can be served in many different ways. Here are some ideas for how to serve this potato dish:

  • on it’s own as a vegetarian meal
  • alongside grilled meats (steak, chicken, fish, pork)
  • on a salad
  • in a wrap
  • as a side with a sandwich

Storing Leftover Roasted Potato Salad

If you have leftover Roasted Potato Salad, you’ll want to make sure to store it properly to keep it fresh and safe to eat. Here are some tips for storing roasted potato salad:

  1. Refrigerate promptly: If you’re not going to eat this Easy Roasted Potato salad right away, be sure to refrigerate it as soon as possible. Bacteria can grow rapidly at room temperature, so it’s important to get the potato salad into the refrigerator within 2 hours of making it.
  2. Use an airtight container: To keep the roasted potato salad fresh, store it in an airtight container. This will help prevent it from drying out or absorbing other odors in the fridge.
  3. Keep it separate from other foods: When storing roasted potato salad in the fridge, be sure to keep it separate from other foods. This will help prevent cross-contamination and the spread of bacteria.
  4. Label and date: To keep track of how long the roasted potato salad has been in the fridge, be sure to label the container with the date you made it. Leftover roasted potato salad will keep for up to 3-4 days in the fridge.
  5. Don’t freeze: Roasted potato salad doesn’t freeze well, so it’s best to avoid freezing it. The texture and flavor can be affected by freezing, and the potatoes may become mushy when thawed.
Print
clock clock iconcutlery cutlery iconflag flag iconfolder folder iconinstagram instagram iconpinterest pinterest iconfacebook facebook iconprint print iconsquares squares iconheart heart iconheart solid heart solid icon
A wooden bowl filled with Easy Roasted Potato Salad

Easy Roasted Potato Salad


5 Stars 4 Stars 3 Stars 2 Stars 1 Star

No reviews

Description

Roasting potatoes for a potato salad is a simple and delicious way to elevate this classic dish. By bringing out the natural sweetness of the potatoes and adding extra flavor and texture, roasting can take a potato salad to a whole new level.


Ingredients

Scale
  • 6 to 8 baby red potatoes, skin-on
  • 2 tablespoons olive oil
  • 1 teaspoon salt
  • 1 teaspoon black pepper
  • 1 teaspoon garlic powder
  • 1 teaspoon onion powder
  • 1/2 teaspoon paprika
  • 2 eggs, for hardboiling
  • 3/4 cup Miracle Whip or mayo
  • 1/3 cup sour cream
  • 1 tablespoon Dijon mustard
  • 1 teaspoon black pepper
  • 1 1/2 stalks celery, minced
  • 1/4 red onion, minced
  • 2 tablespoons fresh chopped parsley, plus more for garnish

Instructions

  1. Heat oven to 400°.
  2. Rinse and dry the potatoes. Cut into large chunks.
  3. Add the potatoes to a large bowl. Pour on the olive oil.
  4. Season with the salt, pepper, paprika, garlic and onion powders.
  5. Mix well to fully coat the potatoes.
  6. Place the potatoes into an oil-lined cast iron pan, or parchment-lined baking sheet.
  7. Roast for about 20-25 minutes, or until tender and golden brown (flip with a spatula a few times while roasting).
  8. As the potatoes are roasting, make the hardboiled eggs.
  9. In a large salad bowl, combine the Miracle Whip (mayo), sour cream, Dijon, black pepper, celery, onions and fresh parsley.
  10. Chop the eggs and gently fold them into the dressing.
  11. Once the potatoes are done roasting, allow them to cool for about five minutes before adding them to the bowl.
  12. Gently mix (fold) in the potatoes to fully coat in the dressing.
  13. Taste for salt.
  14. Garnish with fresh chopped parsley.
  15. Serve warm, or cold.
  16. ENJOY!

Notes

  • keep the skin on the potatoes for added texture and flavor
  • coating the potatoes in oil and seasoning will help them roast evenly and develop a nice crispy exterior
  • if you can, use a cast iron pan to roast the potatoes
  • adding sour cream to the mayo is a game-changer
  • reduce the amount of mayo and sour cream for a lighter dressing
  • allow the potatoes to cool for about 5 minutes prior to adding them to the mixture
  • can serve this potato salad warm, or cold
  • see more tips and notes in post
  • Prep Time: 10 minutes
  • Cook Time: 25 minutes
  • Category: Side dish
  • Method: Easy
  • Cuisine: American

Nutrition

  • Serving Size: 3/4 cup

GET TO KNOW ME!

A photo of me in a black floral dress cooking at the stovetop at Williams-Sonoma

I am more than just recipes. I love fashion and style too! Most importantly, I love my Family (my Hubby and my Fur Babies). My Husband (aka my “Kitchen Bitch”) means the world to me. He’s pretty damn cool too. Not only is he one of the nicest guys you will ever meet, he also has had a lengthy career in professional hockey. Not only winning two Stanley Cups with the Pittsburgh Penguins in the early ’90’s, but most recently winning the Calder Cup with the Charlotte Checkers, amongst many other accolades. If you live in Charlotte and play hockey, or have a family member who plays, be sure to contact him!

Our life has changed dramatically in the past few years with the passing of our two goldendoodles, Vegas and Viva. We were lucky enough to have Vegas for five years (totally wish it was longer). Most recently, losing our Viva to a brain tumor in July of 2020. We welcomed our mini goldendoodle 7, almost seven years ago. We just added the amazing Hazel! Of course, I am always posting tons and tons of photos! Be sure to check out my recipe for Pet Bone Broth! This broth is super rich in nutrients and will provide your pet with a multitude of health benefits!

Let’s Get Social!

Be sure to follow me on social media! I’m always talking food, fashion, and family! I also love sharing some of my favorite Amazon Finds too. Click here to check out my Amazon page! FacebookInstagramTikTokTwitter and Pinterest! THANK YOU!

Easy Crockpot Lentil Soup

Have you heard? Eating lentils brings wealth and prosperity in the New Year! So, I’ve created an easy way to enjoy these protein-packed legumes that’s both hearty, and delicious. Honestly, this Easy Crockpot Lentil Soup can be enjoyed all year long. Brown the coin-shaped sausages for additional flavor and toss them into a slow cooker with the remaining ingredients. After four to five hours, dinner is done! Maybe, just maybe, lentils will become YOUR new favorite legume. This healthy, slow-cooker soup makes for the perfect weeknight meal.

a bowl of Easy Crockpot Lentil Soup with bread in the background

ITALIAN TRADITION OF EATING LENTILS ON NEW YEARS EVE

Eating lentils right after midnight is an Italian tradition that dates back to Roman times. The flat, coin-shape of the lentil is believed to resemble Roman coins and are typically served with some type of pork. Cotechino con lenticchie (sausages and green lentils) is most popular. The sausages are cut into circles to also resemble coins for financial wealth and prosperity for the upcoming year.

WHAT ARE LENTILS

Lentils are a a tiny, round-shaped legume that has long been a staple in Indian cuisine (daal). In addition, lentils play a huge roll in vegan cooking as a plant-based source of protein. They are grown in pods and come in a variety of sizes and colors (green, brown, black, red, yellow and green). Also, lentils are gluten-free!

lentils sitting in a mesh strainer

Health benefits of eating lentils

Lentils are packed full of goodness. These powerful legumes contain 18 grams of protein in one cup. They are full of fiber, a great source of protein and are generous in polyphenols. Polyphenols fight off harmful agents in the body.

OTHER GOOD LUCK FOODS FOR THE NEW YEAR!

Ok, so let’s be honest. You may get a different answer depending on where you grew up. Having grown up in the north, pork and sauerkraut has always been our “good luck” food to ring in the New Year. Seriously, I can remember attending New Year’s Eve parties where big roasting pans full of roast pork and sauerkraut where brought out just past midnight.

BLACK-EYED PEAS – said to bring good luck in the form of money

ROUND SWEETS – represent a circle of luck

HEARTY GREENS – eat cabbage or kale for prosperity

CORNBREAD – it’s golden hue represents gold and riches in the new year

GRAPES – In Spain and Mexico, people eat 12 grapes at the stroke of midnight for luck

NOODLES – super long noodles bring long life in the New Year

POMEGRANATE SEEDS – eat for fertility and life

FISH – symbolizes abundance

CHAMPAGNE – wealth and nobility

PRETZELS – a German tradition for luck and prosperity

TIPS ON MAKING EASY CROCKPOT LENTIL SOUP

Follow these simple tips to prepare this healthy bean soup:

  • although browning the smoked sausage is not mandatory, the process does provide for another level of flavor
  • easily substitute with your favorite sausage, or leave out the sausage for a vegetarian lentil soup
  • rinse the lentils to remove any dirt and/or debris
  • adjust cook time if substituting other types of lentils (red will cook more quickly and green may need a bit more time)
  • use a food processor to mince the vegetables (makes for a better consistency)
  • substitute crushed tomatoes with whole (just crush them once you add to the slow cooker)
  • fresh rosemary can be great substitute for fresh thyme (or use both)
  • add spinach (at the end)
  • reduce cooking time by preparing on the stovetop in an enameled cast iron pot
  • serve with buttery bread for dipping and/or a side salad

STORAGE AND FREEZING

This dairy-free soup is great for meal prep and will last in the fridge up to five days. Alternatively, this easy crockpot lentil soup is a great freezer-meal soup and will last up to three months in the freezer.

Print
clock clock iconcutlery cutlery iconflag flag iconfolder folder iconinstagram instagram iconpinterest pinterest iconfacebook facebook iconprint print iconsquares squares iconheart heart iconheart solid heart solid icon
a bowl of Easy Crockpot Lentil Soup with bread in the background

Easy Crockpot Lentil Soup


5 Stars 4 Stars 3 Stars 2 Stars 1 Star

No reviews

Description

Have you heard? Eating lentils brings wealth and prosperity in the New Year! So, I’ve created an easy way to enjoy these protein-packed legumes that’s both hearty, and delicious. Honestly, this Easy Crockpot Lentil Soup can be enjoyed all year long. Brown the coin-shaped sausages for additional flavor and toss them into a slow cooker with the remaining ingredients. After four to five hours, dinner is done! Maybe, just maybe, lentils will become YOUR new favorite legume. This healthy, slow-cooker soup makes for the perfect weeknight meal.


Ingredients

Scale
  • 1 pound brown lentils, rinsed
  • 1 pound smoked sausage, cut into circles
  • 2 stalks celery with leaves, minced
  • 1/2 onion, minced
  • 1 large carrot, minced
  • 20 ounces crushed tomatoes
  • 5 to 6 cups chicken or vegetable stock
  • 5 sprigs thyme 
  • 2 bay leaves
  • 1 teaspoon salt
  • 1 teaspoon black pepper

Instructions

  1. Cut the sausage into circles and brown in a pan.
  2. Rinse the lentils.
  3. Mince the carrots, celery and onion.
  4. Once the sausages have browned, add them to the crockpot with the remaining ingredients, including the lentils.
  5. Add a bit of stock to the pan you cooked the sausages to remove the brown bits. Add to the crockpot.
  6. Cook on high 4 to 5 hours. 
  7. Check the liquid levels a few times. Add more stock, as needed.
  8. Soup is done when the lentils are tender.
  9. Remove and discard the bay leaves and thyme stalks.
  10. Serve in bowls with fresh bread for a hearty meal.
  11. ENJOY!

Notes

SEE POST FOR NOTES AND TIPS!

  • Prep Time: 10 minutes
  • Cook Time: 4 hours, 30 minutes
  • Category: Soup, Bisque
  • Method: Easy
  • Cuisine: American

Nutrition

  • Serving Size: 1 bowl

GET TO KNOW ME!

I am more than just recipes. I love fashion and style too! Most importantly, I love my Family (my Hubby and my Fur Babies). My Husband (aka my “Kitchen Bitch”) means the world to me. He’s pretty damn cool too. Not only is he one of the nicest guys you will ever meet, he also has had a lengthy career in professional hockey. Not only winning two Stanley Cups with the Pittsburgh Penguins in the early ’90’s, but most recently winning the Calder Cup with the Charlotte Checkers, amongst many other accolades. If you live in Charlotte and play hockey, or have a family member who plays, be sure to contact him!

Our life has changed dramatically in the past few years with the passing of our two goldendoodles, Vegas and Viva. We were lucky enough to have Vegas for five years (totally wish it was longer). Most recently, losing our Viva to a brain tumor in July of 2020. We welcomed our mini goldendoodle 7, almost seven years ago. We just added the amazing Hazel! Of course, I am always posting tons and tons of photos! Be sure to check out my recipe for Pet Bone Broth! This broth is super rich in nutrients and will provide your pet with a multitude of health benefits!

Let’s Get Social!

Be sure to follow me on social media! I’m always talking food, fashion, and family! I also love sharing some of my favorite Amazon Finds too. Click here to check out my Amazon page! FacebookInstagramTikTokTwitter and Pinterest! THANK YOU!

CROQUE MADAME

Croque Madam

Took a trip to France today. Well, in my mind, and in my kitchen. For the longest time, I have been wanting to create a recipe for a Croque Madame. Must admit, I am so glad I did! They were beyond amazing. Use a good quality French bread, or sourdough. In my opinion, go with sourdough. You must use shredded Gruyère cheese and great quality slices of ham. Want to make even a bit more fancier? Top with a perfect, sunny-side up duck egg.

This recipe will also work as a Croque Monsieur. Just leave out the egg! Click here to watch a short video I created on TikTok making this fabulous Croque Madame. If you have not yet signed up for this social media platform, use my code 5SSIS800K0H06 to create an account!

Croque Madame

BÉCHAMEL SAUCE FOR CROQUE MADAME

Prepare the bechamel sauce. Heat the heavy whipping cream in the microwave until warm. Pulse in thirty second increments. In a saucepan, add the butter. Allow to melt and foam. Whisk in the flour to create a roux. Cook off the flour taste. Slowly incorporate the warm cream with a whisk. Season with nutmeg, garlic powder, kosher salt and black pepper. Reserve.

HOW TO PREPARE A CROQUE MADAME

Lay four slices of bread on a flat surface. Cover two of the slices with a touch of dijon (side facing up). Add a layer of shredded Gruyère cheese on top of the dijon. Place two slices of ham on each. Follow with another layer of shredded Gruyère cheese. If you wish, you can add a layer of dijon to the top slice (inside).

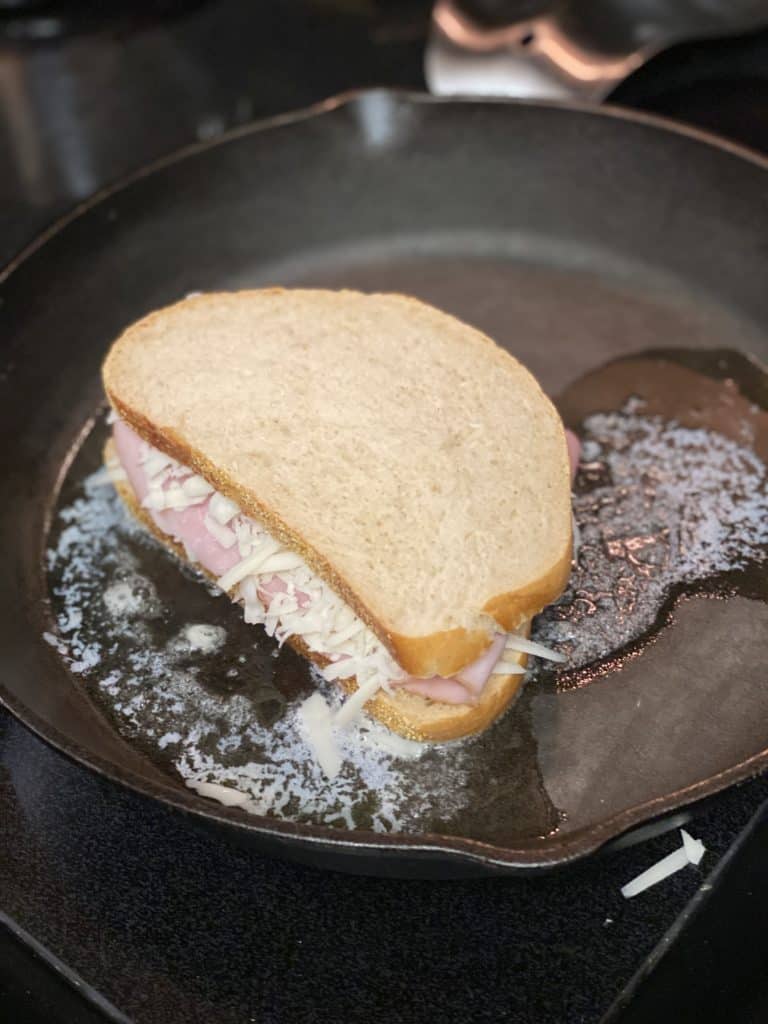
You will not be buttering the outside of the bread as you normally would with a grilled cheese. They will brown up in the pan with the melted butter. Heat up two tablespoons of butter in a cast iron or non-stick pan.

Place sandwiches in pan. Allow to brown on both sides. If needed, grill in batches. Just be sure to add another tablespoon of butter to the cast iron pan before grilling the second sandwich. Remove the grilled sandwiches from pan. Place on a parchment lined baking pan. Turn the oven to broil.

Spoon the reserved béchamel sauce on the top of each sandwich. Add another generous layer of shredded Gruyère cheese on top of the béchamel. Place under broiler for about 4 to 5 minutes. You just want the cheese to melt and brown. While the sandwiches are broiling, fry the eggs to sunny side up. For this preparation, I used duck eggs. Honestly, I just love the color and size of the yolk. Feel free to substitute with regular eggs.

Remove the Croque Madame from the oven. Top each with the egg. Serve with a side salad, these roasted potatoes (recipe below), or with my Creamy Tomato Basil Soup.

Croque Madame

ROASTED POTATOES

Cut baking potatoes in half, lengthwise. Follow by cutting each half into three or four pieces. Place in a bowl. Coat with olive oil, kosher salt and black pepper. Bake at 410 degrees until crispy on the outside and tender on the inside.

LET’S GET SOCIAL!

I am more than just recipes. I love fashion and style too! Most importantly, I love my Family (my Hubby and my Fur Babies). My Husband (aka my “Kitchen Bitch”) means the world to me. He’s pretty damn cool too. Not only is he one of the nicest guys you will ever meet, he also has had a lengthy career in professional hockey. Not only winning two Stanley Cups with the Pittsburgh Penguins in the early ’90’s, but most recently winning the Calder Cup with the Charlotte Checkers, amongst many other accolades. If you live in Charlotte and play hockey, or have a family member who plays, be sure to contact him!

Our life has changed dramatically in the past few years with the passing of our two goldendoodles, Vegas and Viva. We were lucky enough to have Vegas for five years (totally wish it was longer). Most recently, losing our Viva to a brain tumor in July of 2020. We welcomed our mini goldendoodle 7, almost seven years ago. We just added the amazing Hazel! Of course, I am always posting tons and tons of photos! Be sure to check out my recipe for Pet Bone Broth! This broth is super rich in nutrients and will provide your pet with a multitude of health benefits!

FOLLOW ME!

Be sure to follow me on social media! I’m always talking food, fashion, and family! I also love sharing some of my favorite Amazon Finds too. Click here to check out my Amazon page! FacebookInstagramTikTokTwitter and Pinterest! THANK YOU!

NAVY BEAN AND HAM SOUP

two bowls of navy bean and ham soup on a wooden board

Leftover ham from Easter? Or, maybe you are just looking for an amazing idea for a warm bowl of soup on a chilly fall or winter evening. This Navy Bean and Ham Soup is a great option. Feels so much like home. So, go grab your ham bone and a few bags of dried navy beans. Plan ahead because it is going to take about three hours. However, it will be all worth it when you will end up with a big pot of goodness!

If you like Lima Beans, you must check out my recipe for Lima Bean Soup. In my opinion, lima beans get a bad rap. For some of us maybe it was having to sit at the dinner table and gobble up all of those frozen lima beans on our plate. My Husband refuses to eat them. He has absolutely no idea what he is missing. I swear these are not the lima beans from your childhood. Give them a try!

two bowls of navy bean and ham soup on a wooden board

HOW TO PREPARE NAVY BEAN AND HAM SOUP

Place your beans in a bowl with cold water and salt. Allow the beans to soak for at least an hour. Heat up the olive oil in a large soup pot. I have been using this Lodge Enameled Cast Iron Pot a lot lately to prepare my soups. Add in the minced celery, carrots, onions and garlic. Want a super easy way to dice vegetables? Check this Chop ‘N Prep from Tupperware. It’s my new favorite kitchen gadget! Allow the vegetables to soften (not brown) for a few minutes. Coat the vegetables with the flour. Allow the raw taste of the flour to cook off for about a minute, or so.

Add in the chicken stock, water, bay leaves, ham and ham bone. Rinse the beans and add them to the pot. Season with black pepper. The soup should have enough salt from the ham. You can check the taste once the soup is finished. Bring to a boil. Turn heat down to a low simmer. Cover and allow to cook for at least three hours, or until the beans have fully softened, but are not falling apart. Stir occasionally.

a pot of ham and bean soup

To finish, remove and discard the bay leaves. Remove the ham bone. Cut any extra ham from the bone and place in soup. Add in the fresh parsley. I like my soup to have a touch of thickness. So, take a ladle full of broth and add to a bowl. Add in cornstarch to create a slurry. Heat the soup up to just under a boil. With a slotted spoon, stir in the slurry. Just enough to thicken slightly. Turn off heat. Serve and ENJOY!

LET’S GET SOCIAL!

I am more than just recipes. I love fashion and style too! Most importantly, I love my Family (my Hubby and my Fur Babies). My Husband (aka my “Kitchen Bitch”) means the world to me. He’s pretty damn cool too. Not only is he one of the nicest guys you will ever meet, he also has had a lengthy career in professional hockey. Not only winning two Stanley Cups with the Pittsburgh Penguins in the early ’90’s, but most recently winning the Calder Cup with the Charlotte Checkers, amongst many other accolades. If you live in Charlotte and play hockey, or have a family member who plays, be sure to contact him. He is known as one of the best skate sharpeners in the world!

Our life has changed dramatically in the past few years with the passing of our two goldendoodles, Vegas and Viva. We were lucky enough to have Vegas for five years (totally wish it was longer). Most recently, losing our Viva to a brain tumor in July of 2020. We welcomed our mini goldendoodle 7, almost seven years ago. We just added the amazing Hazel! Of course, I am always posting tons and tons of photos! Be sure to check out my recipe for Pet Bone Broth! This broth is super rich in nutrients and will provide your pet with a multitude of health benefits!

Be sure to follow me on social media! I’m always talking food, fashion, and family! I also love sharing some of my favorite Amazon Finds too. Click here to check out my Amazon page! FacebookInstagramTikTokTwitter and Pinterest!

EGGS BENEDICT WITH CANDIED COUNTRY HAM

Eggs Benedict

I am all about the flavor combination of sweet, savory and salty for breakfast. When I was presented with the challenge of using Clifty Farm Country Ham Biscuit Slices to create a breakfast dish, this recipe came to mind. My creative juices started flowing. I knew I did not want to just use the country ham in it’s traditional form. I wanted to elevate the sweetness and saltiness of my favorite breakfast creation. So, I candied it using brown sugar and maple syrup. OMG! The ultimate southern favorite, country ham, paired with my not so traditional version of Eggs Benedict is outstanding! Hope you enjoy my recipe for Eggs Benedict with Candied Country Ham.

Eggs Benedict with Candied Country ham

Be sure to follow Clifty Farm on Facebook and Instagram. Click here for a coupon to try their amazing line of products! This recipe will make three generous servings. It does require a few more steps than most recipes, but you I can assure you, it will be totally worth the extra effort!

Heat the oven to 350 degrees. Lay the country ham slices on a non-stick baking sheet. Crumble the brown sugar on the top of each slice, then drizzle on the maple syrup. Place in oven and bake for about 10 minutes, turning the slices over halfway through the baking process. Keep checking just to ensure you are not burning the sugars. Remove from oven and reserve. You can allow the candied ham to cool in the pan or on a baking rack. You will notice the ham will start to harden like candy…this is exactly how you want it! Once the candied ham is placed on the warm pancake and topped with the egg, it will heat up perfectly and have just the right consistency.

For the super fluffy pancakes, in a bowl, combine the cake flour, sugar, baking powder and salt. In a larger bowl, combine the egg and milk. Lightly mix. Add the melted butter slowly to the egg/milk mixture so as to not scramble the egg. Combine the dry ingredients to the wet ingredients…whisking very gently, adding just a little bit at a time. Do not overwork or over mix the batter. You just want to combine.

In a separate bowl, start beating the egg whites and the sugar on medium low until stiff peaks form…you may have to increase the speed just a bit at the end. Gently…and I mean gently…fold with a spatula…the stiff egg whites into the pancake batter. Do not worry if all of the whites are not fully incorporated.

Heat up a non-stick pan or griddle to medium, medium-low…the key to these perfect pancakes, is to cook them slowly. Spray with non-stick spray or butter. Drop about a 1/2 cup spoonful of the batter mixture onto the pan for each pancake. Allow to form bubbles before flipping. This will probably take about five to six minutes. Flip and allow to cook on the other side about two minutes or so. This amount of batter made five generous size pancakes. Cover finished pancakes and reserve in a warm place (oven or microwave) while you prepare the rest of the ingredients.

browning pancakes in a non stick skillet for my eggs Benedict with candied country ham

Start boiling a pot of water for poaching the eggs. When the water just about comes to a boil…add a bit (tablespoon) of white vinegar. Crack an egg in a small bowl. Lower the heat just a touch…you do not want a hard boil as you are poaching. Swirl the water with a slotted spoon and drop in the egg…the egg white will start to form around the yolk. I can typically poach two eggs at a time in the same pot…do not get frustrated if it takes you several attempts…I still screw them up once in a while. Eggs should take about four minutes to poach…meaning the white will be set and the yolk will still run when broken.

Remove eggs from water and allow to drain on paper towels. For this recipe…you need to poach three eggs.

I would suggest, at this point, to start plating, then prepare your Hollandaise sauce…it only takes about a minute to prepare, but you definitely want to devour as soon as you add the sauce. Place a pancake on a plate (I only plated mine this way for the “gram” then transferred to a board for photo ops. Cover each pancake with the candied country ham slices, then top each with a poached egg. Sprinkle on shredded cheddar cheese.

For the Hollandaise sauce…this is super easy to do…in a bowl, just wide enough to fit an immersion blender, add the egg yolks, water and lemon juice. Melt the butter. Transfer the butter to something you can pour from. Start the immersion blender and slowly pour in the warm butter…a little bit at a time…you do NOT want to scramble the egg. You will start to see a silky, smooth sauce form. Taste and season with salt/pepper, if needed.

a bowl of hollandaise sauce

Pour sauce on top of egg stacks. Garnish the Eggs Benedict with Candied Country Ham with a bit of fresh parsley and ENJOY!

UPDATE: I won the Grand Prize for this recipe for Eggs Benedict with Candied Country Ham, along with my recipes for Clams with Crispy Country Ham and Maple Apple Foam and Pasta Carbonara with Country Ham and Quail Eggs.

LET’S GET SOCIAL!

I am more than just recipes. I love fashion and style too! Most importantly, I love my Family (my Hubby and my Fur Babies). My Husband (aka my “Kitchen Bitch”) means the world to me. He’s pretty damn cool too. Not only is he one of the nicest guys you will ever meet, he also has had a lengthy career in professional hockey. Not only winning two Stanley Cups with the Pittsburgh Penguins in the early ’90’s, but most recently winning the Calder Cup with the Charlotte Checkers, amongst many other accolades. If you live in Charlotte and play hockey, or have a family member who plays, be sure to contact him!

Our life has changed dramatically in the past few years with the passing of our two goldendoodles, Vegas and Viva. We were lucky enough to have Vegas for five years (totally wish it was longer). Most recently, losing our Viva to a brain tumor in July of 2020. We welcomed our mini goldendoodle 7, almost seven years ago. We just added the amazing Hazel! Of course, I am always posting tons and tons of photos! Be sure to check out my recipe for Pet Bone Broth! This broth is super rich in nutrients and will provide your pet with a multitude of health benefits!

FOLLOW ME!

Be sure to follow me on social media! I’m always talking food, fashion, and family! I also love sharing some of my favorite Amazon Finds too. Click here to check out my Amazon page! Facebook, Instagram, TikTok, Twitter and Pinterest! THANK YOU!

CREAMY TOMATO BASIL SOUP

a white bowl of creamy tomato basil soup with a croque madame in the background

In my opinion, soup is for every season. Agree? So, I have always wanted to try creating a recipe for Creamy Tomato Basil Soup. However, it’s been somewhat intimidating. Last night, I dove right in. First, I had to figure out how I could not only make it creamy, but also get rid of the chunks of vegetables. With all of this, I still needed the soup to have a ton of flavor. Well, I DID it!!! Hope you like my recipe for Creamy Tomato Basil Soup, as much as I do. Oh, and the Hubby loved, loved, loved! it’s a relatively simple recipe that will take about 35 to 40 minutes from prep to bowl! This soup is also keto-friendly!

What compliments a big bowl of Creamy Tomato Soup better than a fabulous grilled cheese? So, I decided to garnish mine with bite-sized “croutons” of a Gruyère and Ham Grilled Cheese. A few weeks ago, I paired this fabulous sandwich with my Minestrone Soup. If you are following the Keto diet, use a low-carb bread. There are so many readily available at your local grocery stores. For this recipe, I used a sesame Ezekiel bread.

To achieve this creamy texture, you will need either a blender, or an immersion blender. Never would I have imagined that I would utilize my immersion blender so often. Click here to purchase one similar to the one I use! Click here to check out a short video I created on TikTok making this fabulous Creamy Tomato Basil Soup. If you are not yet a member of this social media platform, use my code 5SSIS800K0H06 to create an account!

a white bowl of creamy tomato basil soup with a croque madame in the background

HOW TO MAKE CREAMY TOMATO BASIL SOUP

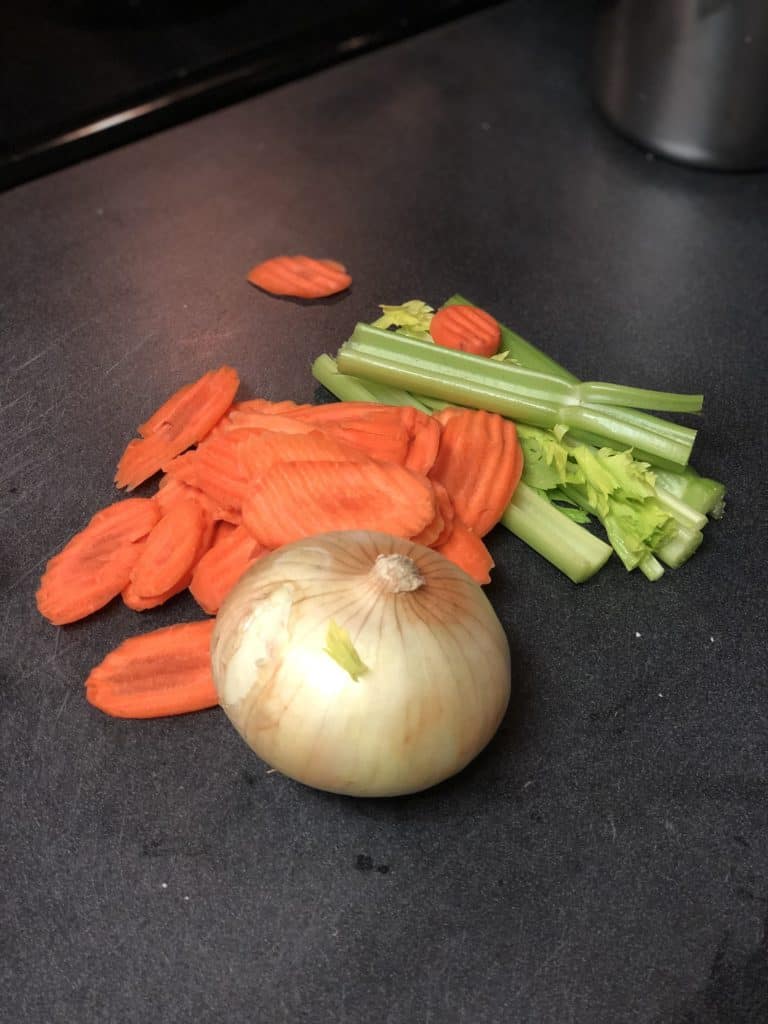
One of my favorite things about this recipe is that I don’t have to sit there and chop up the vegetables super tiny. Once fully simmered, the entire contents of the pot will be blended. So, a nice chop will do fine. Heat up, to medium, the olive oil and butter in a deep pot. Add in the chopped carrots, celery, onions and garlic. Season with salt and pepper. Allow the vegetables to soften for about five minutes. Do NOT brown. Just soften.

Dust the vegetables with the flour. Cook off the raw flour taste for about a minute or so. Keep stirring so that the flour does not burn. Pour in the chicken broth and stir with a slotted spoon or whisk to release any bits at the bottom. Add in the fire roasted tomatoes. Be sure to include the juice. Sprinkle in the dried oregano, fresh basil, and bay leaves. Season with kosher salt and black pepper. Stir. Bring the pot to a boil. Reduce heat and simmer for about 15 minutes.

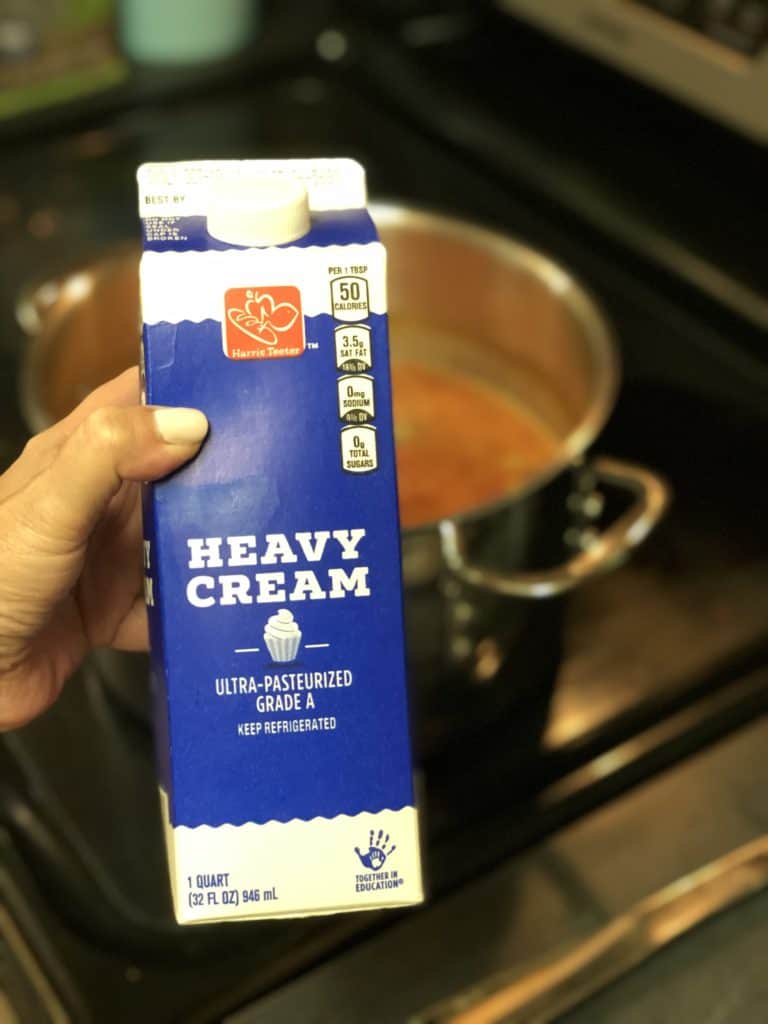
Add in the Parmesan rind. Honestly, it’s no big deal if you do not have one, or cannot find in a grocery store. However, these are great to have on hand. Add to almost any soups for a greater depth of flavor. The rinds store well in the freezer! Pour in at least two cups of the heavy whipping cream. Stir. Slowly, and I mean very slowly, add in the freshly grated Parmesan cheese. Meaning, add a little bit and stir. Keep repeating until the entire cup is fully incorporated. If you pour in all at once, the cheese will clump up. You do NOT want that to happen! Allow to simmer for another 20 minutes.

TO FINISH AND SERVE

Remove and discard the bay leaves. With an immersion blender, blend well to get rid of any chunks of vegetables. This will also thicken the soup. If you do not have an immersion blender, you can use a traditional blender. However, just be very careful because the heat of the soup may cause the lid of the blender to pop. It’s best to blend in batches, with a towel covering the top.

Serve this Creamy Tomato Basil Soup, piping hot, in huge bowls garnished with fresh chiffonades of basil. You can serve along side a beautiful grilled cheese, or do like I did and cut up my Gruyere and Ham Grilled Cheese and use as a garnish! ENJOY! My Croque Madame also makes for the perfect accompaniment!

LET’S GET SOCIAL!

I am more than just recipes. I love fashion and style too! Most importantly, I love my Family (my Hubby and my Fur Babies). My Husband (aka my “Kitchen Bitch”) means the world to me. He’s pretty damn cool too. Not only is he one of the nicest guys you will ever meet, he also has had a lengthy career in professional hockey. Not only winning two Stanley Cups with the Pittsburgh Penguins in the early ’90’s, but most recently winning the Calder Cup with the Charlotte Checkers, amongst many other accolades. If you live in Charlotte and play hockey, or have a family member who plays, be sure to contact him. He is known as one of the best skate sharpeners in the world!

Our life has changed dramatically in the past few years with the passing of our two goldendoodles, Vegas and Viva. We were lucky enough to have Vegas for five years (totally wish it was longer). Most recently, losing our Viva to a brain tumor in July of 2020. We welcomed our mini goldendoodle 7, almost seven years ago. We just added the amazing Hazel! Of course, I am always posting tons and tons of photos! Be sure to check out my recipe for Pet Bone Broth! This broth is super rich in nutrients and will provide your pet with a multitude of health benefits!

FOLLOW ME!

Be sure to follow me on social media! I’m always talking food, fashion, and family! I also love sharing some of my favorite Amazon Finds too. Click here to check out my Amazon page! FacebookInstagramTikTokTwitter and Pinterest! THANK YOU FOR THE LOVE AND SUPPORT!

LIMA BEAN SOUP

Lima Beans! In my opinion, you either truly love them, or truly hate them. There is no in between. If you are one of the haters, I’m hoping to be able to sway your opinion about these tender bites of loveliness with this recipe for Lima Bean Soup. First, I’m not talking about the lima beans you were force fed growing up. You know the ones I’m talking about. Those green things (usually came frozen in a box) that sat on your plate lathered in butter. As you kept pushing them to the side of your plate, just hoping they would disappear into thin air. Better yet, they would take a leap off your plate and onto the floor. Knowing quite well your doggie wouldn’t even touch them.

So, bear with me. I promise, if you try my recipe for Lima Bean Soup, you just may just have a new appreciation for them! This recipe is relatively easy. Cook time will take just a little over an hour.

If I truly cannot convince you to like lima beans, then check out my Navy Bean and Ham Soup! Love soup? Click here for more great recipes!

a white bowl of lima bean soup with ham

HOW TO PREPARE LIMA BEAN SOUP

Pour your dried beans in a bowl filled with water and about one tablespoon of kosher salt. Allow to soak for about 15 to 20 minutes. You do not need to soak any longer, or even overnight.

dried lima beans in a bowl of water

Rinse the beans. Place them in deep pot with the butter and at least two tablespoons of kosher salt. Fill the pot with water. Just about two to three inches above the beans will work perfectly. As the beans cook, you may need to add more water. Bring to a boil.

dried lima beans and two sticks of butter in a pot

Once the pot comes to a boil, turn the heat down to a simmer. Allow to simmer for about an hour, or until the beans become tender. Keep watch to see if you need additional water. Taste for salt. The dried beans tend to be able to handle a lot of salt. So, do not hesitate adding more.

Try NOT to overcook the beans. You want them tender, but still have texture. When the beans are almost finished, add the diced ham. I love using one of these small, boneless hams from Hormel. The ham is fully-cooked. Basically, you are really only heating it up.

Ladle the Lima Bean Soup in big crocks. Garnish with black pepper. ENJOY!

LET’S GET SOCIAL!

I am more than just recipes. I love fashion and style too! Most importantly, I love my Family (my Hubby and my Fur Babies). My Husband (aka my “Kitchen Bitch”) means the world to me. He’s pretty damn cool too. Not only is he one of the nicest guys you will ever meet, he also has had a lengthy career in professional hockey. Not only winning two Stanley Cups with the Pittsburgh Penguins in the early ’90’s, but most recently winning the Calder Cup with the Charlotte Checkers, amongst many other accolades. If you live in Charlotte and play hockey, or have a family member who plays, be sure to contact him. He is known as one of the best skate sharpeners in the world!

Our life has changed dramatically in the past few years with the passing of our two goldendoodles, Vegas and Viva. We were lucky enough to have Vegas for five years (totally wish it was longer). Most recently, losing our Viva to a brain tumor in July of 2020. We welcomed our mini goldendoodle 7, almost seven years ago. We just added the amazing Hazel! Of course, I am always posting tons and tons of photos! Be sure to check out my recipe for Pet Bone Broth! This broth is super rich in nutrients and will provide your pet with a multitude of health benefits!

Be sure to follow me on social media! I’m always talking food, fashion, and family! I also love sharing some of my favorite Amazon Finds too. Click here to check out my Amazon page! FacebookInstagramTikTokTwitter and Pinterest!

CHICKEN CORDON BLEU

Chicken Cordon Bleu with pasta

I cannot believe I waited this long to create a recipe for Chicken Cordon Bleu. Crispy outside with melty goodness inside. What more could you want? I have to admit though, am not much of a fan of Swiss cheese. So, I substituted with Gruyère cheese. In my opinion, the substitution only made this recipe better!

Yes, there are definitely a few more steps to this recipe than my usual. However, it is relatively easy. Make a few extra. Leftovers are a blessing and can be enjoyed for up to two days in the fridge. Plan on at least one piece of chicken per person. This recipe will yield two servings.

a wooden platter of chicken cordon bleu cut in half

HOW TO PREPARE CHICKEN CORDON BLEU

PREPARING AND STUFFING THE CHICKEN

Cut each chicken breast in half. Be mindful not to cut all the way through. Leave the breast attached at one side. Lay each split breast between sheets of parchment paper and pound as thin as you can get without breaking the flesh. Season both sides with kosher salt and black pepper.

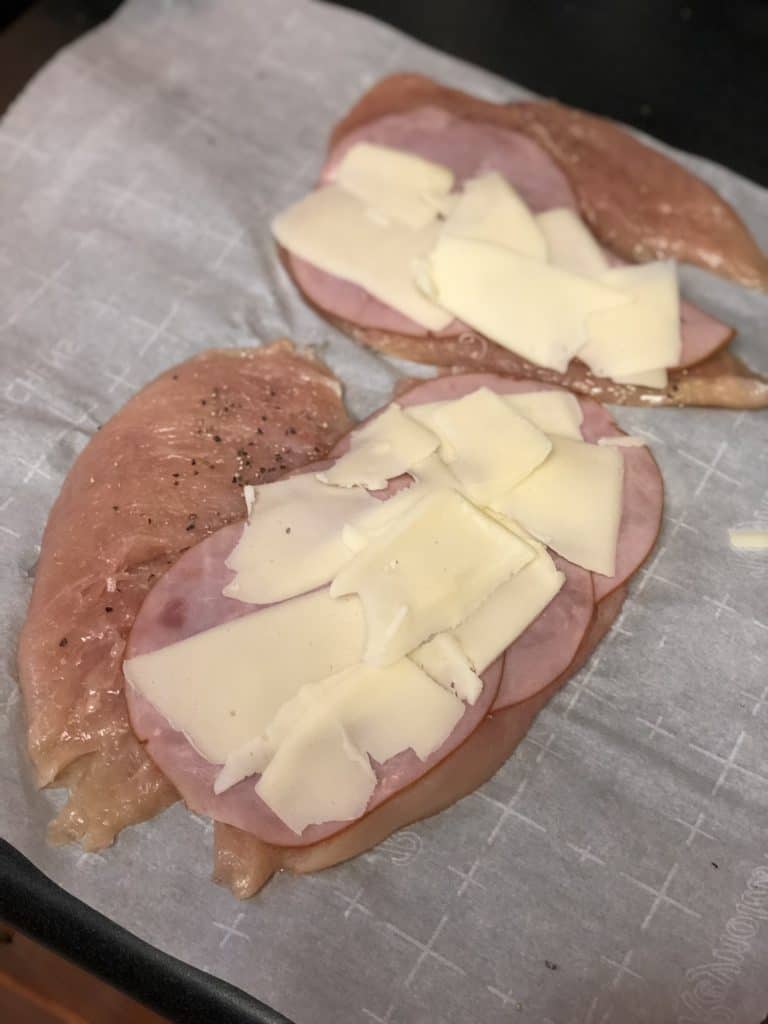
Top one side of the inside of each chicken breasts with the deli ham and Gruyère cheese.

Fold the other side of the chicken breast over and tuck in the ham and cheese. Secure tightly with long toothpicks (do not forget to remove before serving). Try to seal as much as the edges as you can with the toothpicks. You will need about six for each breast.

DREDGING AND FRYING THE CHICKEN

Heat oven to 350 degrees. Prepare a dredging station. Add enough flour in a bowl for both breasts. Season with kosher salt, black pepper and a few dashes of paprika. In a separate bowl, whisk the eggs with the heavy cream. In a third bowl, mix well, both types of breadcrumbs.

dredging station for chicken cordon bleu

Heat up canola oil in a frying or cast iron pan. You just want enough oil in the pan to cover the chicken breast about halfway. Dredge each piece of chicken in the flour, then the egg, then coat with the breadcrumbs. Be sure that the entire piece is fully coated. This will help to secure the cheese/ham inside.

Place chicken in hot oil and brown on both sides.

Once browned, remove chicken and drain any excess grease. Salt. Place chicken on parchment lined baking sheet. Bake in oven for at least 20 to 25 minutes. I did turn my halfway through baking.

DIJON SAUCE FOR CHICKEN CORDON BLEU

While the chicken is baking, and close to being finished, prepare the dijon sauce. In a saucepan, melt a tablespoon of butter. Add a tablespoon of flour and cook for about a minute or so just to get rid of the raw flour taste. Whisk in the heavy whipping cream, Dijon mustard and nutmeg. Allow to thicken to a sauce-like consistency. If you notice that the sauce is a little too thick, add a touch more heavy cream. I kind of sucked at photographing the sauce on the finished chicken, but the taste was amazing! See photo below!

TO FINISH AND SERVE THE CHICKEN CORDON BLEU

Remove chicken from oven and allow to rest for a few minutes.

Be sure to remove all toothpicks. Plate the chicken. Top with the Dijon cream sauce, or on the side. Serve up this fabulous Chicken Cordon Bleu with a side of my Broccoli Pasta. ENJOY!!!

LET’S GET SOCIAL!

I am more than just recipes. I love fashion and style too! Most importantly, I love my Family (my Hubby and my Fur Babies). My Husband (aka my “Kitchen Bitch”) means the world to me. He’s pretty damn cool too. Not only is he one of the nicest guys you will ever meet, he also has had a lengthy career in professional hockey. Not only winning two Stanley Cups with the Pittsburgh Penguins in the early ’90’s, but most recently winning the Calder Cup with the Charlotte Checkers, amongst many other accolades. If you live in Charlotte and play hockey, or have a family member who plays, be sure to contact him. He is known as one of the best skate sharpeners in the world!

Our life has changed dramatically in the past few years with the passing of our two goldendoodles, Vegas and Viva. We were lucky enough to have Vegas for five years (totally wish it was longer). Most recently, losing our Viva to a brain tumor in July of 2020. We welcomed our mini goldendoodle 7, almost seven years ago. We just added the amazing Hazel! Of course, I am always posting tons and tons of photos! Be sure to check out my recipe for Pet Bone Broth! This broth is super rich in nutrients and will provide your pet with a multitude of health benefits!

Be sure to follow me on social media! I’m always talking food, fashion, and family! I also love sharing some of my favorite Amazon Finds too. Click here to check out my Amazon page! FacebookInstagramTikTokTwitter and Pinterest!