There’s nothing more comforting than a Classic Tuna Melt Sandwich. With perfectly toasted bread, melty cheddar cheese, and a creamy tuna salad filling, this is the kind of easy, satisfying recipe you’ll want to make again, and again. Whether you call it nostalgic, timeless, or simply the best tuna melt ever, it’s guaranteed to hit the spot for lunch, or a quick weeknight dinner paired with a crock of soup.
Why You Will Love This Classic Tuna Melt Recipe
- Quick and Easy Lunch Idea – Perfect for busy weekdays, this classic tuna melt sandwich comes together in less than 20 minutes.
- Best Tuna Melt Ever – Crispy sourdough or whole grain bread, golden brown and toasty, with gooey cheddar cheese and a creamy tuna salad makes this the ultimate tuna melt recipe.
- Simple Pantry Ingredients – Made with canned tuna, mayonnaise, Dijon mustard, and cheese, all items you probably already have in your kitchen.
- Versatile Sandwich Recipe – Works with different breads, cheeses, and fillings, making it easy to adapt to your taste.
- High-Protein Meal – Thanks to tuna and cheese, this sandwich is filling, satisfying, and a protein-packed option for lunch or dinner.
- Family-Friendly Comfort Food – A tuna melt is nostalgic and comforting, loved by both kids and adults alike.
Ingredient Substitutions
- Tuna – Swap albacore or yellowfin with chunk light tuna, salmon, or even canned chicken.
- Bread – Use rye, ciabatta, English muffins, or even a bagel instead of sourdough.
- Cheese – Replace cheddar with Swiss, mozzarella, provolone, Havarti, or pepper jack for a different flavor.
- Mayo – Substitute with Greek yogurt or a lighter mayonnaise for a healthier twist.
- Dijon Mustard – Yellow mustard or spicy brown mustard can also be used.
- Celery/Onion – Try pickles, relish, scallions, or even bell peppers for crunch and flavor.
- Other Add-Ins – Crisp bacon, sliced tomatoes, spinach, sliced avocado, jalapeños, and fresh herbs can be added in the tuna melt for variety.
How to Make a Tuna Melt
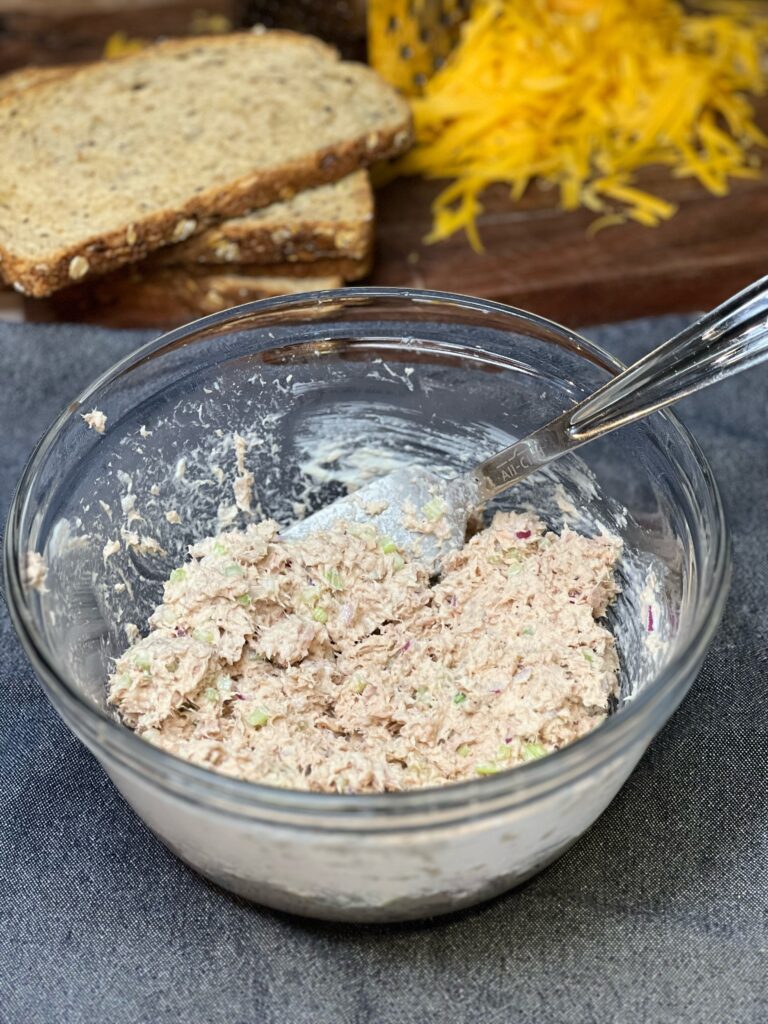
- Mince the celery and red onion, then lay them on a paper towel to absorb excess moisture for about five minutes.
- Drain the tuna and add it to a mixing bowl with the celery, onion, 2 tablespoons of mayonnaise, Dijon mustard, and black pepper. Mix well.
- Adjust the consistency by adding more mayonnaise, if needed.
- Spread mayonnaise on the outsides of each slice of bread.
- Heat a non-stick skillet, or griddle pan, over medium heat.
- Place two slices of bread in the skillet, mayo side down.
- Top with a layer of shredded cheddar cheese.
- Spoon the tuna mixture generously over the cheese, then sprinkle on a little more cheese.
- Place the top slice of bread over the filling, with the mayo side facing up.
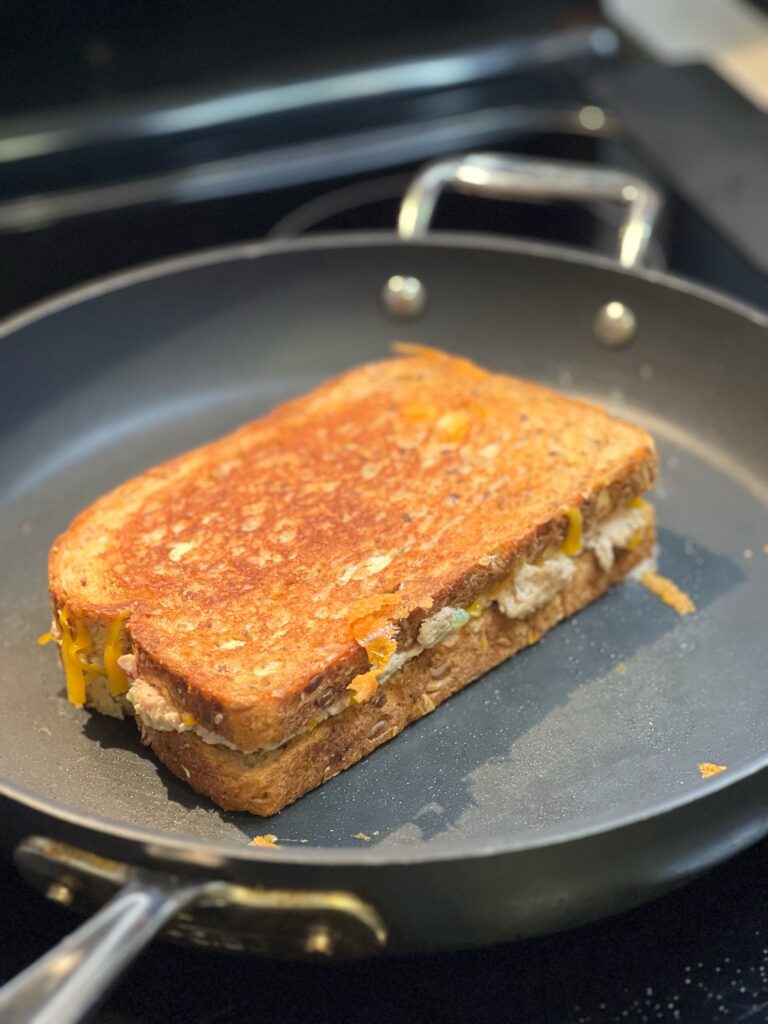
- Toast until the bottom bread is golden and the cheese starts melting, then carefully flip.
- Cook until the other side is golden brown and the cheese is fully melted.
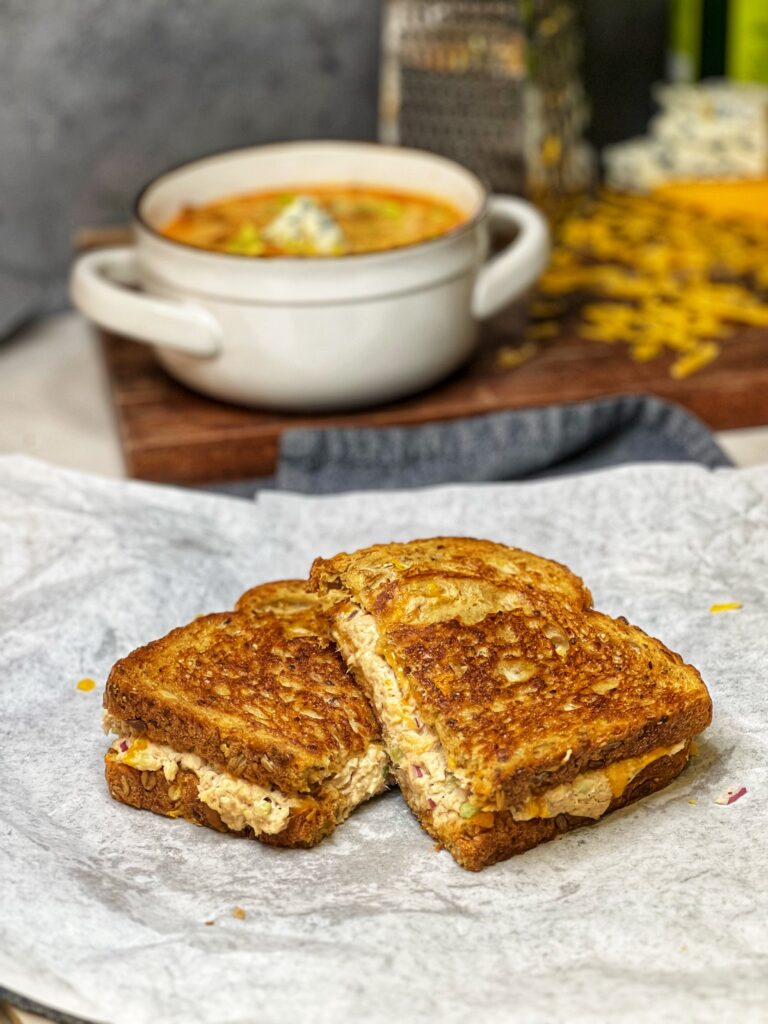
- Slice in half and serve warm.
How to Serve and Store
- Serving: Slice this classic tuna melt sandwich in half and serve hot while the bread is crispy and the cheese is perfectly melted. Pair with French fries, sweet potato fries, potato chips, or a light side salad for a complete meal. A bowl of tomato soup also makes a classic pairing.
- Storing: Tuna melts are best enjoyed fresh, but if you have leftovers, wrap them tightly in foil or place in an airtight container and refrigerate for up to a day.
- Reheat in a skillet or toaster oven over medium heat to crisp the bread and melt the cheese again. Avoid microwaving, as it can make the bread soggy.
- Make Ahead: You can prepare the tuna salad filling in advance and store it in the fridge for up to 2 days. Assemble and toast the sandwich when ready to eat.
Frequently Asked Questions
- Can I use a different protein instead of tuna? Yes! This recipe works beautifully with canned salmon or shredded chicken.
- What else can I put in a tuna melt? Try sliced tomatoes, pickles, spinach, avocado, or even a slice of bacon for extra flavor.
- Can I make this in the oven? Yes. Assemble the sandwiches, place them on a baking sheet, and bake at 375°F (190°C) for about 10 minutes, flipping halfway.
- What’s the best cheese for a tuna melt? Cheddar is classic, but Swiss, provolone, or even mozzarella all melt beautifully.
- How do I store leftovers? Tuna melts are best enjoyed fresh, but you can refrigerate in foil or an airtight container for up to a day. Reheat in a skillet to crisp the bread again.
- How can I add some heat to my tuna melt? Mix in a dash of hot sauce, cayenne pepper, sriracha, or crushed red pepper flakes with the tuna mixture. You could also use pepper jack cheese, or add a few slices of jalapeño for extra spice.
More Easy Sandwich Recipes to Love
Print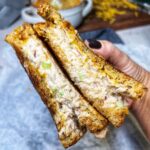
Classic Tuna Melt Sandwich
- Total Time: 15 minutes
- Yield: 2 to 3 servings 1x
Description
There’s nothing more comforting than a Classic Tuna Melt Sandwich. With perfectly toasted bread, melty cheddar cheese, and a creamy tuna salad filling, this is the kind of easy, satisfying recipe you’ll want to make again and again. Whether you call it nostalgic, timeless, or simply the best tuna melt ever, it’s guaranteed to hit the spot for lunch or a quick weeknight dinner.
Ingredients
- 2 cans albacore or yellowfin tuna, in oil or water, drained
- 4 pieces sliced sourdough or whole grain bread
- 1 celery stalk, minced
- 1–2 tablespoons red onion, minced
- 3–4 tablespoons mayonnaise, plus more for toasting the bread
- 1 teaspoon Dijon mustard
- 1/2 teaspoon black pepper
- 1/2–3/4 cup shredded cheddar cheese
Instructions
- Mince the celery and red onion, then lay them on a paper towel to absorb excess moisture for about five minutes.
- Drain the tuna and add it to a mixing bowl with the celery, onion, 2 tablespoons of mayonnaise, Dijon mustard, and black pepper. Mix well.
- Adjust the consistency by adding more mayonnaise, if needed.
- Spread mayonnaise on the outsides of each slice of bread.
- Heat a non-stick skillet, or griddle pan, over medium heat.
- Place two slices of bread in the skillet, mayo side down.
- Top with a layer of shredded cheddar cheese.
- Spoon the tuna mixture generously over the cheese, then sprinkle on a little more cheese.
- Place the top slice of bread over the filling, with the mayo side facing up.
- Toast until the bottom bread is golden and the cheese starts melting, then carefully flip.
- Cook until the other side is golden brown and the cheese is fully melted.
- Slice in half and serve warm.
- ENJOY!
Notes
- Drain the tuna well to avoid soggy filling.
- Let celery and onions dry slightly before mixing.
- A little extra cheese inside makes the melt creamier.
- Mayo on the outside of the bread crisps better than butter.
- Use medium heat for toasting to prevent burning before the cheese melts.
- Feel free to add crisp bacon, sliced avocado, jalapeños, and/or fresh spinach.
- Prep Time: 10 minutes
- Cook Time: 5 minutes
- Category: Lunch, Dinner
- Method: Easy
- Cuisine: American
GET TO KNOW ME!

WELCOME! My name is Melissa Latin aka. Charlotte Fashion Plate. Happy to meet you! I am more than just recipes. I love fashion and style too! Most importantly, I love my Family (my Hubby and my Fur Babies). My Husband (aka my “Kitchen Bitch”) means the world to me. He’s pretty damn cool too. Not only is he one of the nicest guys you will ever meet, he also has had a lengthy career in professional hockey. Not only winning two Stanley Cups with the Pittsburgh Penguins in the early ’90’s, but most recently winning the Calder Cup with the Charlotte Checkers, amongst many other accolades. If you live in Charlotte and play hockey, or have a family member who plays, be sure to contact him!
Our life has changed dramatically in the past few years with the passing of our two goldendoodles, Vegas and Viva. We were lucky enough to have Vegas for five years (totally wish it was longer). Most recently, losing our Viva to a brain tumor in July of 2020. We welcomed our mini goldendoodle 7, almost seven years ago. We just added the amazing Hazel! Of course, I am always posting tons and tons of photos! Be sure to check out my recipe for Pet Bone Broth! This broth is super rich in nutrients and will provide your pet with a multitude of health benefits!
In addition, I’m so very excited to announce I have published my first e-book and paperback, “Mastering Thanksgiving – A Guide to Perfecting Your Thanksgiving Dinner.” Your support would mean the world to me.
Let’s Get Social!
Be sure to follow me on social media! I’m always talking food, fashion, and family! I also love sharing some of my favorite Amazon Finds too. Click here to check out my Amazon page! Facebook, Instagram, TikTok, X, Pinterest and YouTube! Check out my LTK to find out what I’m wearing! THANK YOU!
No comment yet, add your voice below!